2019 (September) Build
2019 (September) Build
2019 (September) Build
or ...
OK. That's kind of a lie. I had been thinking about building a system with water cooling for a while. This is after years of saying I didn't think I would ever make one. The idea of water next to expensive electronics made me nervous. Times change. Computer water cooling parts have become more common and are well-made. After watching a ton of YouTube videos on the subject, it seemed that most leaks were due to operator errors, not hardware failures. I knew that going down the water-cooled route meant extra cost and more maintenance, but I wanted to give it a try. Additionally, I wanted to wall-mount my system. Mostly, that was to get it off my desk, but I also wanted to create a flashy, unique-looking system that would show off the components.
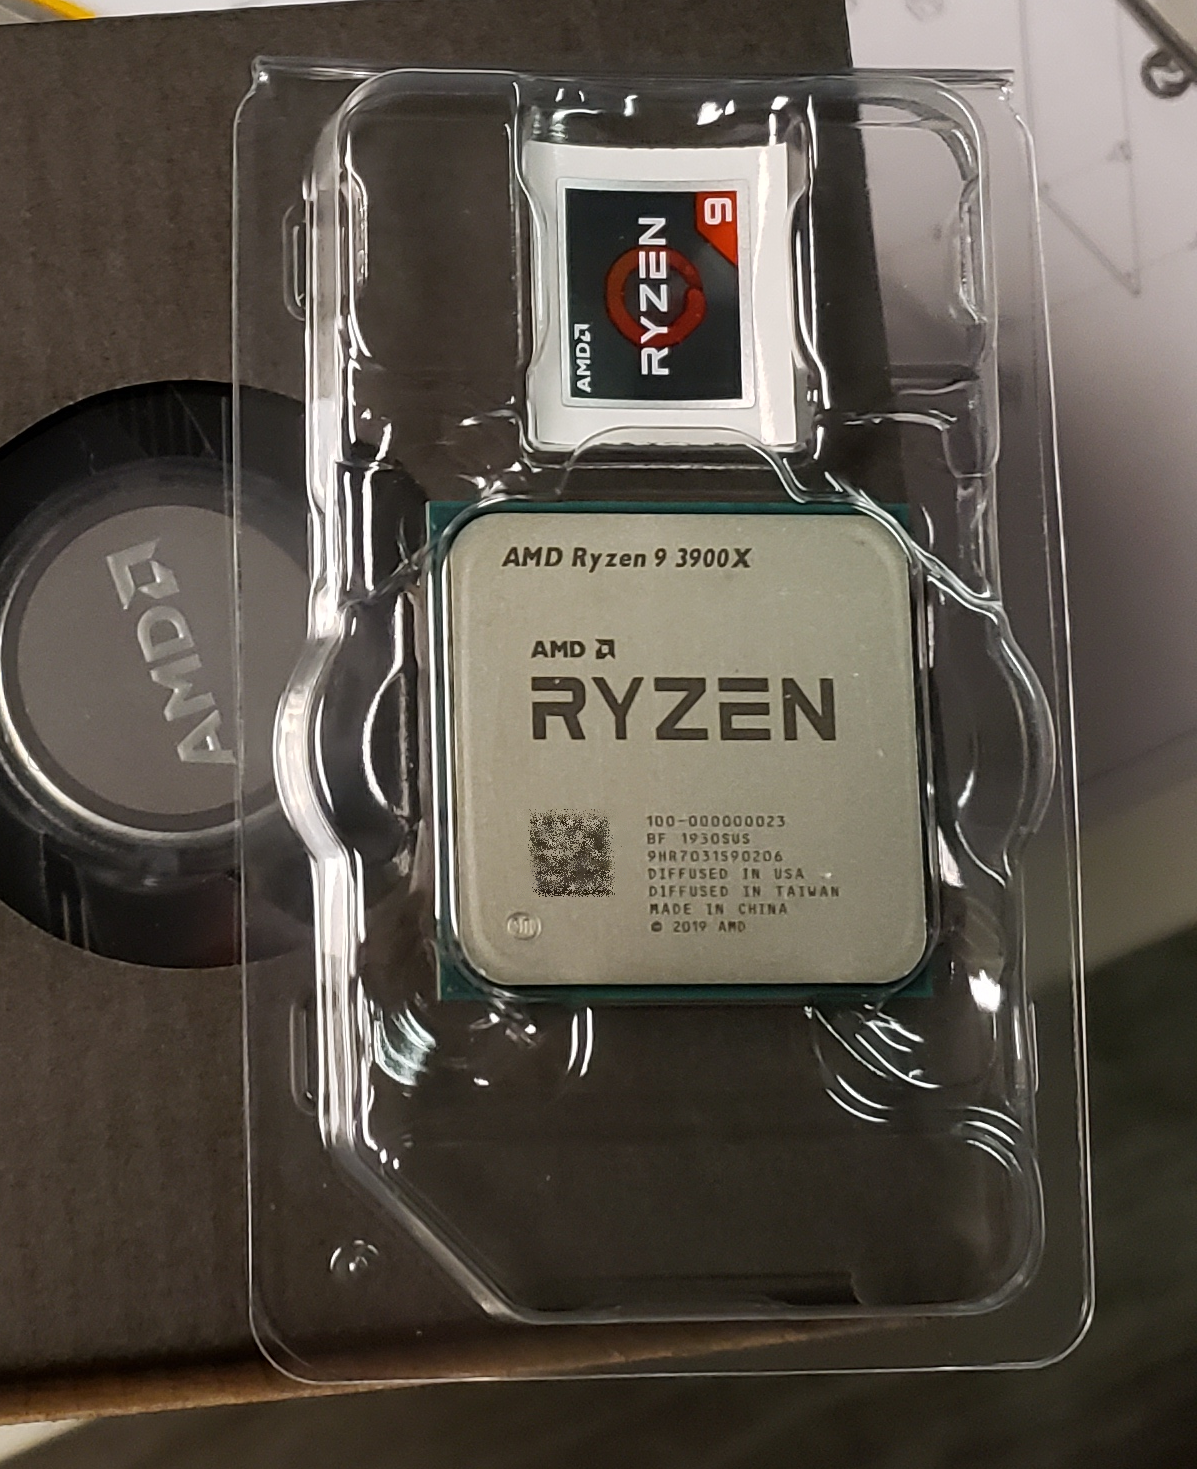
Then AMD came out with the Ryzen 3000 series. Specifically, the Ryzen 9 3900x caught my eye. Along with the X570 chipset and a PCIe Gen 4 SSD in an M.2 form factor - I couldn't help myself. I had not built an AMD system since the Athlon 64 days (probably about 2003 or 2004) because there was no AMD part at the price level I tend to build .. until this year. So, I watched the how-to videos again, ordered parts, and started down the tranquil water path.
For this build, I upgraded from an Intel Core i7 6700K to an AMD Ryzen 9 3900x. As I mentioned above, I had not used an AMD processor in a gaming build since an AMD Athlon 64. I tried to find the exact date, but it was too far in the past for me to find receipts; it was about 2003 or 2004. It's not that I had any reservations about using an AMD processor. They didn't have anything particularly compelling to offer. When Intel came out with the Core 2 Duo processors, they took back the crown, and AMD couldn't get it back. The AMD 3900x changed all that. Interesting? Absolutely! Faster than Intel's offerings? Yes and no.
In pure single-thread performance, the fastest Intel processors still have the edge (which is even more true with the Intel 10900K that was available then, which was the AMD 3900X's closest competitor). This tends to make those CPUs faster in games, which use from one to even eight threads. Many current games require four or six threads, and a couple of games are reported to work best on eight to twelve threads. The difference between AMD's IPC and Intel's IPC tends to be hard to notice in most games. However, the extra cores on the 3900X (and now, the lower price) make it better for just about everything else. I do a bit of video editing, and this CPU is a dream for that.
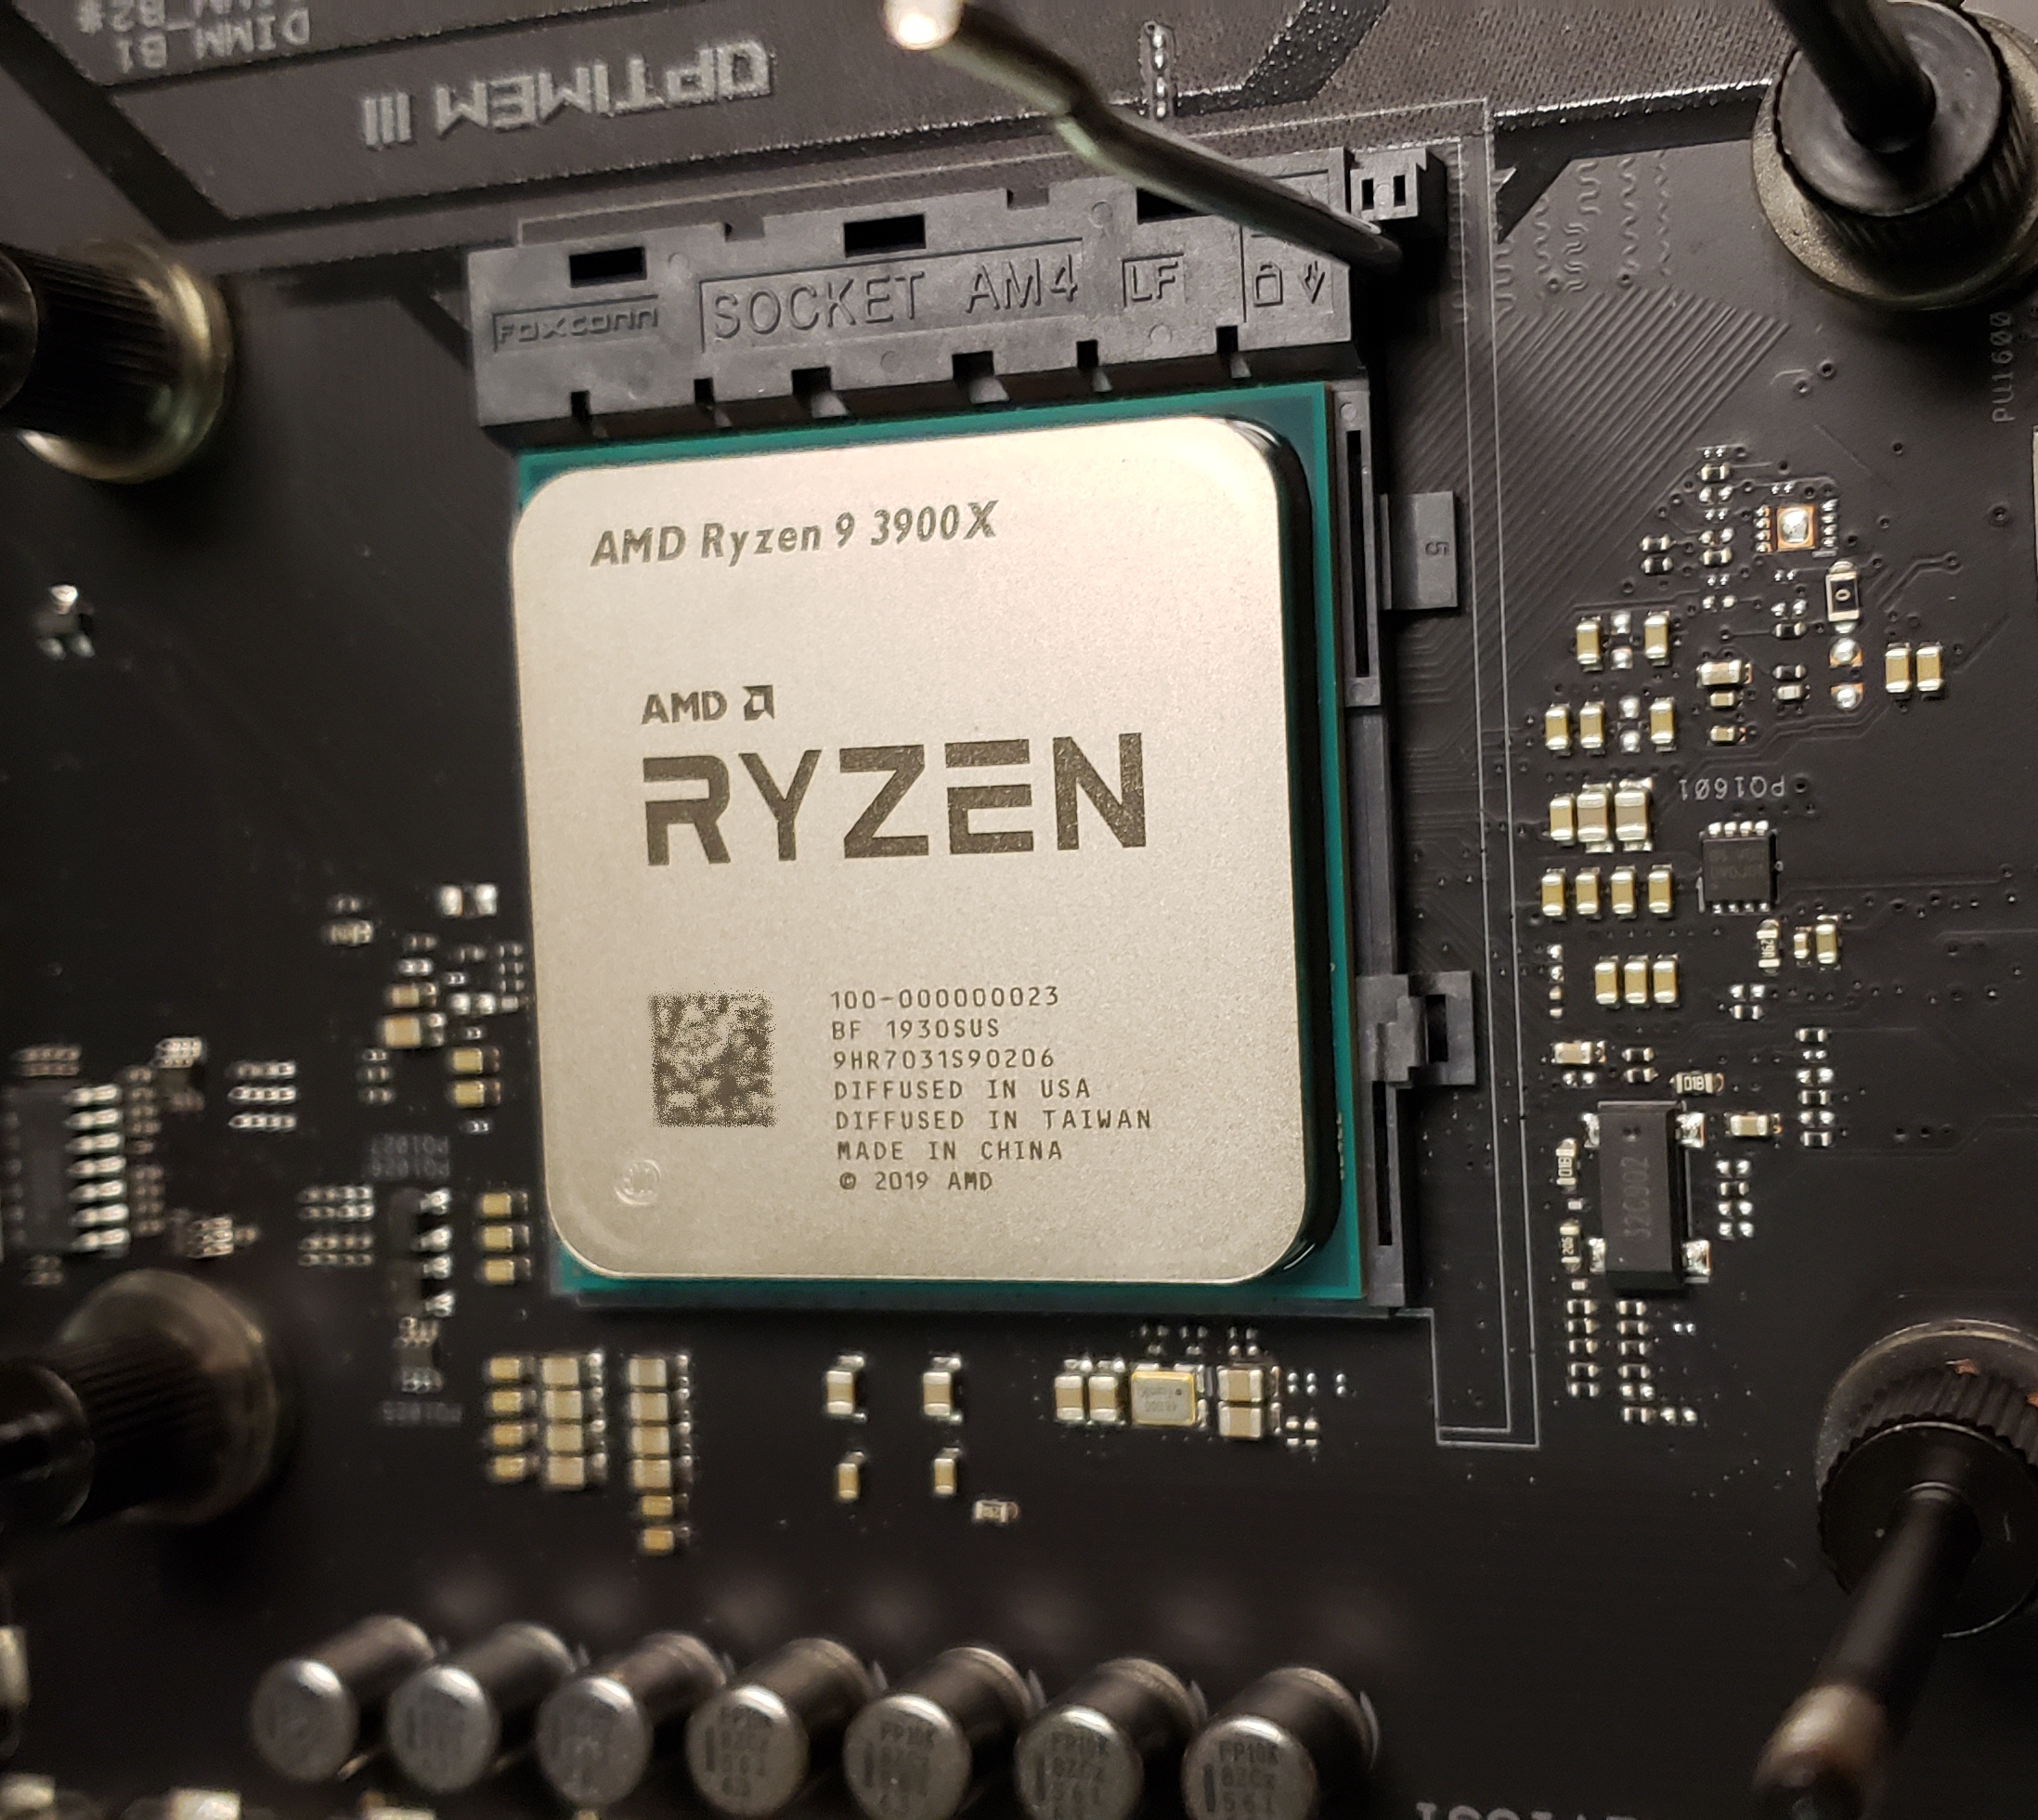
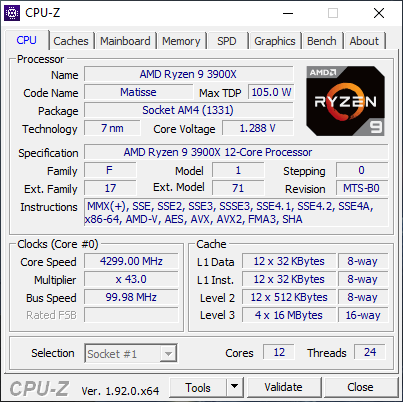
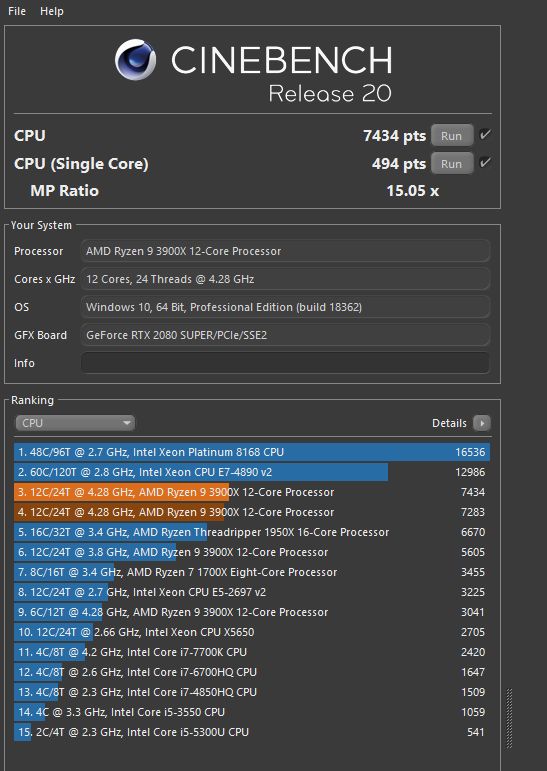
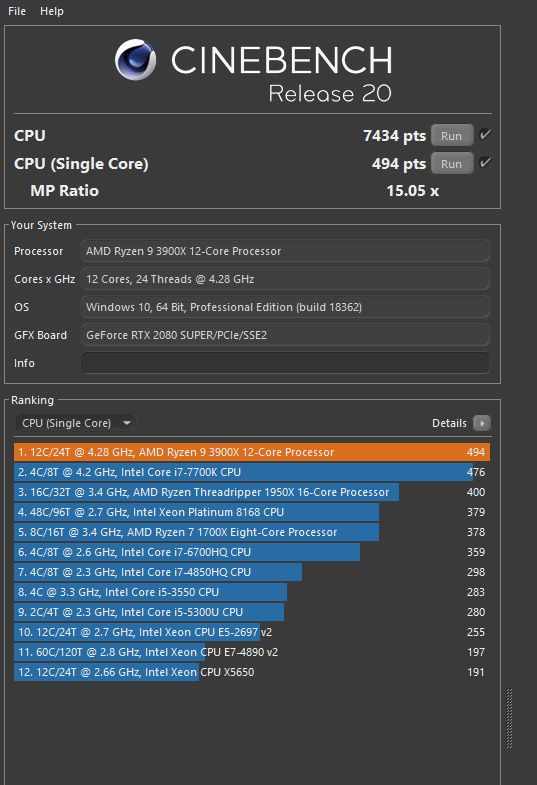
Since I'm using water cooling (more on that later), I can keep 12 cores (24 threads) running at 4.3 GHz on all cores at 39°C idle. I suspect I could do even more if I worked at it. (It's about a 13% boost over stock.) Even months later, I haven't tried to do the "ultimate" tuning. Here are the numbers according to CPU-Z.
I did the obligatory Cinebench 20 multi-core and single-core benchmarks. According to the rankings at HWBOT, that's about what's expected for this overclock. When I ran these benchmarks, I never got over 55°C in CPU temperature, which is what water cooling does.
I have also been using this desktop to transcode and edit more videos than I used to. It's an absolute beast for that. I don't have any numbers for my previous desktop, but it is noticeably faster.
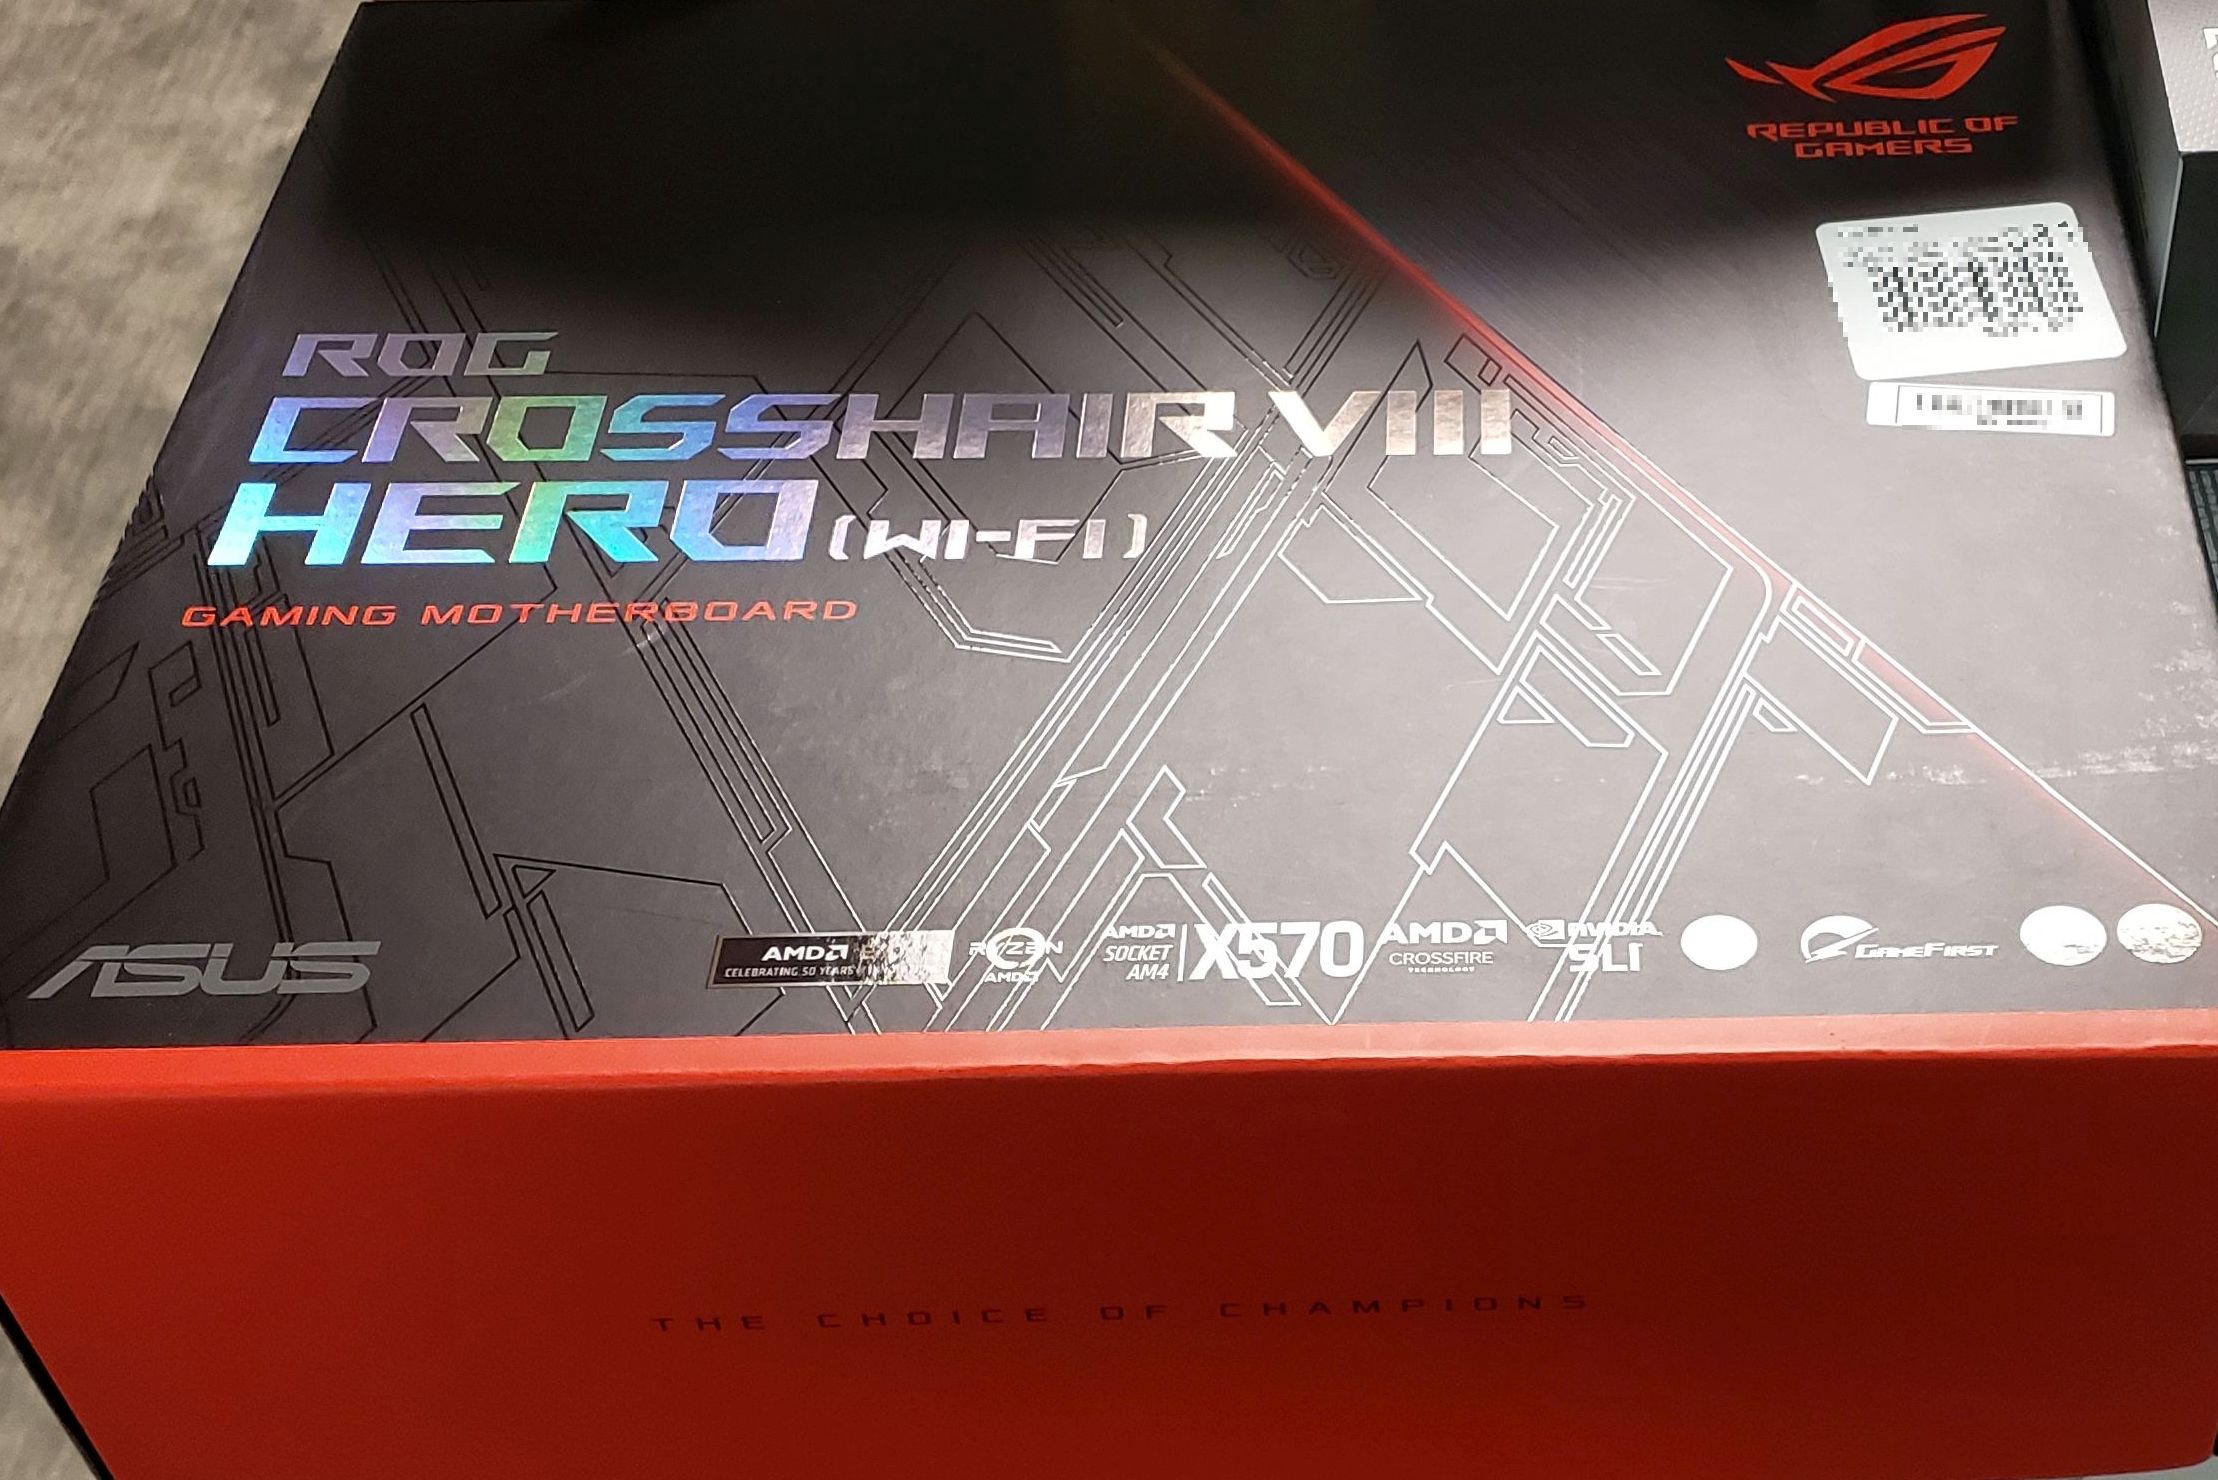
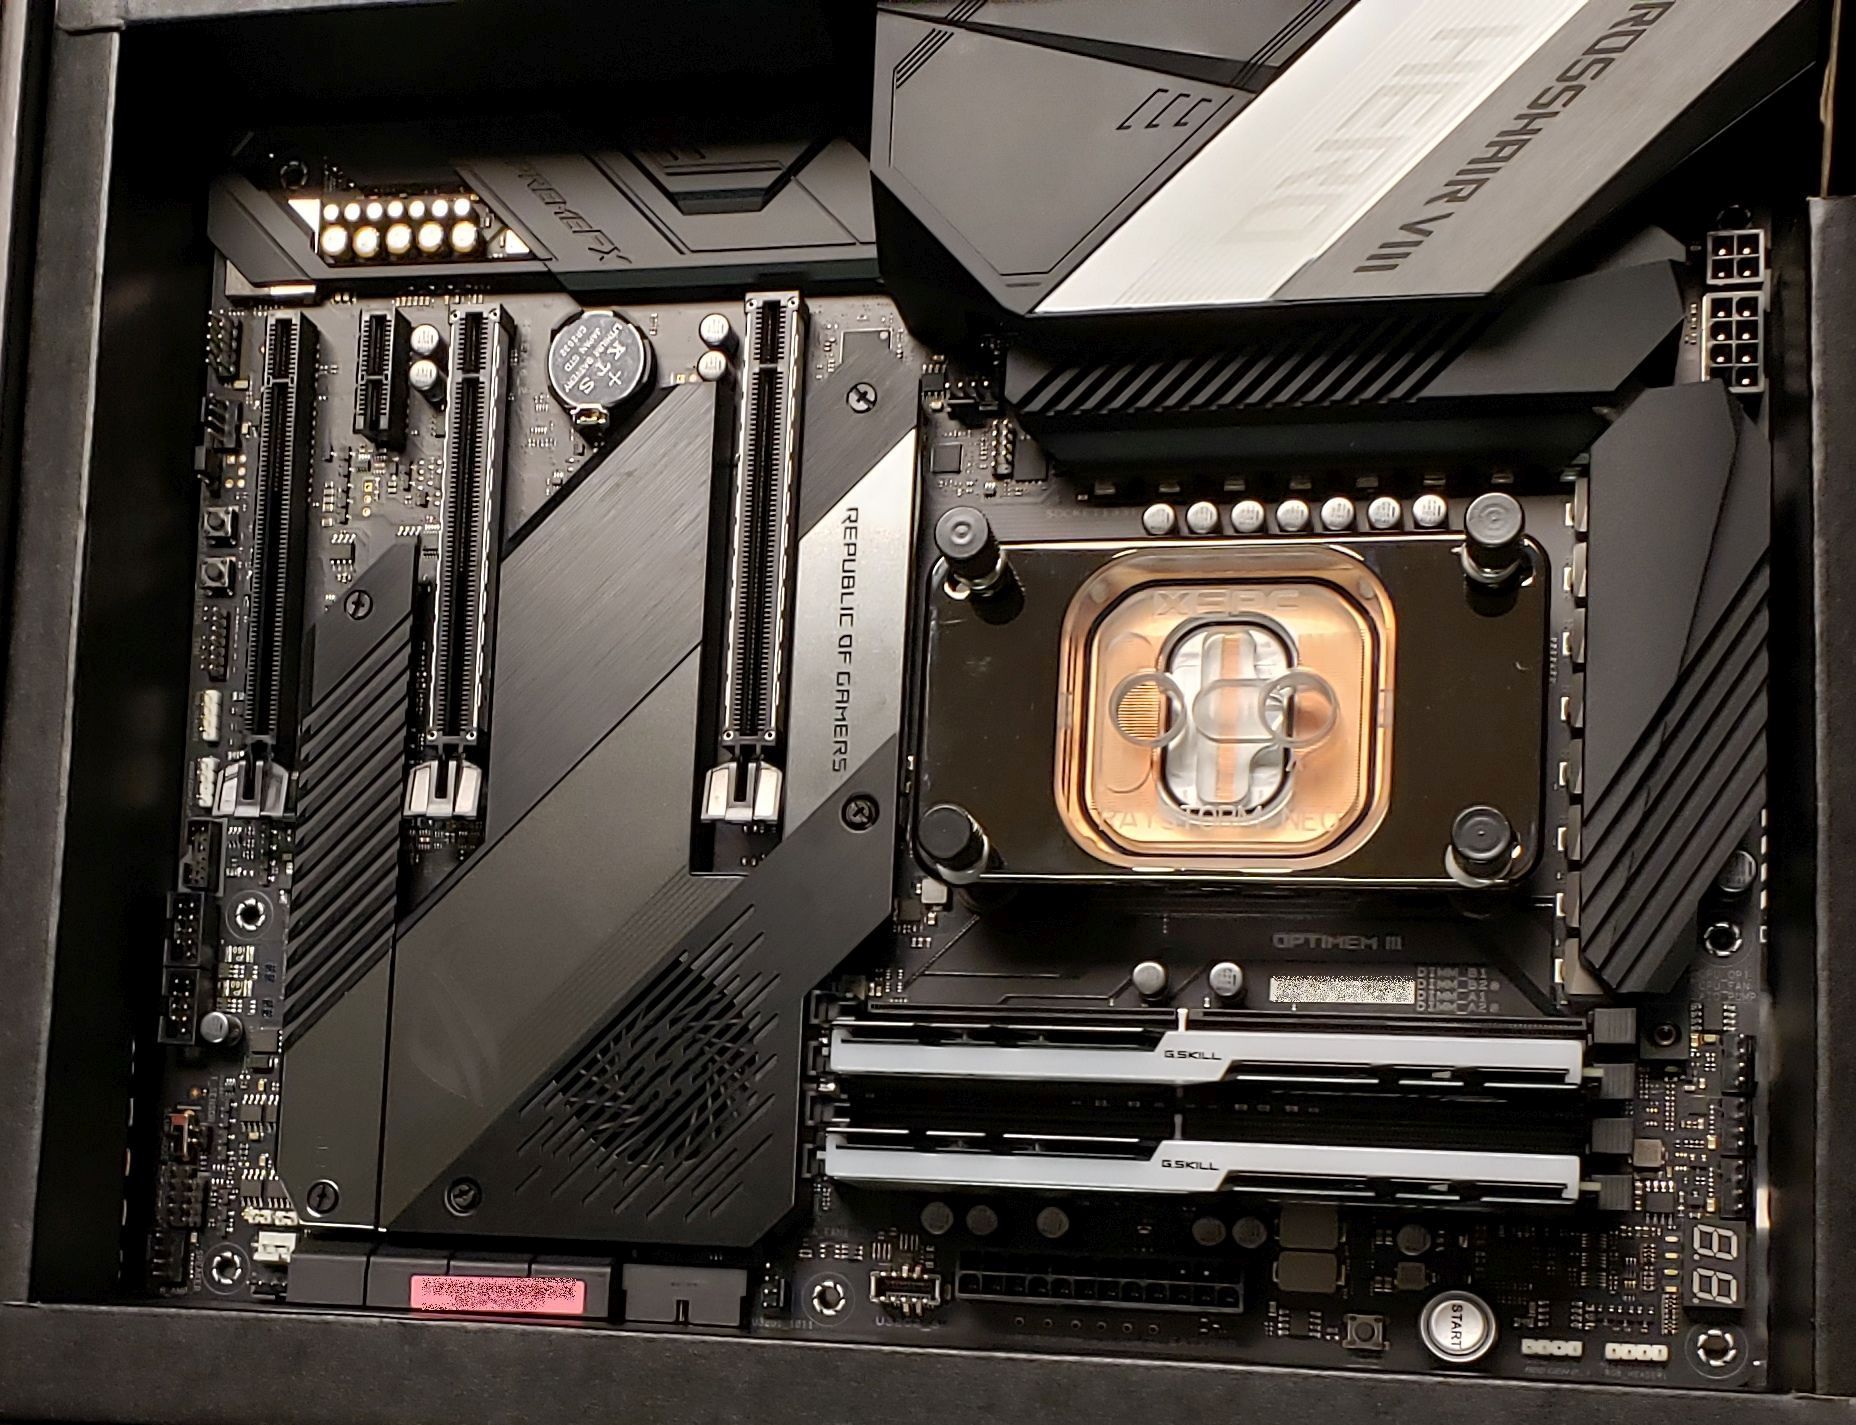
The only logical choice for a motherboard to pair with the AMD 3900x was the X570 chipset. I intended to get at least one large PCIe Gen4 M.2 NVMe SSD for storage (and some version of PCIe M.2 NVMe SSD storage - Gen4 or Gen3 for all storage). After that, it was just a matter of what features I wanted versus how much I was willing to pay. The motherboard I chose (and would likely choose again) was the Asus ROG Crosshair Hero VIII.
Some of the major draws of this chipset and motherboard for me were the dual PCIe 4.0 M.2 slots, tons of USB 3.2 Gen 1 and Gen 2 ports, high-quality Ethernet (x2 ports), headers for water cooling pump and high-amperage fans, and a fixed I/O shield. Fixed I/O shields are a bit of a recent development (usually found in higher-end motherboards), which was more or less required (if I cared to have an I/O shield) because the cases I was looking at for this new build did not have a traditional mounting system for the motherboards where the I/O shield fits into the back of the case. (More on this later.)
Also, something new for me is that I did not add a separate audio card to this build. Therefore, the motherboard audio has to be as good as I can get. Many X570 motherboards use the Realtek ALC1220, and the Crosshair Hero VIII also uses that. Asus calls their version of the SupremeFX S1220 (but is it a Realtek ALC1220) codec. It is paired with an ESS ES9023P (24-bit) digital-to-analog converter (for front-panel output) and a Texas Instruments RC4580 op-amp.
When I decided to create a water-cooled system, I justified the extra cost by going one level down from the absolute top of the heap. That meant buying an Nvidia 2080 Super instead of an Nvidia 2080 Ti. I was planning on buying the water-cooled version from EVGA, so the difference went from about $1400-1500 for the 2080 Ti to about $800-900 for the 2080 Super. I would use the $600 I saved to cover the cost of the water-cooling parts. (That turned out to be a fallacy, as I quickly discovered. $600 did not cover the cost. It was a good-sized dent, but that total cost was just over $1000. See the section on Cooling below.)
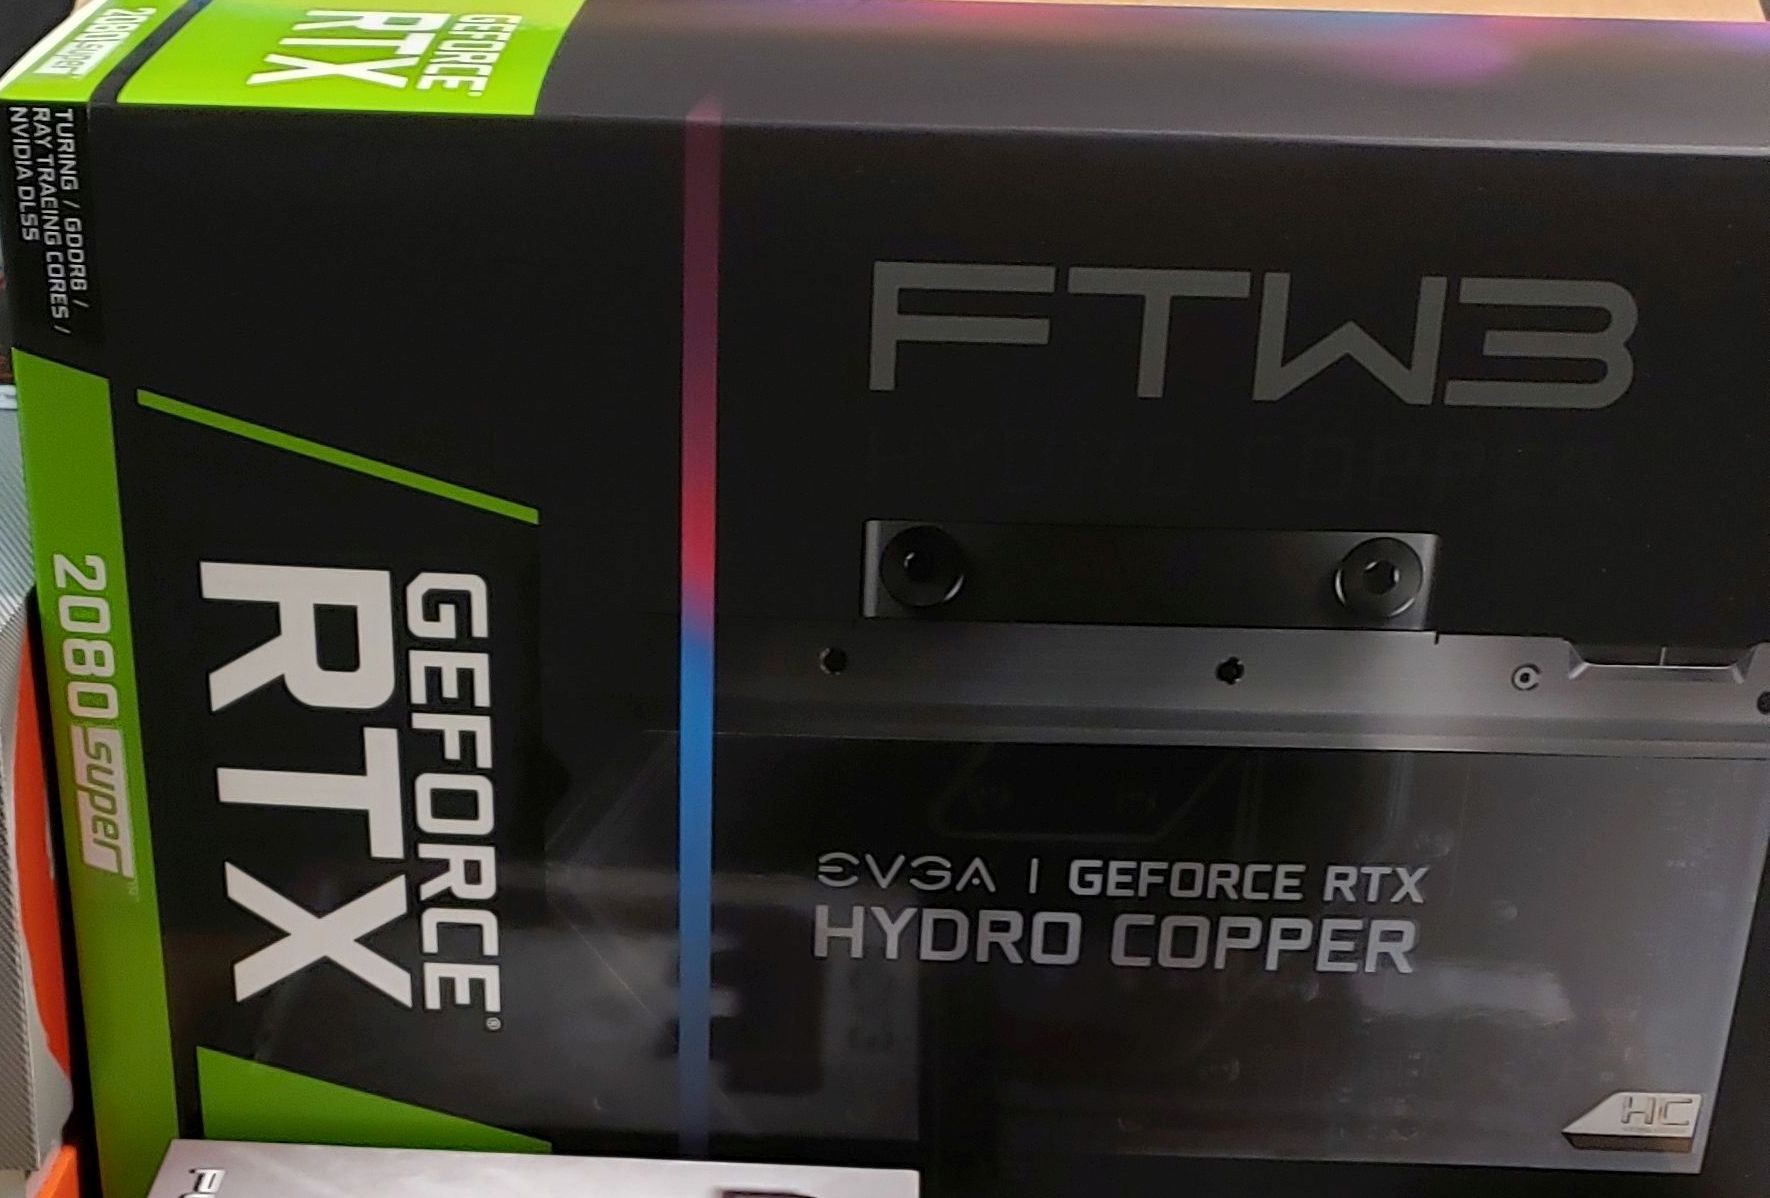
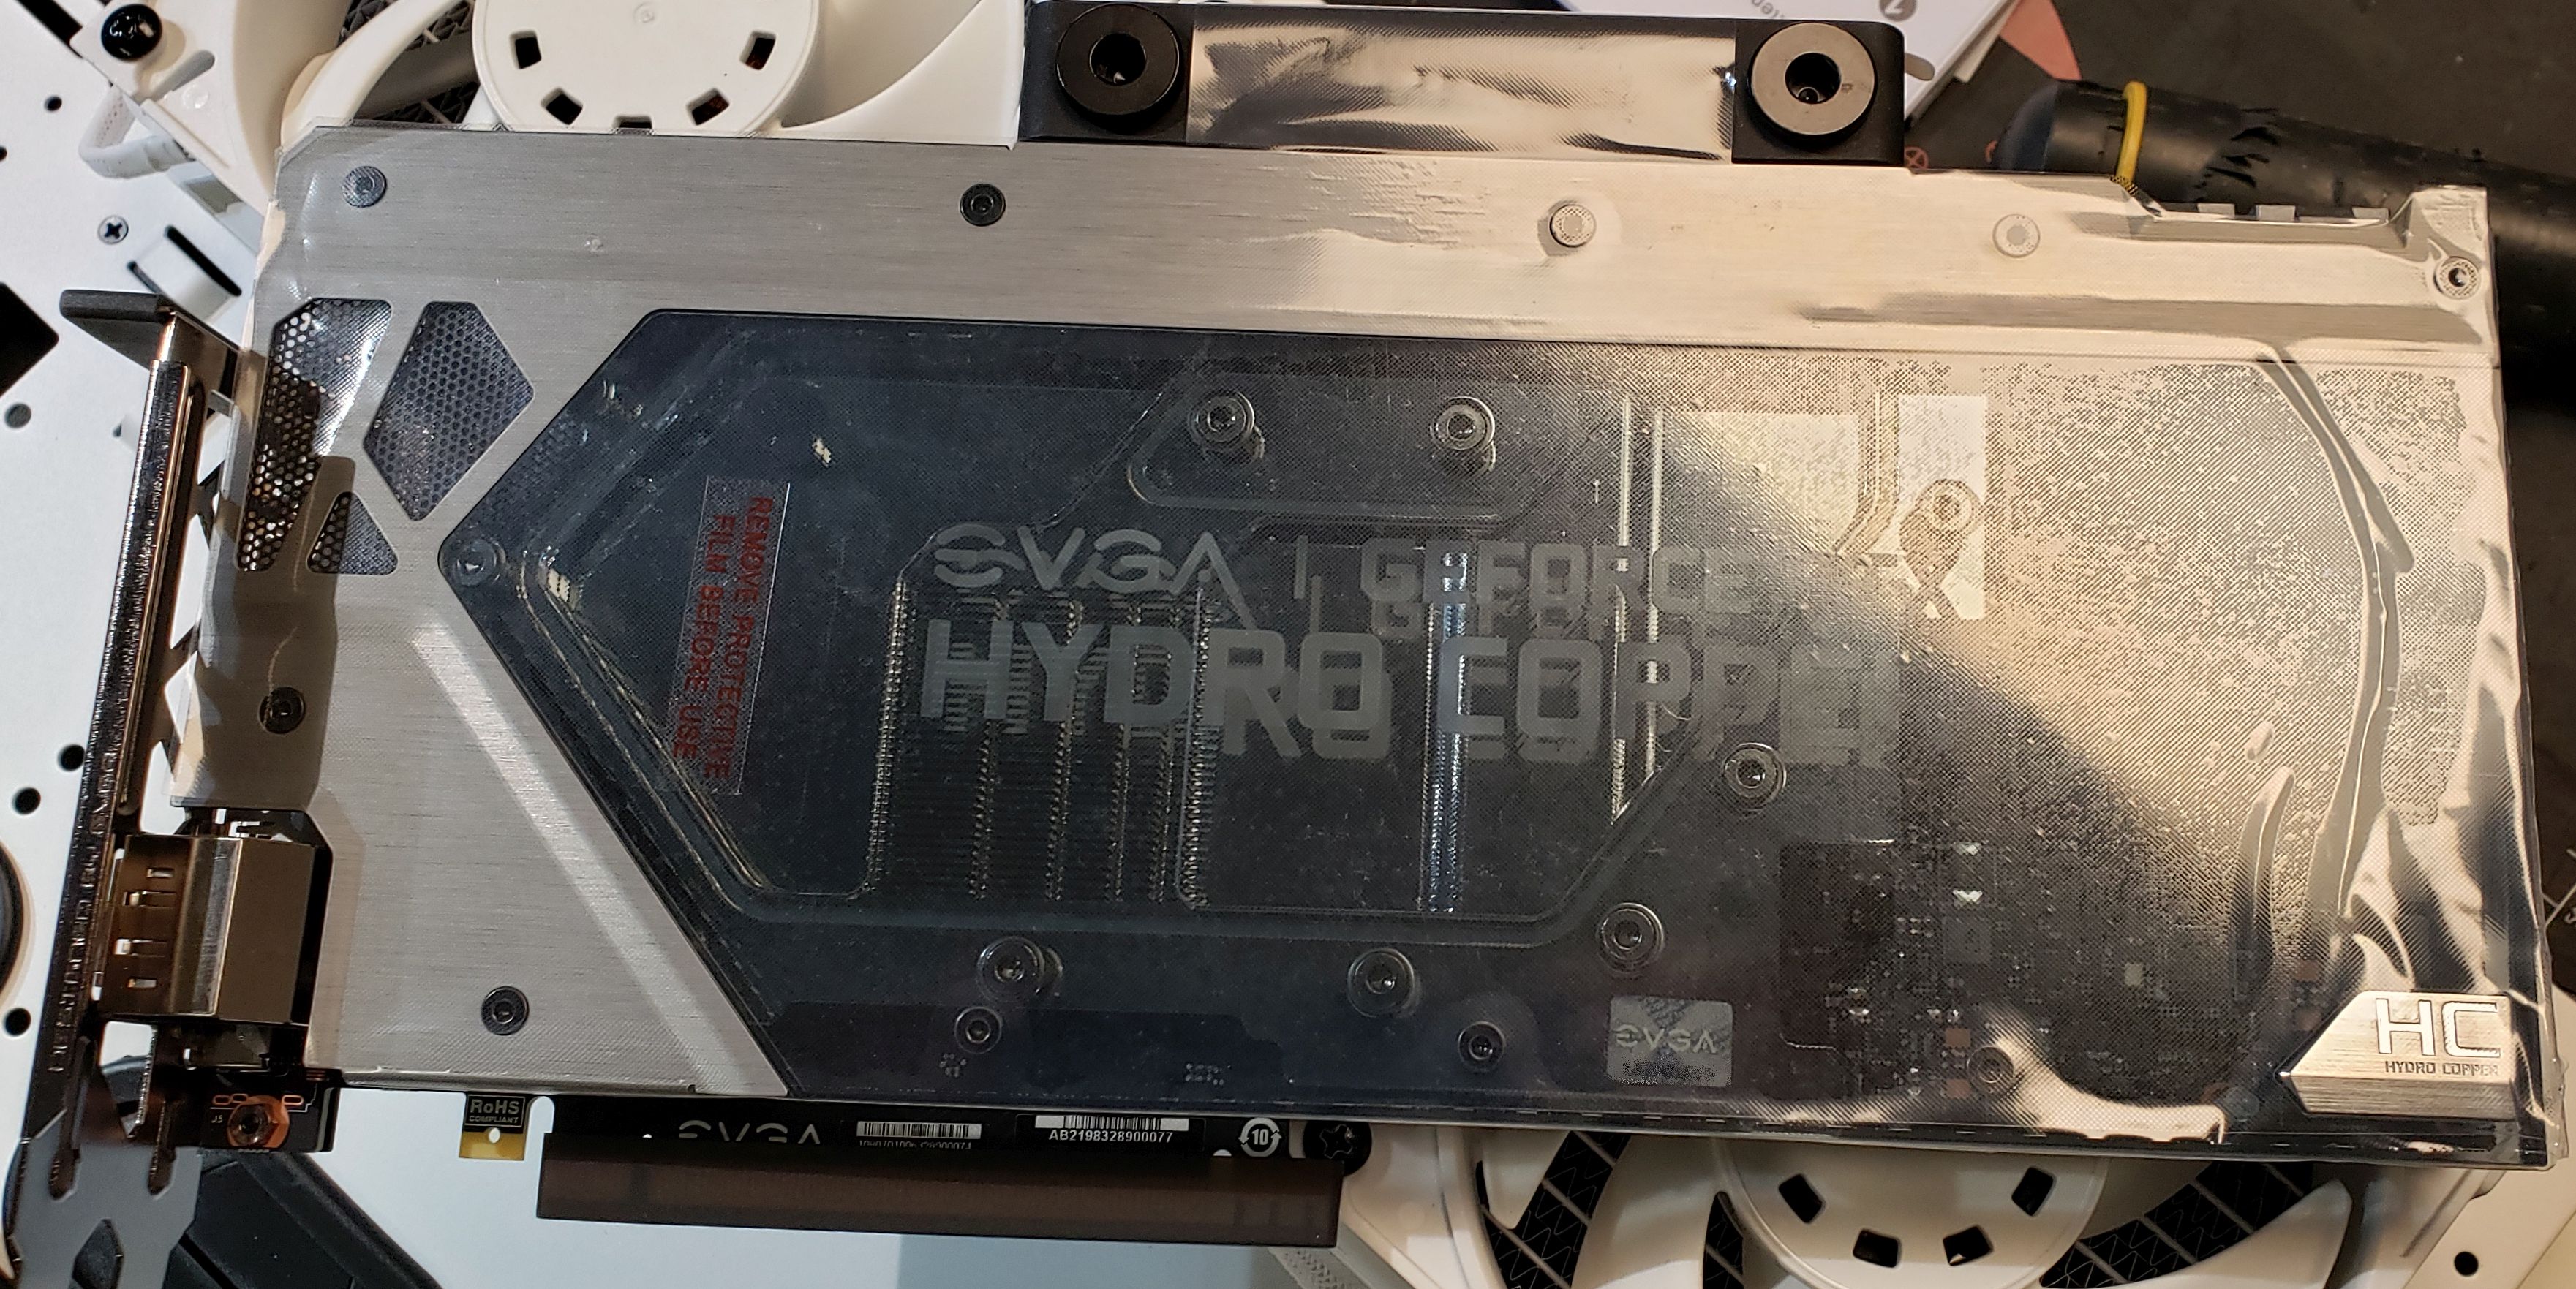
I went with the EVGA RTX 2080 Super FTW3 Hydro Copper, which includes a water block. I looked at getting the air-cooled version and adding a third-party GPU water block, but the cost of going that route was about the same or slightly more than getting it preinstalled. I've always been a fan of EVGA cards, but I've also used Asus STRIX cards. I recently purchased an Acer XB271HU, a 144 Hz, 2560 x 1440 resolution 27" monitor. The 2080 Super has plenty of power for that monitor, even with ray-tracing turned on. I also have an older Dell U2713HM, 2650 x 1440, but only at 60Hz. It's pretty much just my side monitor, but it comes in handy.
The card was bundled with a couple of games that show off the ray-tracing features of the card: Control and Wolfenstein: Youngblood. I expected to love Wolfenstein: Youngblood because I like its predecessors, but I found the game rather "meh," and have never finished it. Control, on the other hand, was a wonderful game that I played to the very end. It now has expansions, but I've not played them.
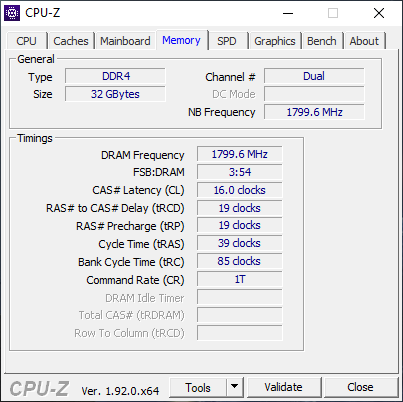
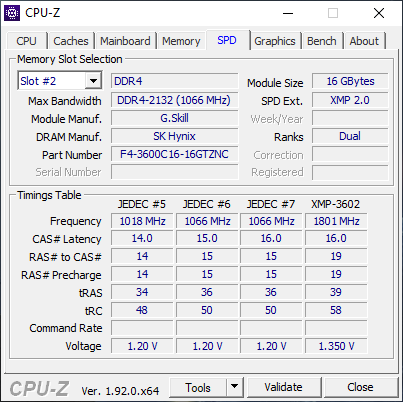
I debated whether to get 32 GB of RAM or 64 GB. I eventually went with 32 GB of Trident Z Neo 32GB DDR4 3600. I knew I wanted 3600 MHz RAM to max out the timings, but keep the AMD Infinity Fabric at a 1:1 ratio. This RAM is made to work well with the new AMD processors. It has 16-19-19-39 timing numbers (CAS Latency 16) when running at 1.35V. G.Skill has become my go-to RAM supplier. I have yet to be disappointed with any of the RAM I've purchased made by them. When I got this, it was a new model for a new CPU, so it was pretty pricey at $223. (Note from November 2021: I decided to bump that up to 48GB, so I bought another 16 GB of this same RAM for $112.)
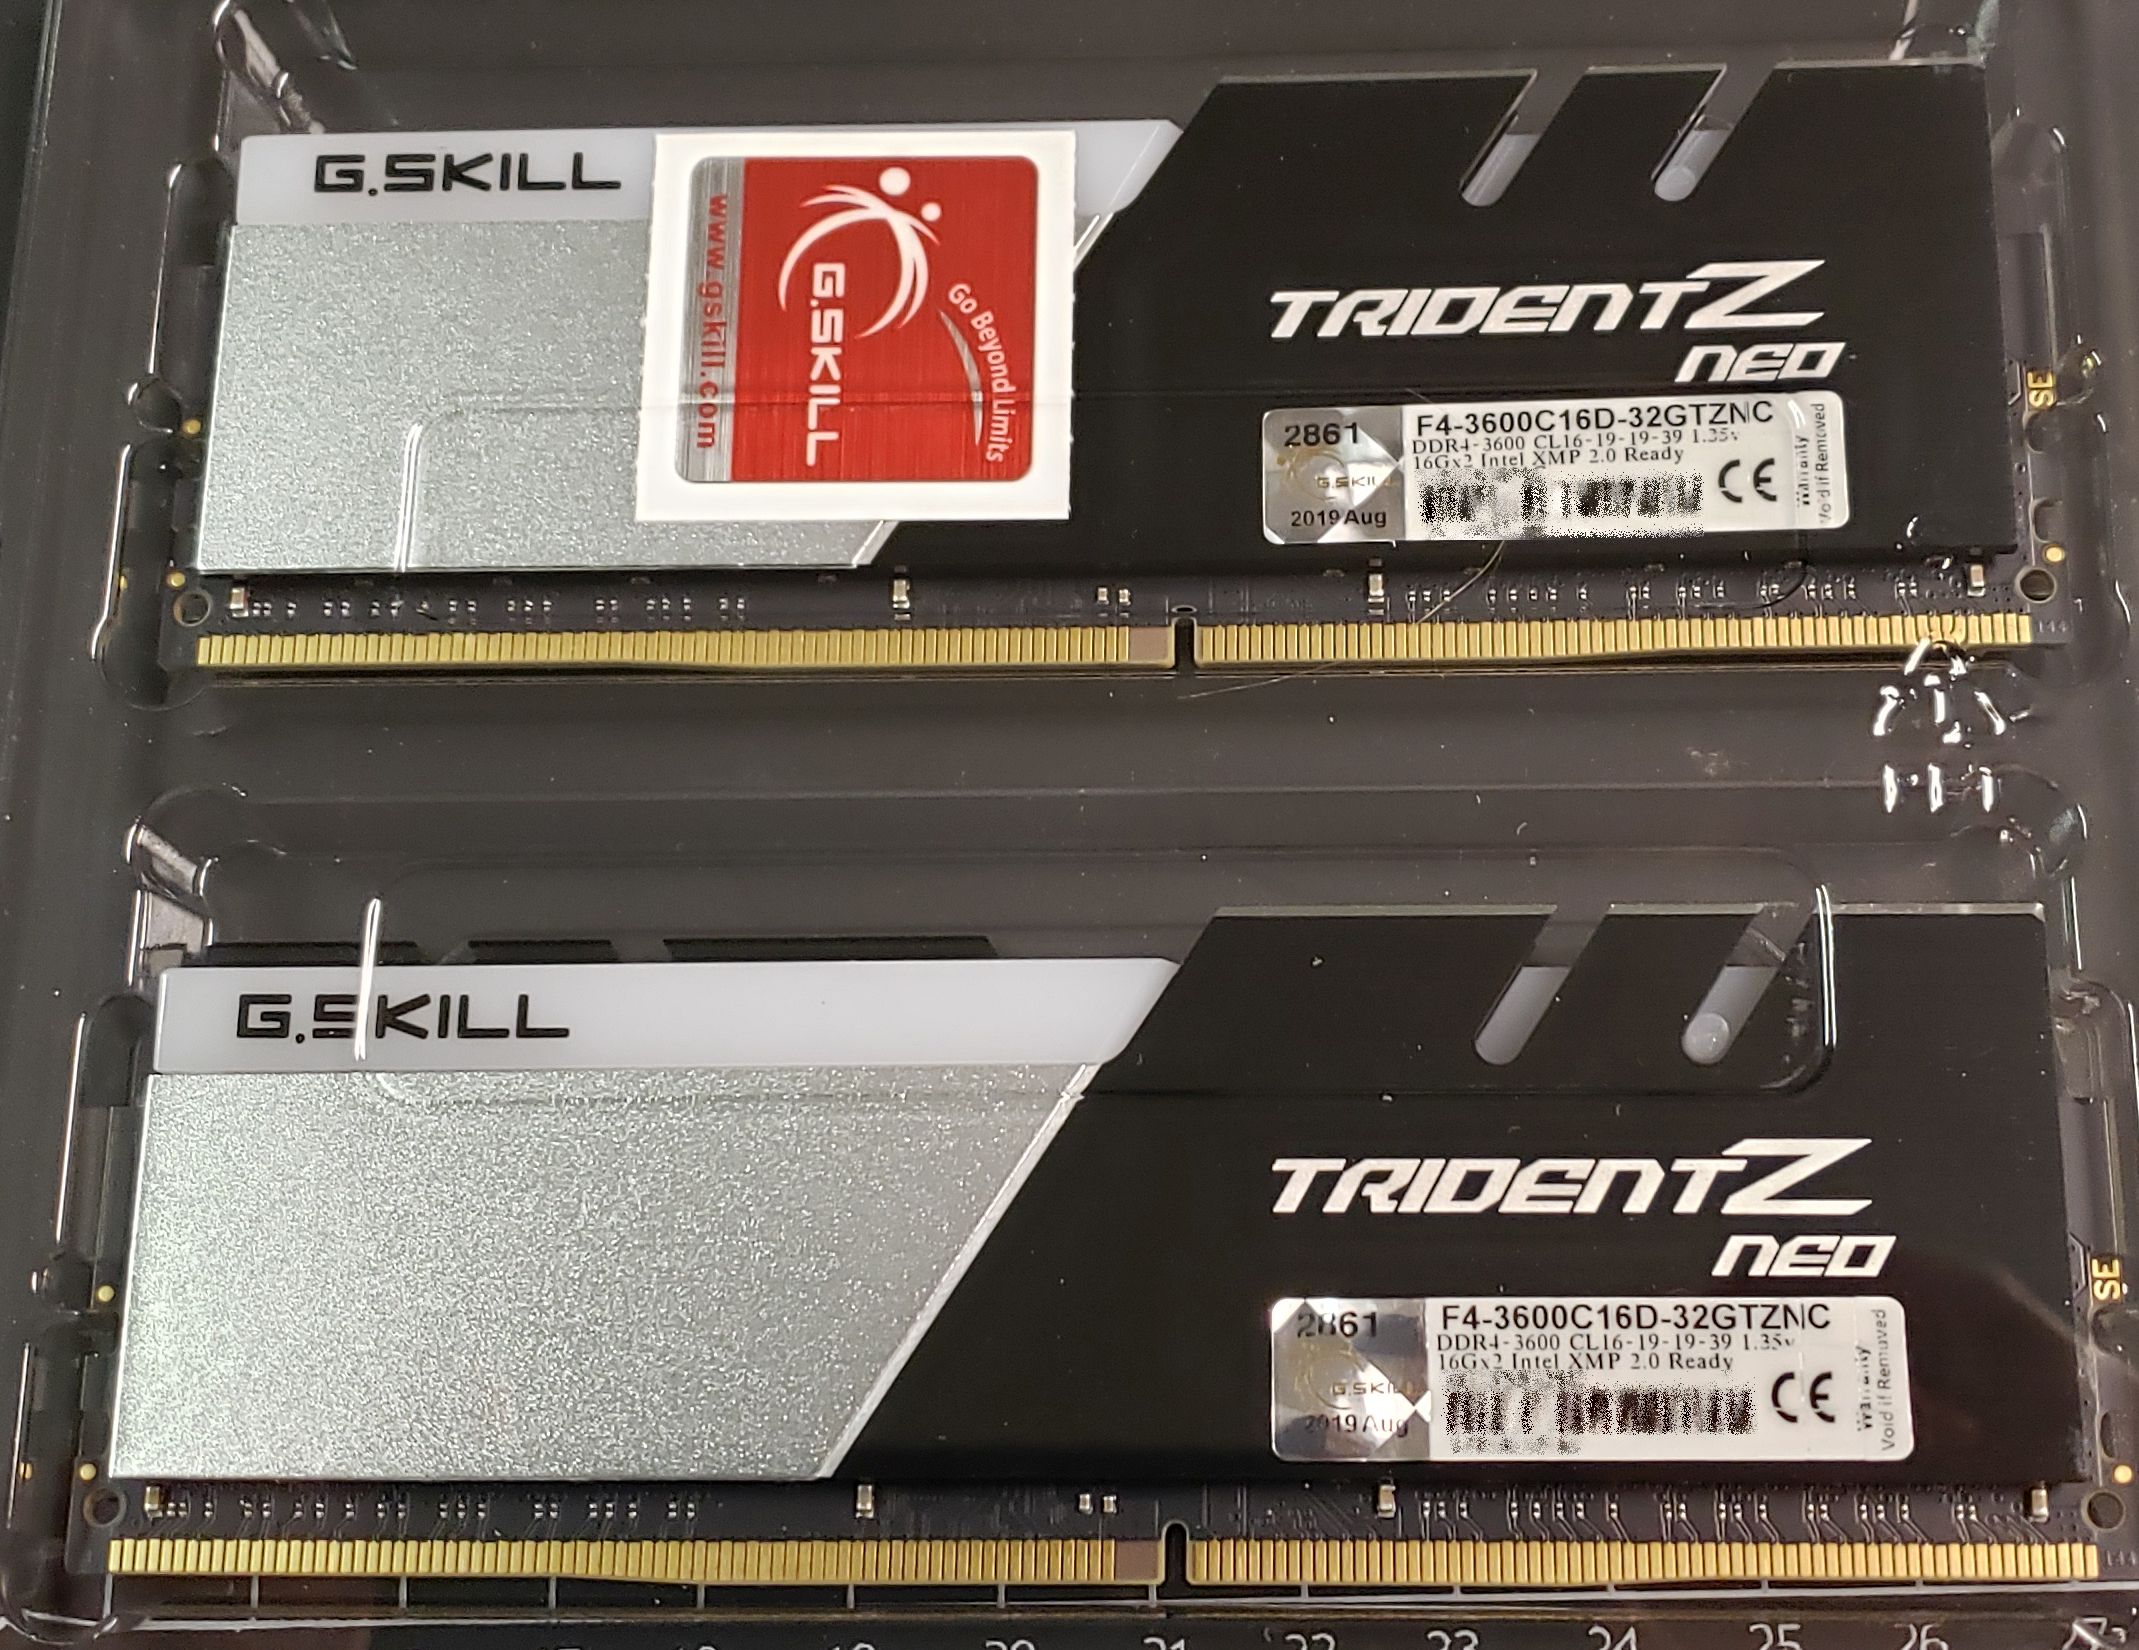

The RGB is a nice touch, but I didn't go overboard with RGB in this system. If a component came with it, I used it but didn't go out of my way.
I decided that I would only use SSD drives in this build. In my last system, I had a few SSDs (the 2.5" variety) that handled most of the important tasks like being a boot drive and the main games drive. I used a single 3.5" 4TB HDD for music, videos, and pictures. Since this motherboard was an X570 with two M.2 slots with PCIe Gen 4.0 support, I wanted my main SSD to be an M.2 PCIe Gen 4.0 drive. (Otherwise, what was the point of buying X570?)
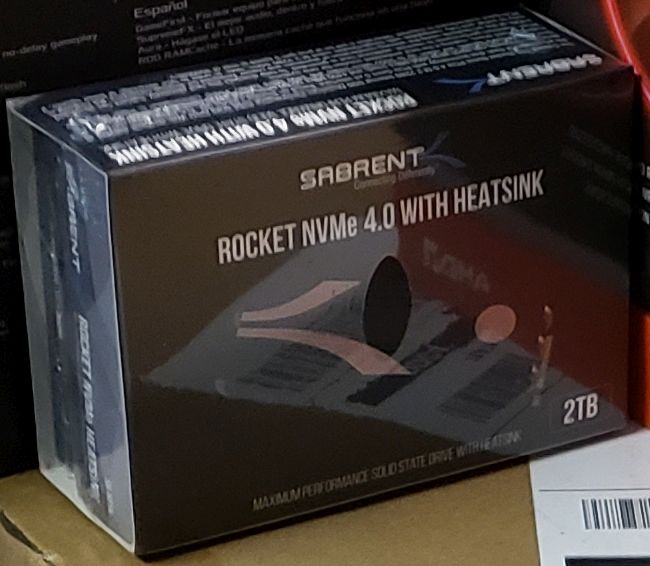
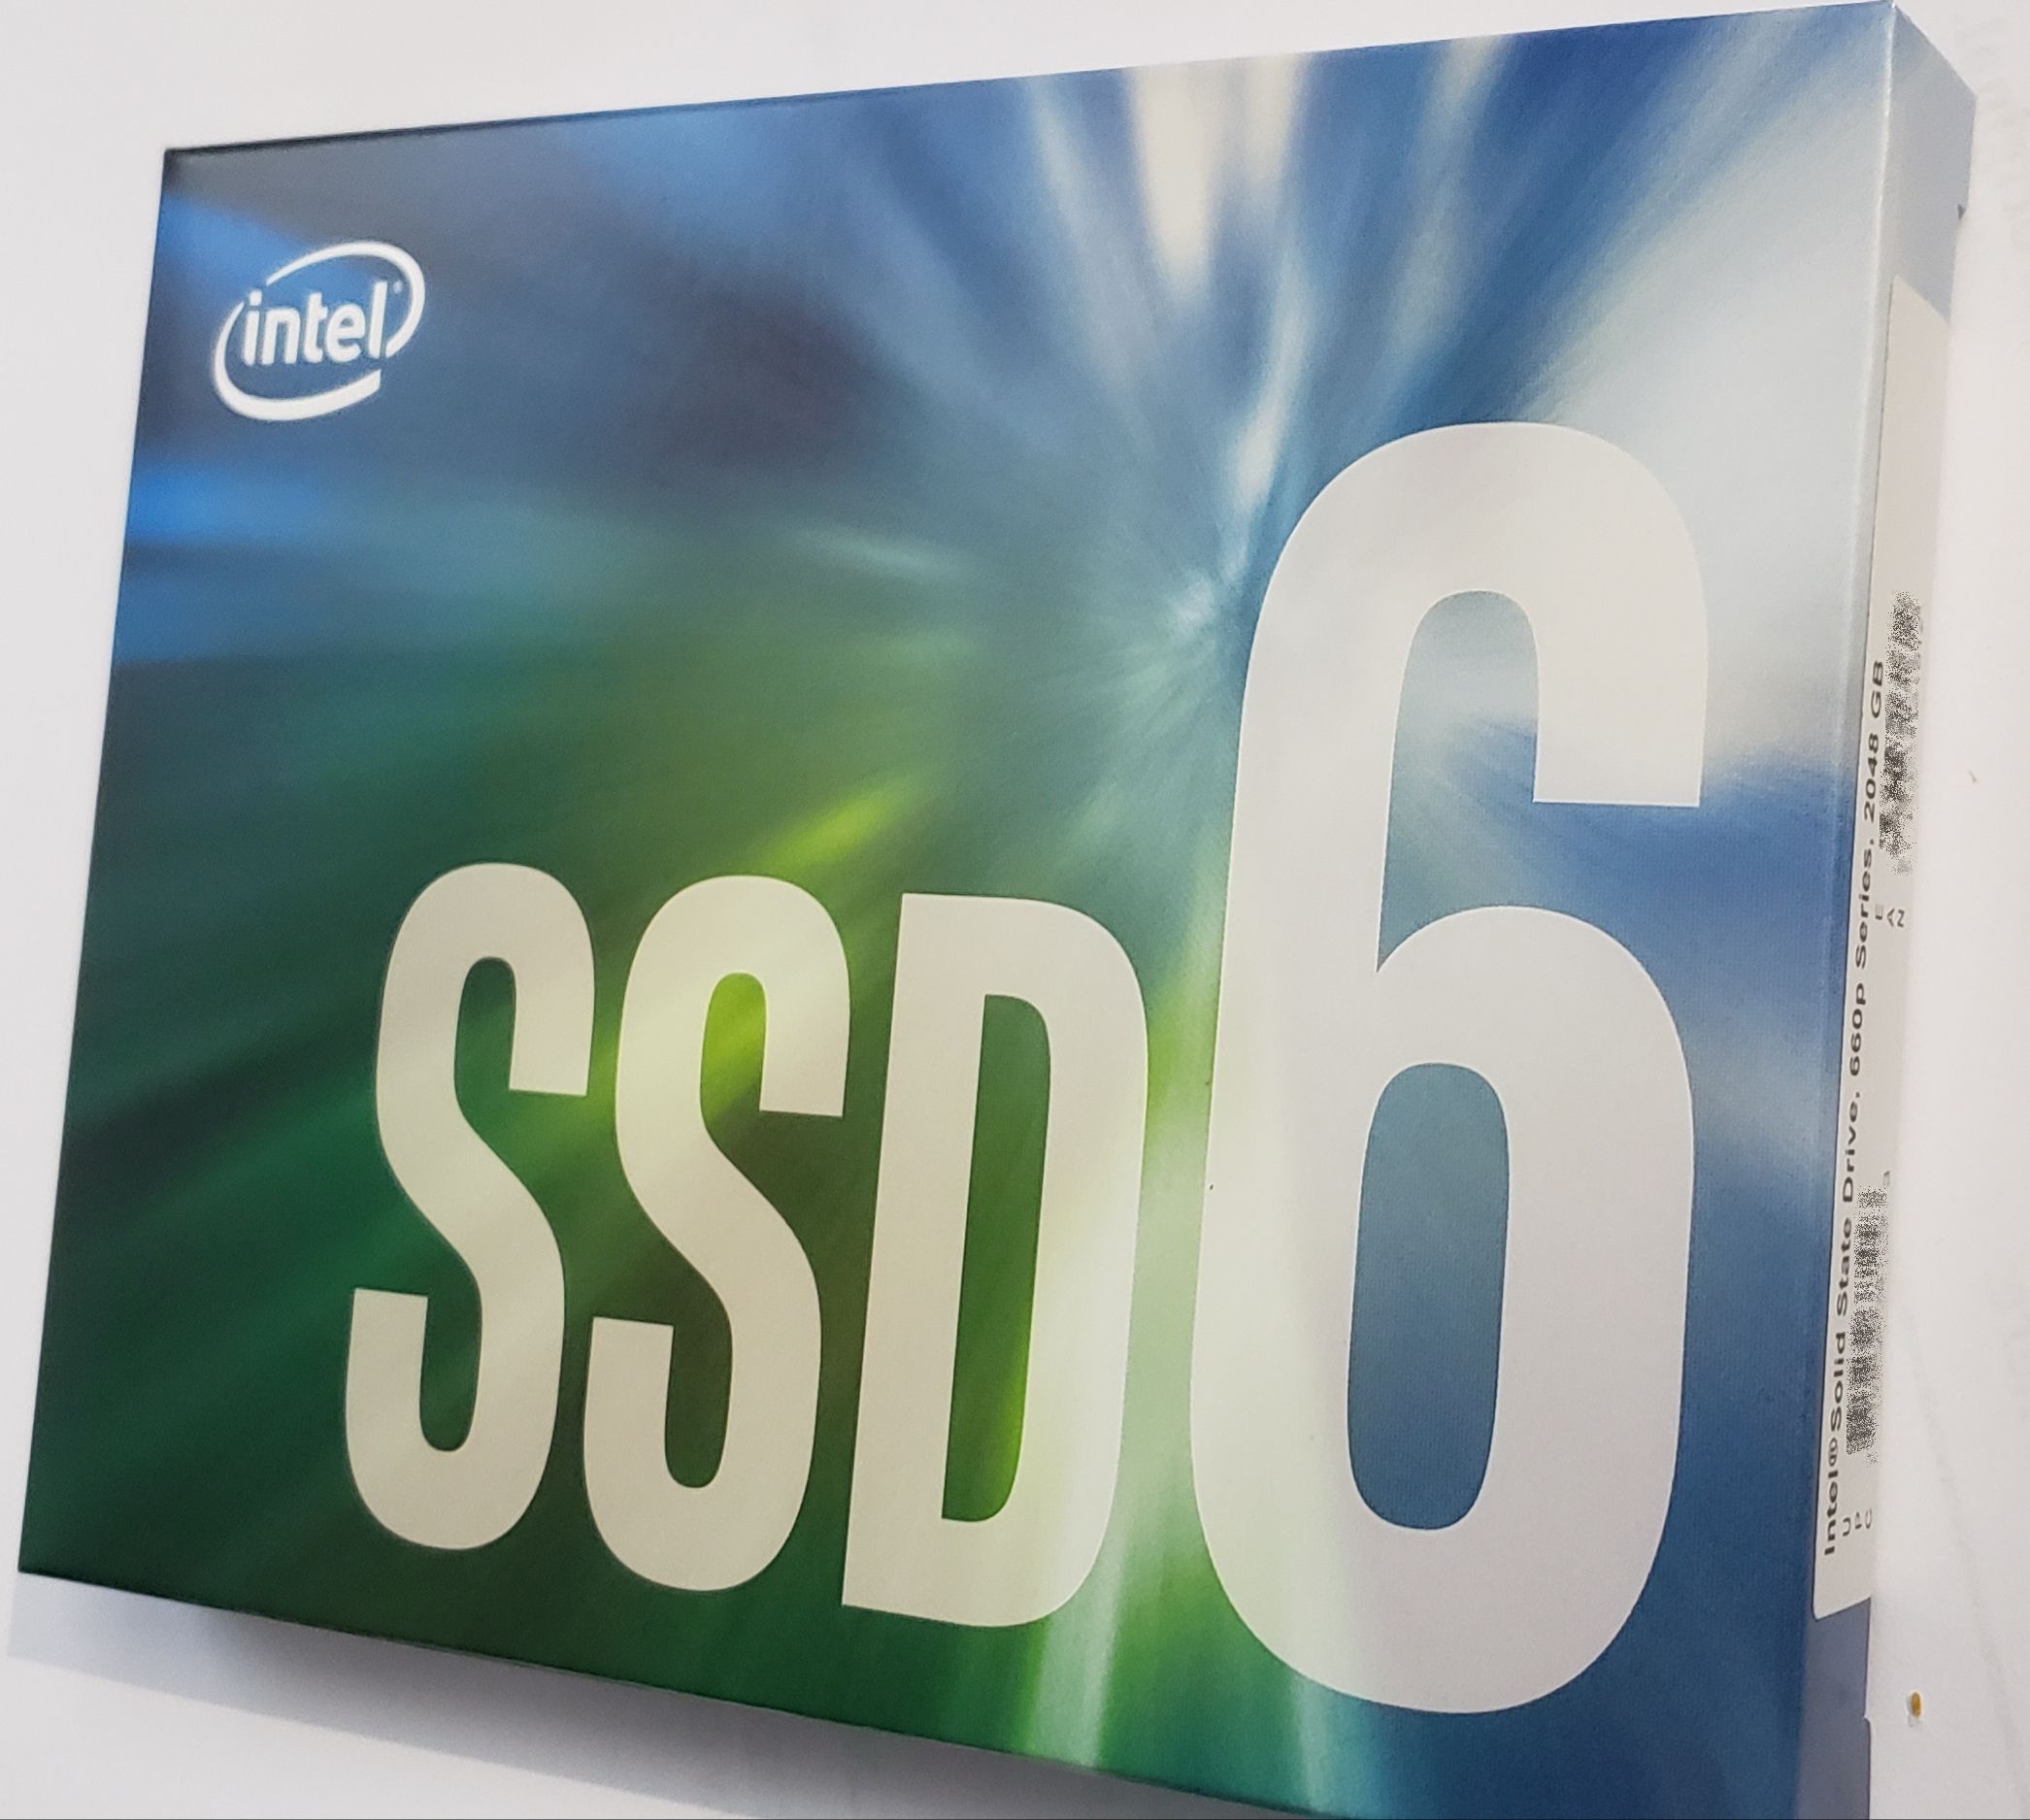
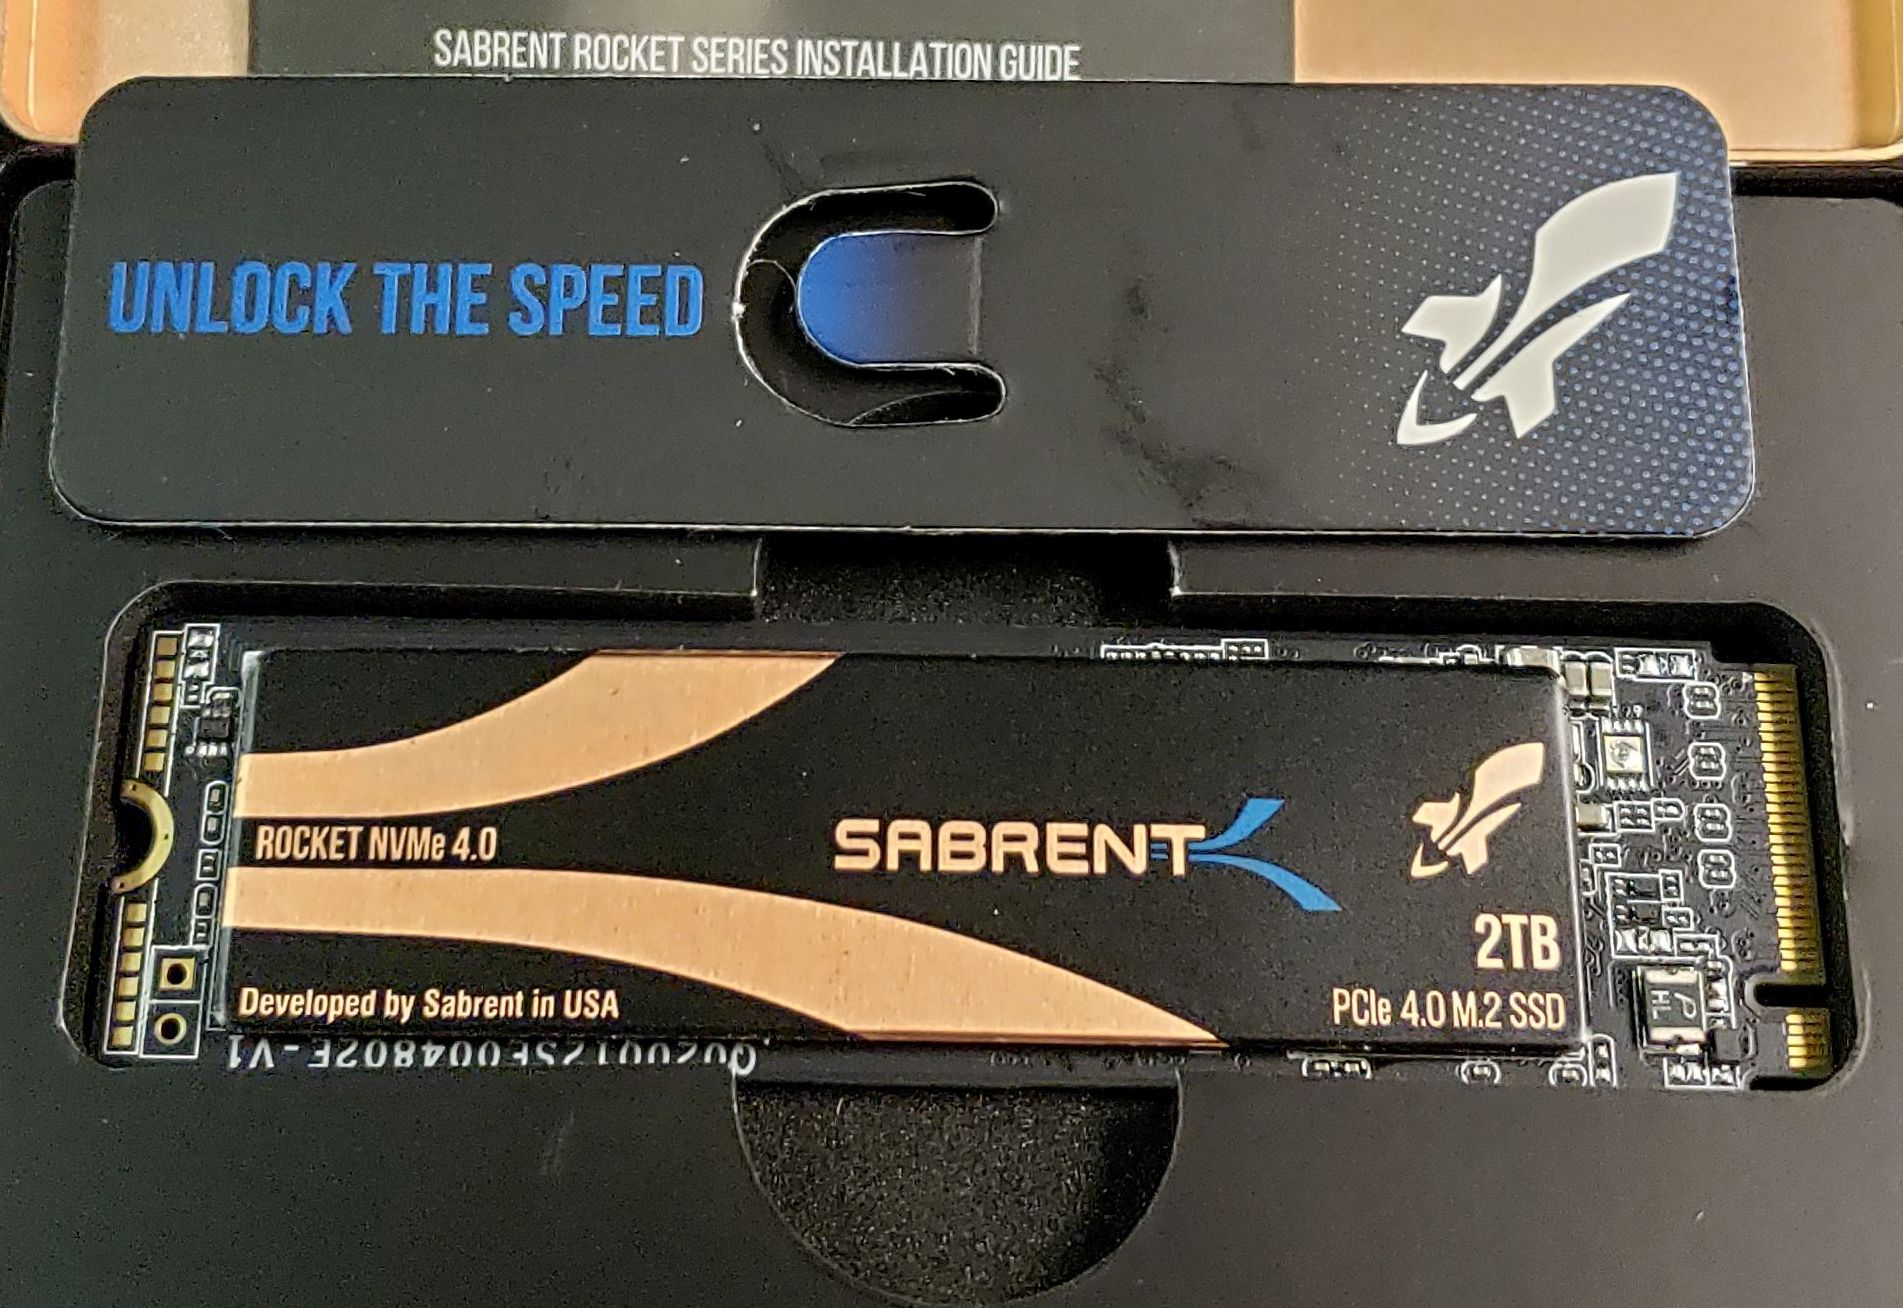
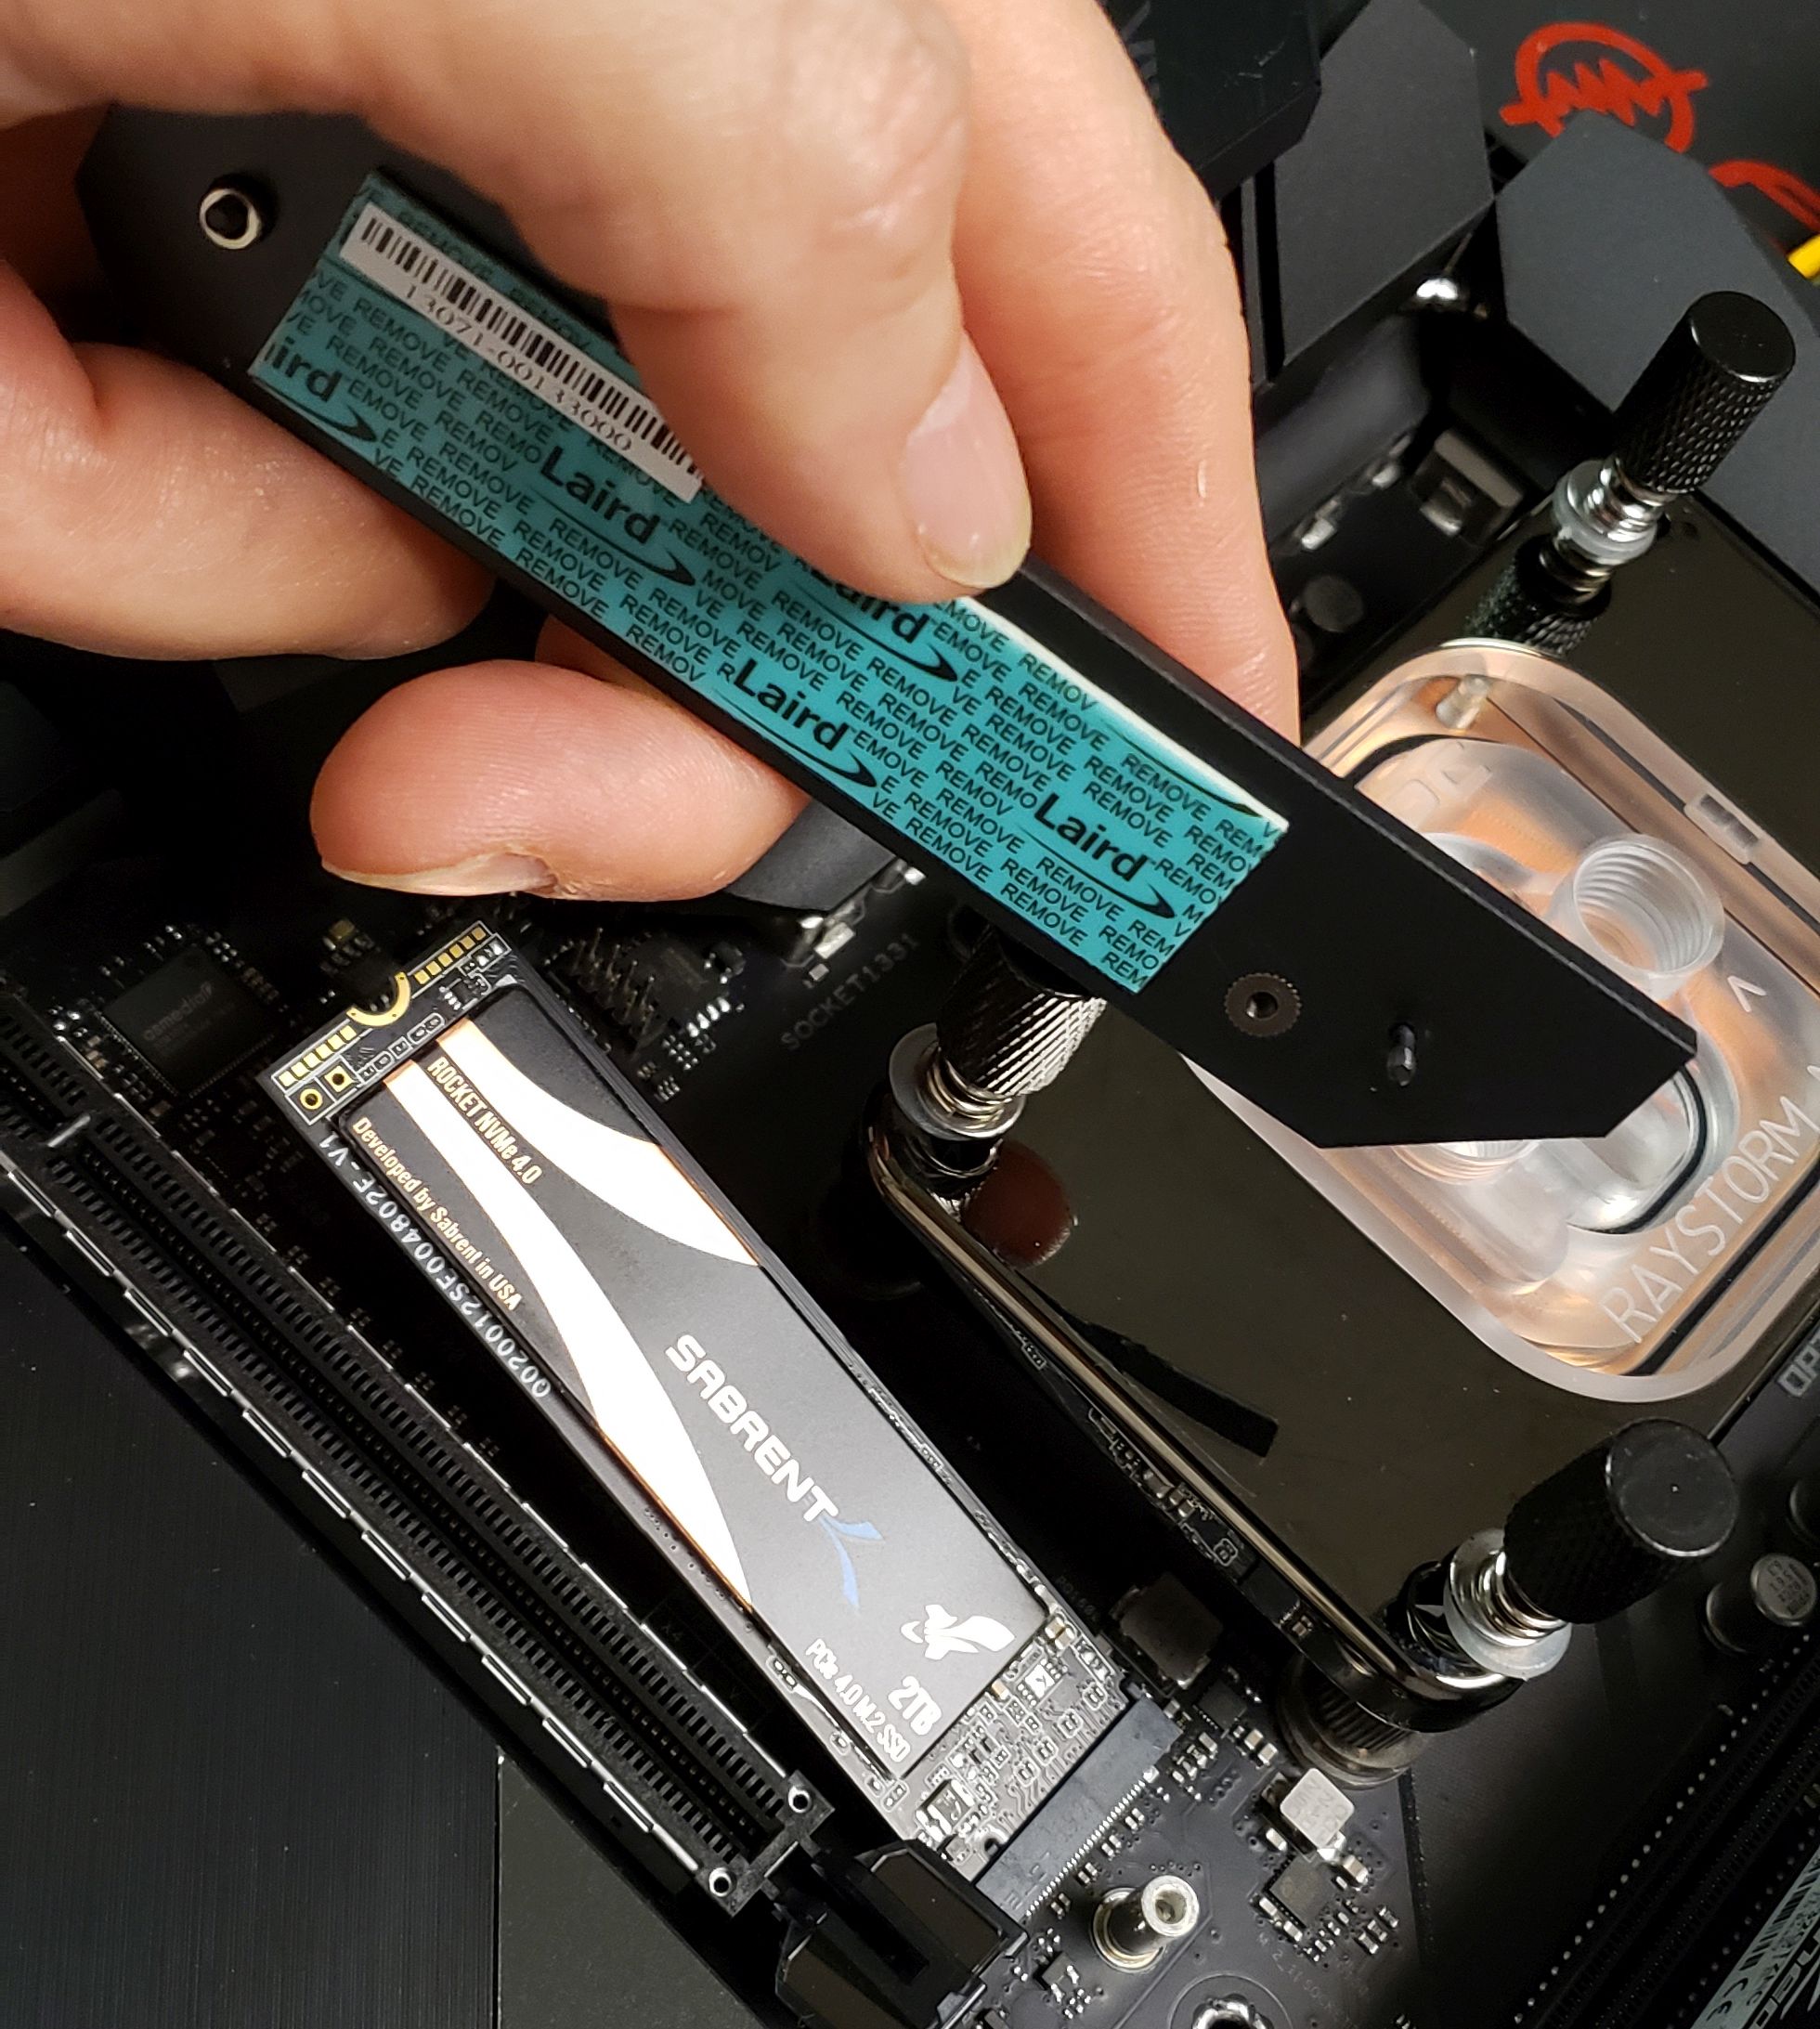
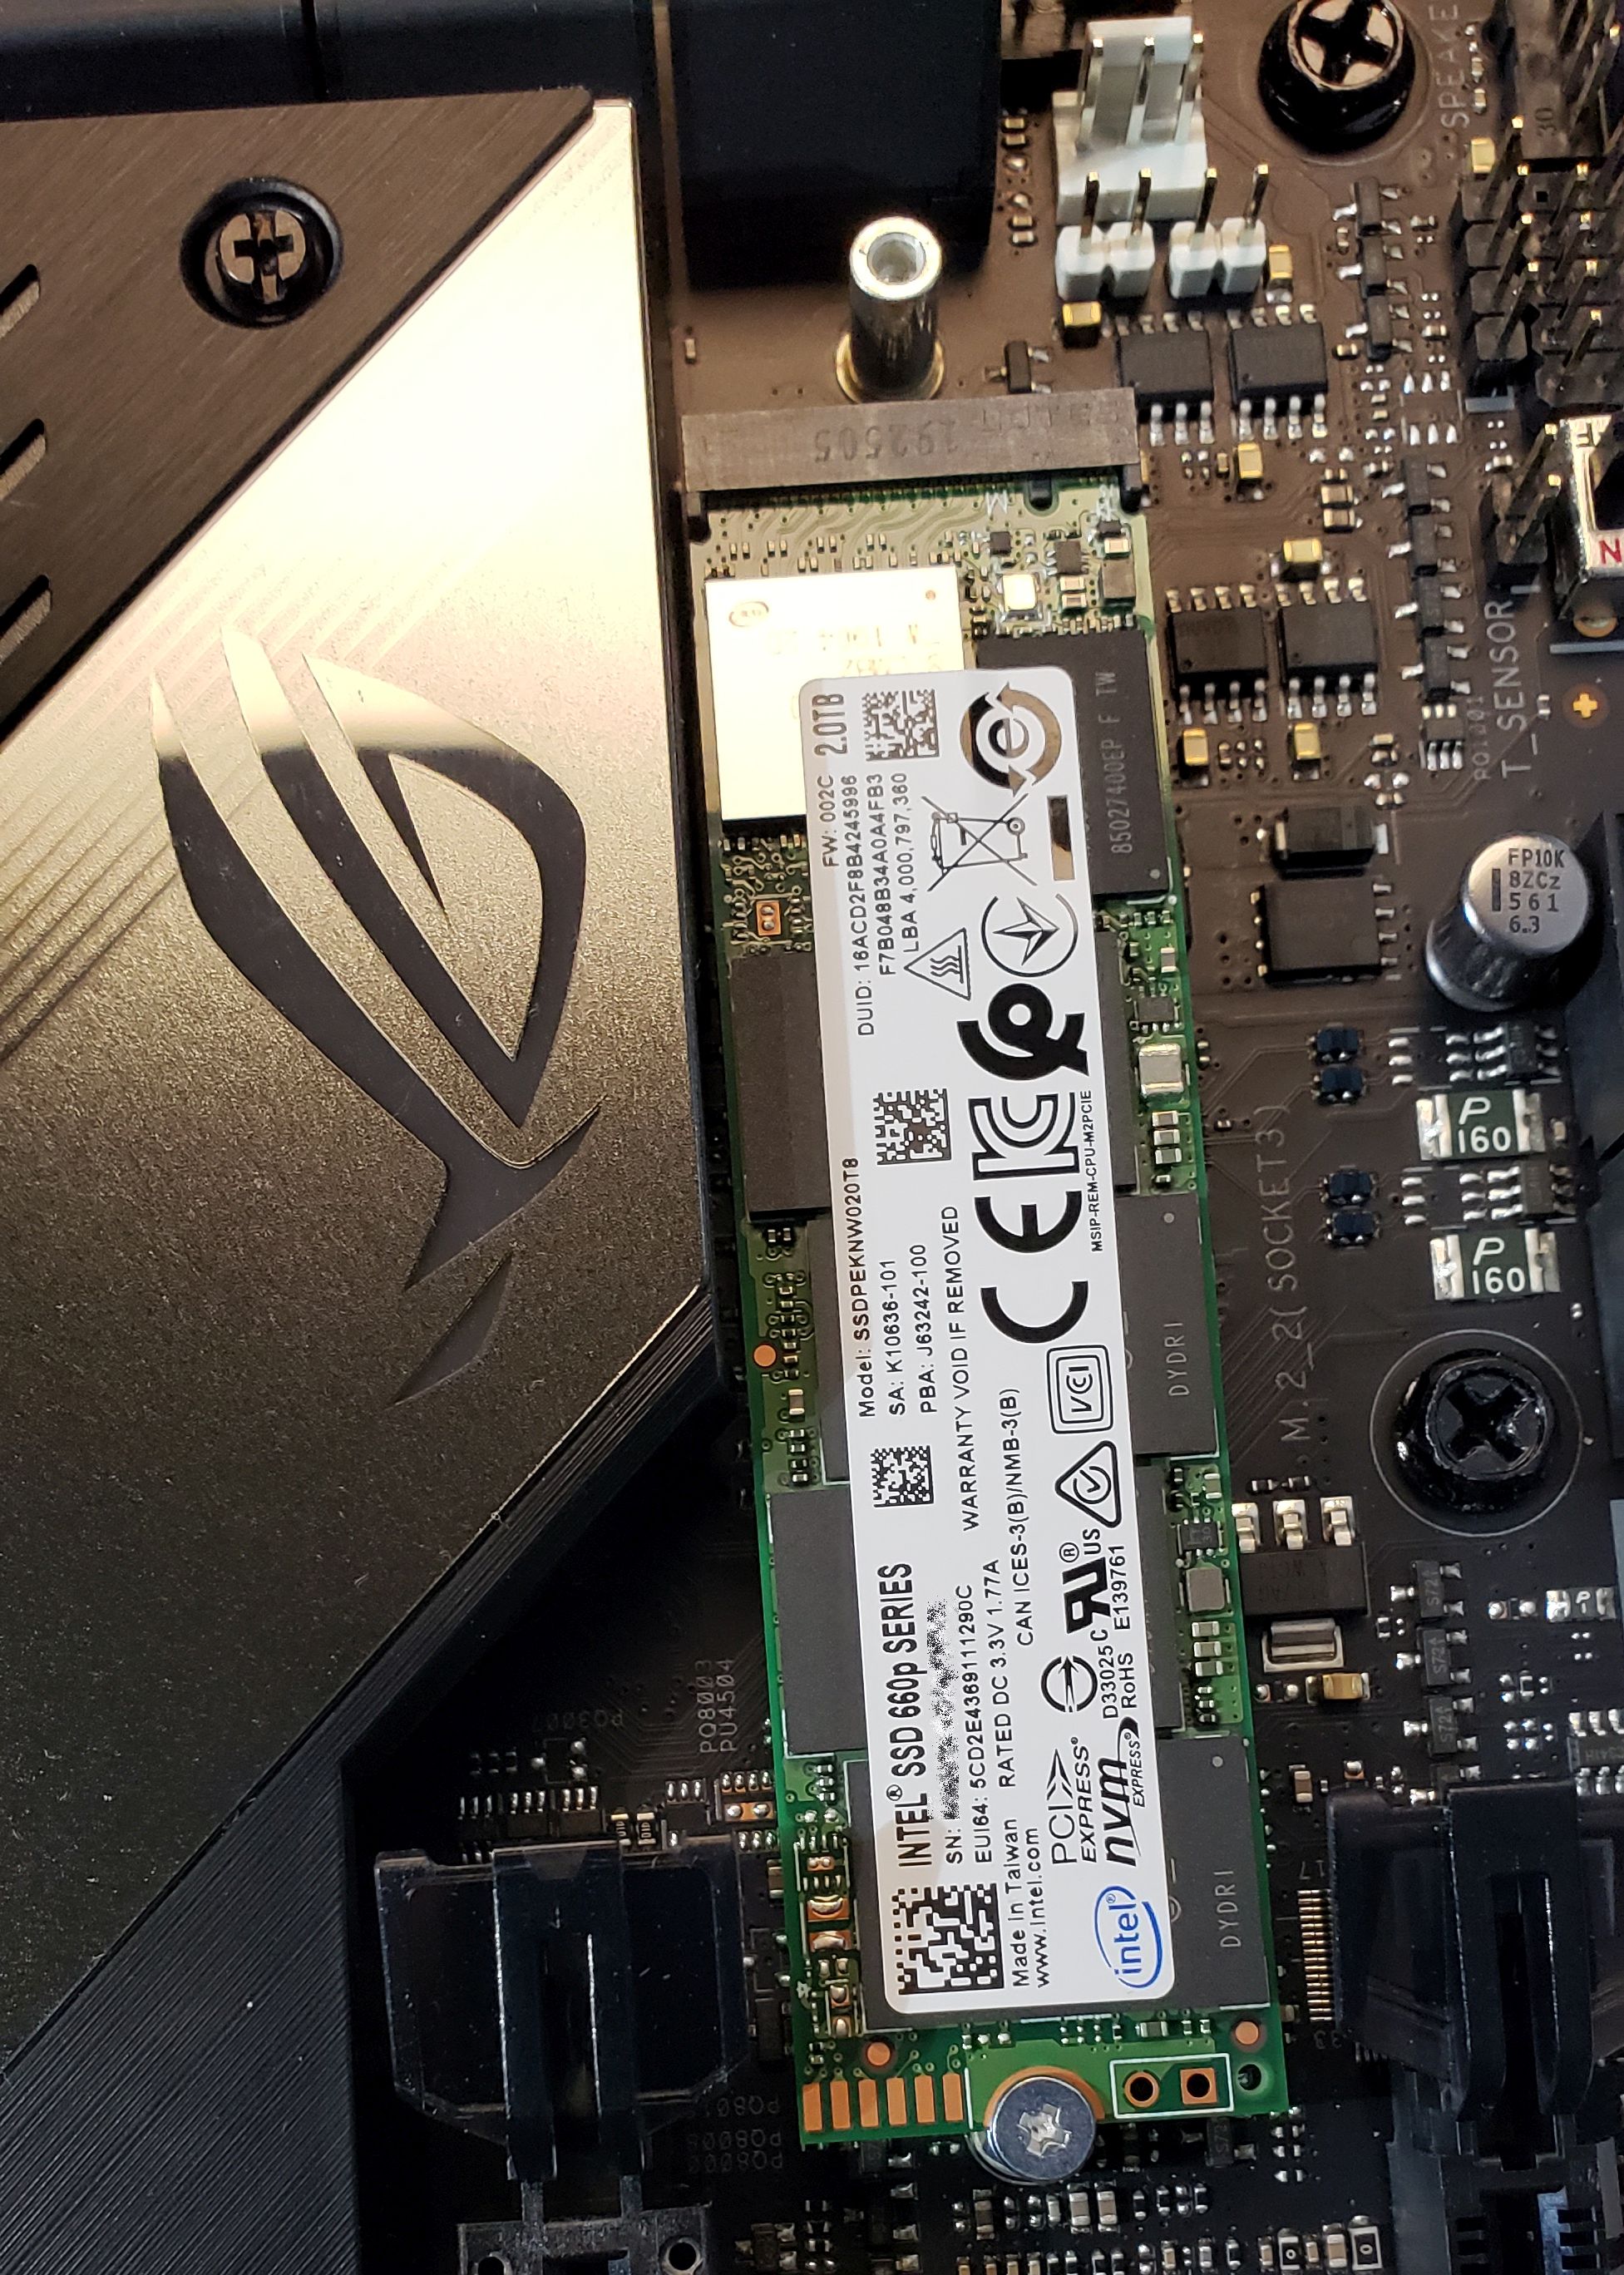
I went with a Sabrent Rocket NVMe 4.0 2TB drive for my main drive. I use 2TB of very fast SSD goodness for my boot drive, primary applications, user files, and games folder. For extra storage for music, videos, and pictures (that I used to have on the 4TB rotating HDD), I am using an IBM 660P M.2 PCIe Gen 3.0 2TB SSD. While nowhere near as fast as the Sabrent Rocket SSD, it is significantly faster than the old HDD and cheaper than the Sabrent Rocket SSD. Interestingly, it was about 1/2 the cost and about 1/2 the performance. Neither drive was especially cheap, but it lets me use only the M.2 slots on the motherboard for storage. With no SATA cables - data or power - anywhere to be found, it helps give the system a very clean look.

Now, the question is, was it worth the cost? Let's trot out a few benchmark results.
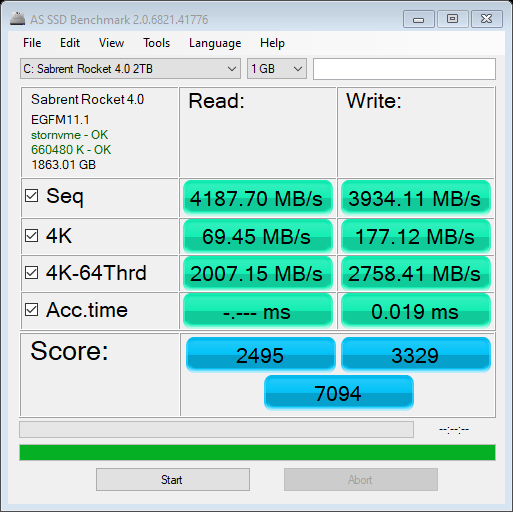
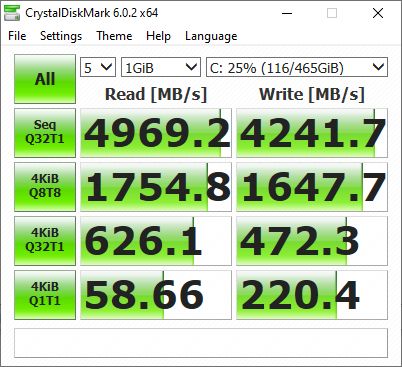

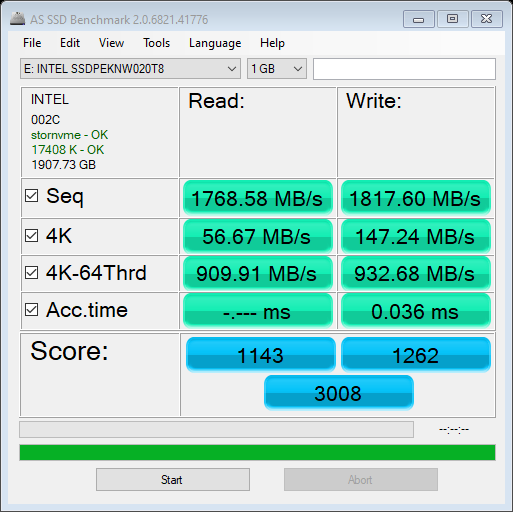
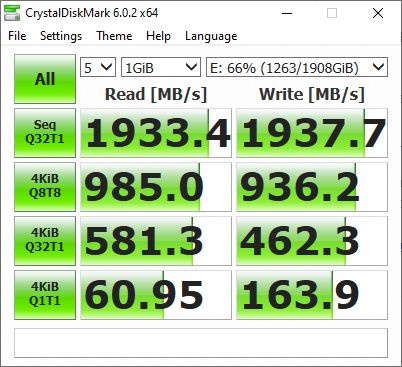
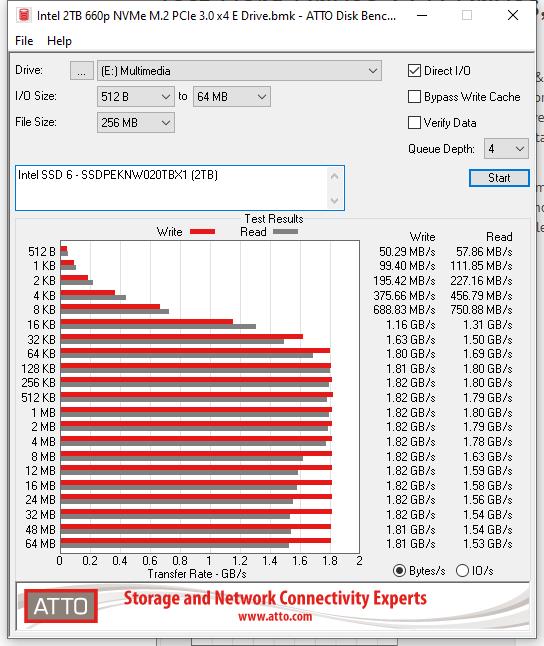
Compare these results to the PCI Gen 3.0 Samsung 970 Pro 1TB. I can't quite compare like models since there is no 2TB model of the Samsung 970 Pro. The 970 Pro was in the $350 range for half the storage. There is a 2TB version of the Samsung 970 EVO Plus, which at the time I bought the Sabrent Rocket (at $410) cost $90 more (at $499.99. It's since come down about $50 to $450). Here is a Guru3D review of that model's benchmarks. Depending on the test, the Sabrent Rocket performed similarly to the 970 Pro. In others, the Sabrent Rocket left the 970 Pro in the dust at up to 68% faster.
That said, benchmarks are just that. I had a 1TB Samsung 860 EVO 2.5" as my boot drive before, so I wasn't expecting a mind-bending increase in speed. I don't notice much difference when booting Windows from powering on. But then, even the 860 EVO booted Windows 10 in about 15 seconds. It's probably a few seconds less with the Sabrent Rocket. I can say that the Sabrent Rocket feels fast when loading games. It was fast before, so a faster fast is a relative thing. Given the cost savings relative to the increase in speed, I'm pretty happy with that choice.
The theme for my new system was mostly white with black and blue highlights. I knew that getting a white X570 motherboard at the time was not a possibility. (That still seems to be the case.) White memory on a black motherboard would look odd and stick out more than I wanted, so I didn't try to get that either (although white memory was available, at least). However, I did want to go with an all-white power supply unit (PSU). Lately, my favorite PSU supplier has been Seasonic. I went with the Seasonic Prime SnowSilent 750W Titanium fully modular PSU for this system.

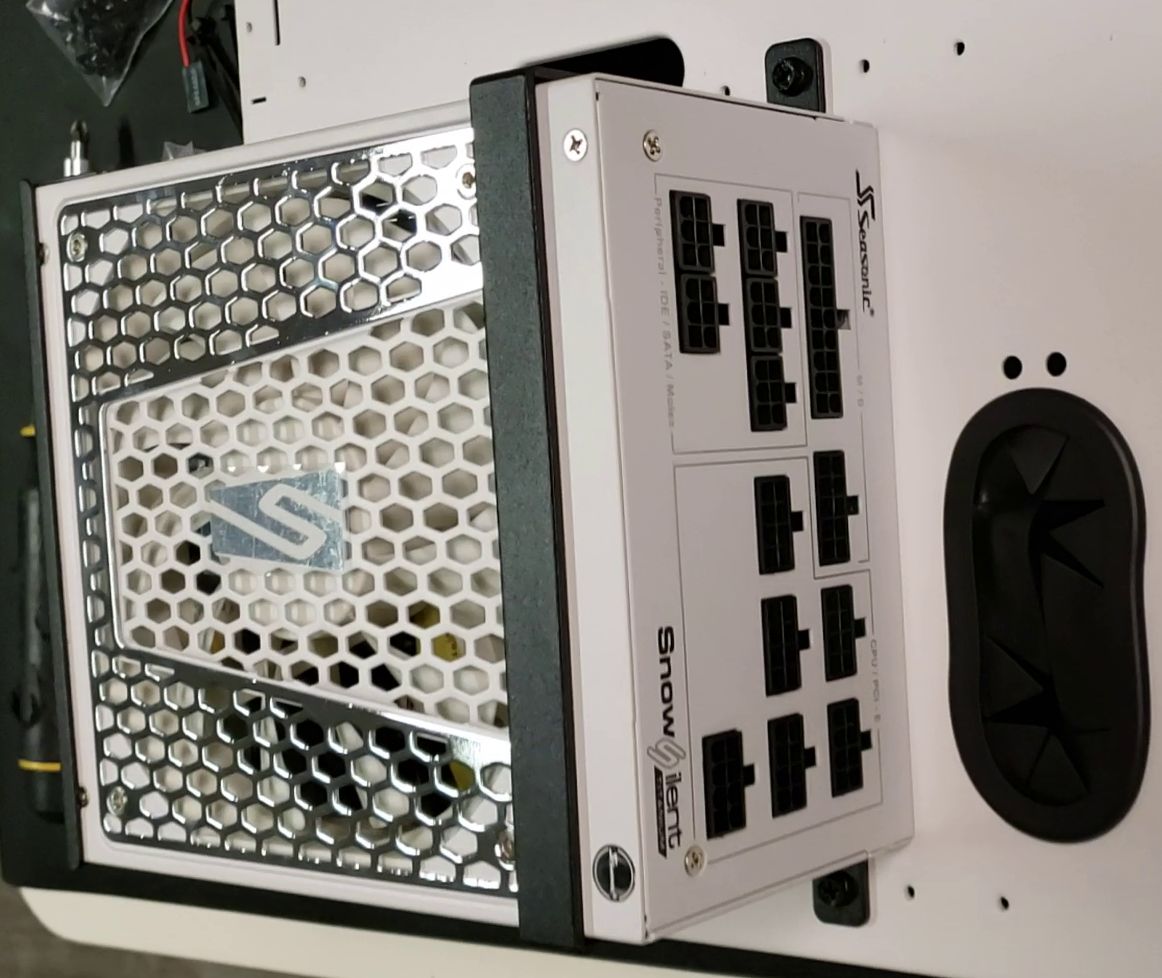
This PSU comes with a 12-year warranty. I had estimated my worst-case power draw to be about 470W. While 470W is higher than half the rating of this 750W PSU, which is where I like to keep my systems to leave plenty of headroom for overclocking and expansions, this PSU is titanium-rated, so it should be between 90 and 94% efficient at the load I anticipated and have a power factor of 0.95. This PSU also has a feature that shuts the internal fan off when the PSU is running at a low load. Except when playing some games, the fan is almost always off. I've heard that this feature has caused some problems for Seasonic in that people have returned the units because they have a "broken fan."
This model comes in nice packaging - suede-like pouches for the PSU and the included cables. They included black cables. BLACK CABLES! The (unusually thick and long) 120V plug was black, too. While it's true that many people who buy this class of PSU will get custom-sleeved cables or cable extensions (myself included), this unit should ship with all-white cables. The modular cables appear to be of really solid construction and thicker than most. But they were all black and plastic coated. Since I was getting custom cables, I didn't fret too much about it. However, I had to search for a white 120V NEMA 5-15P to C13 Power Cord with 14/3 AWG wiring rated at 15 amps. It would have cost Seasonic very little to supply white cables in the first place.
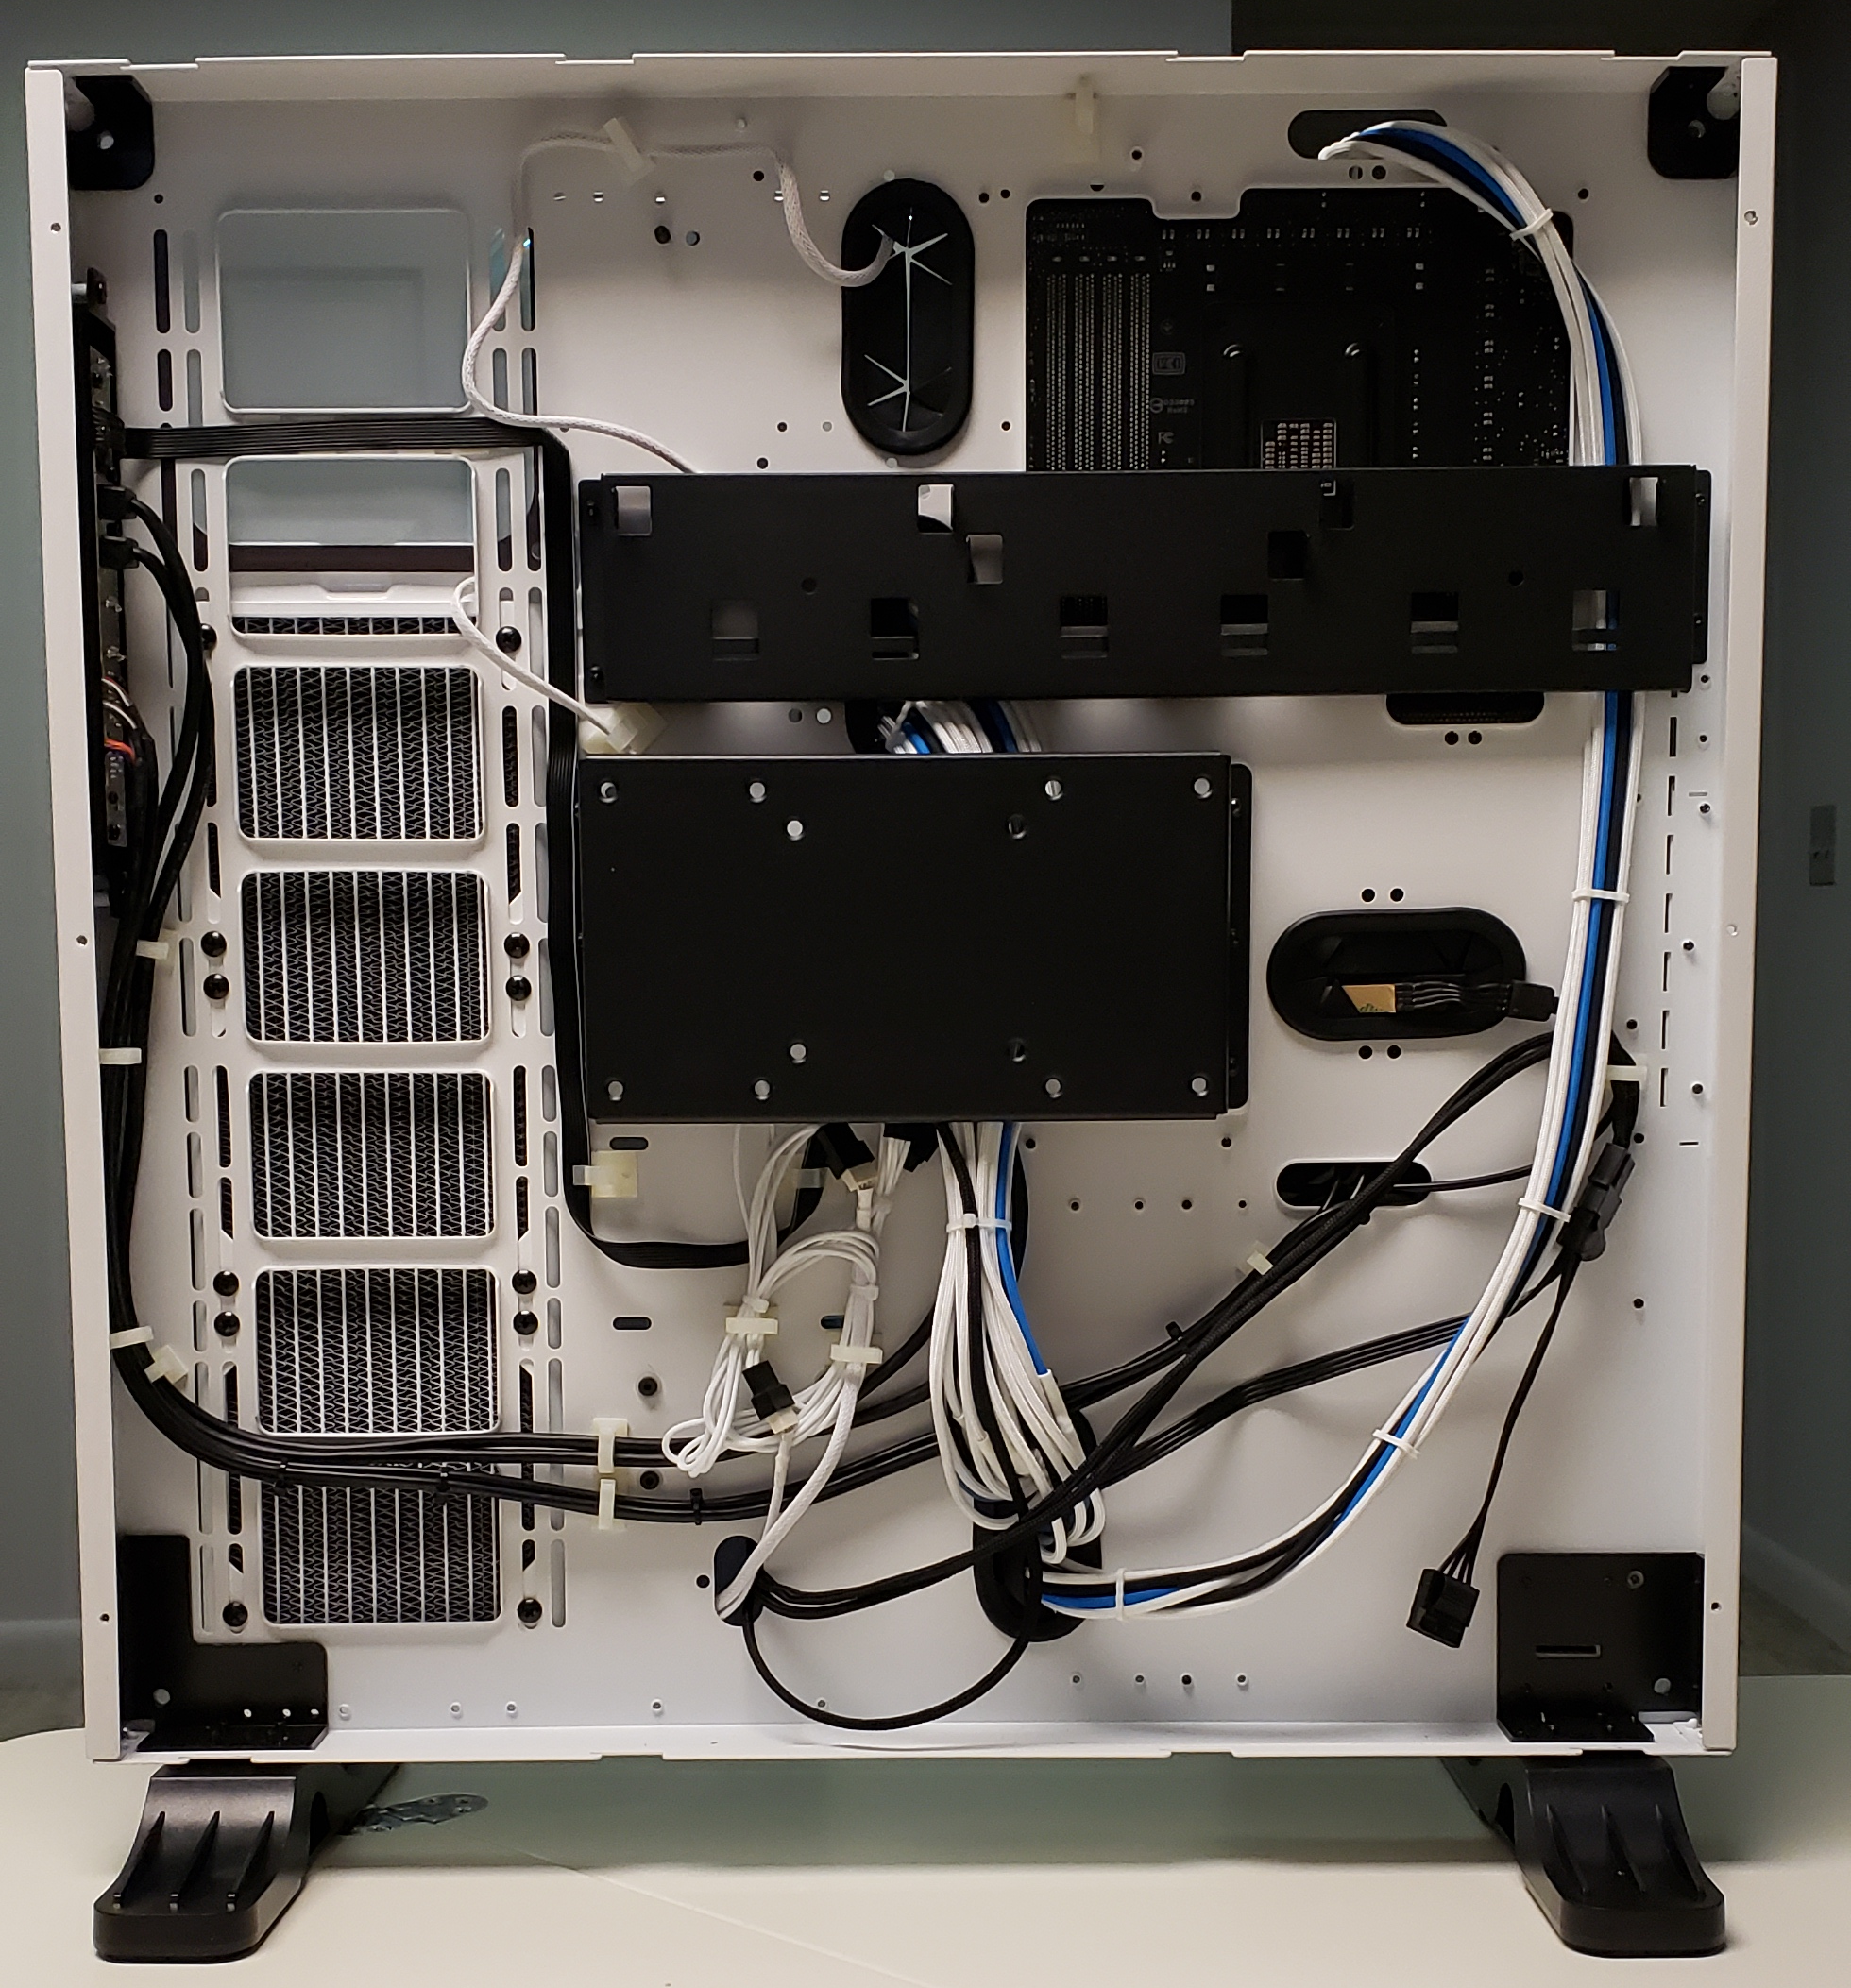
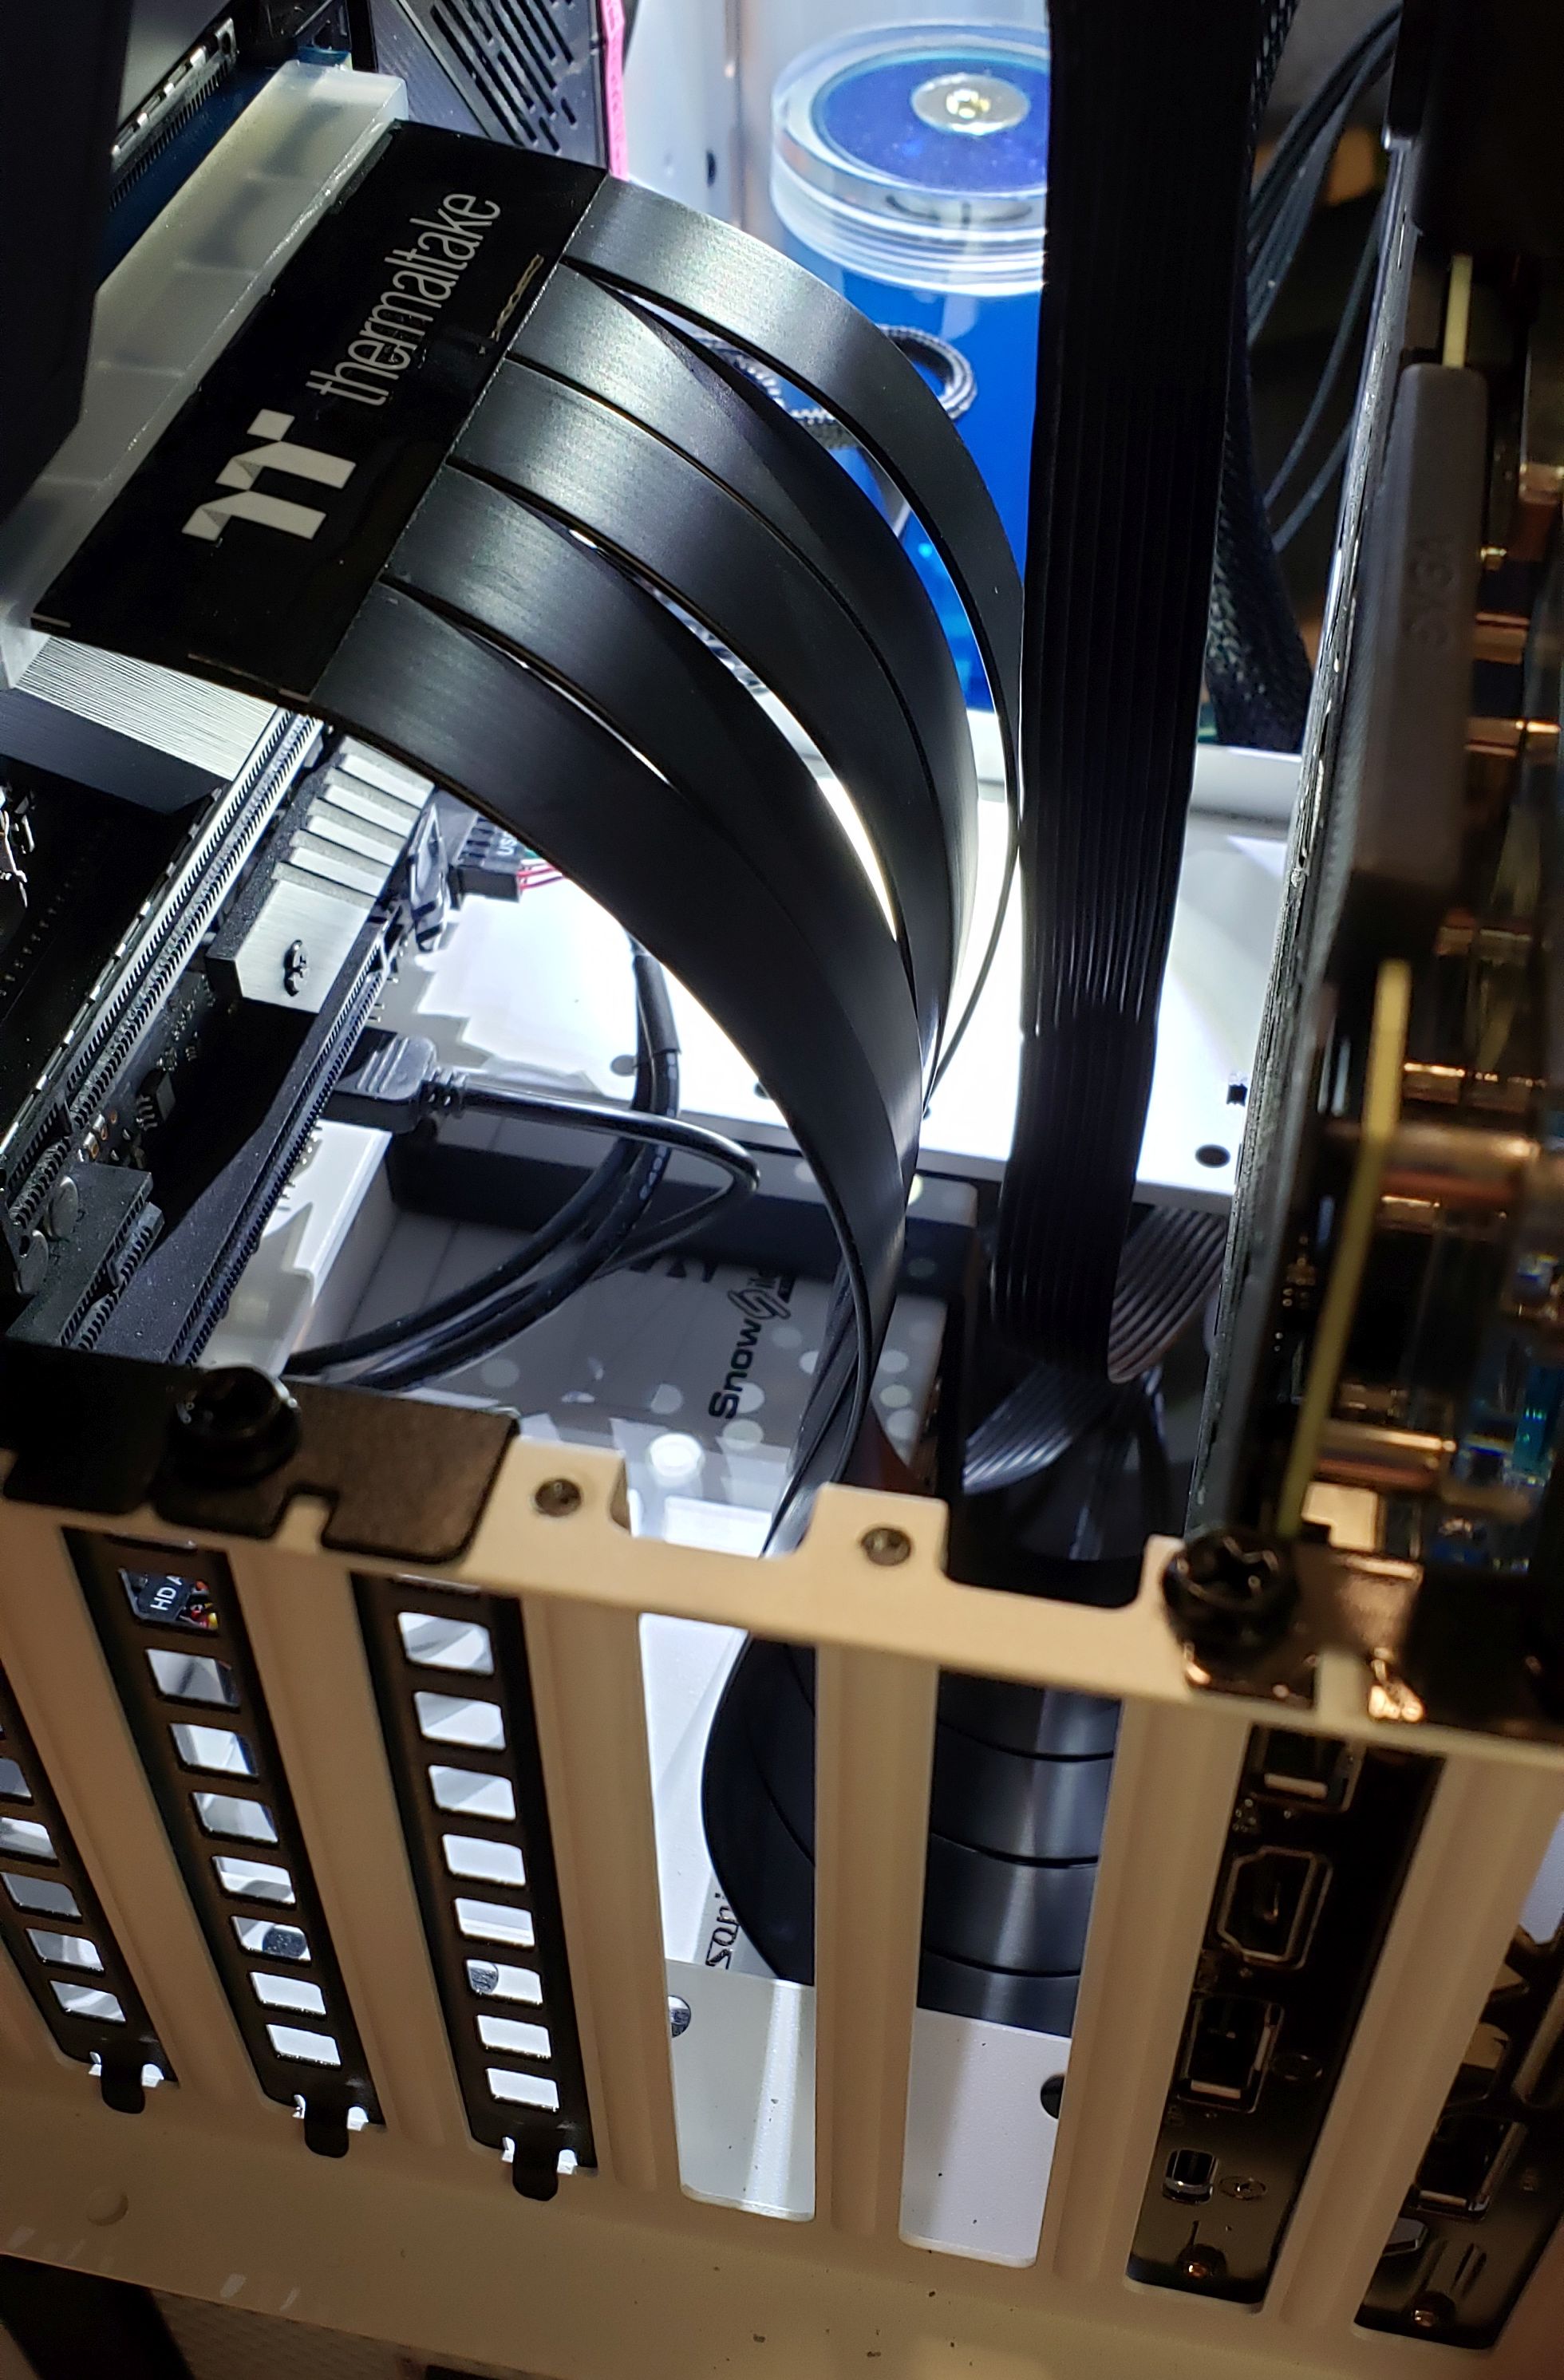
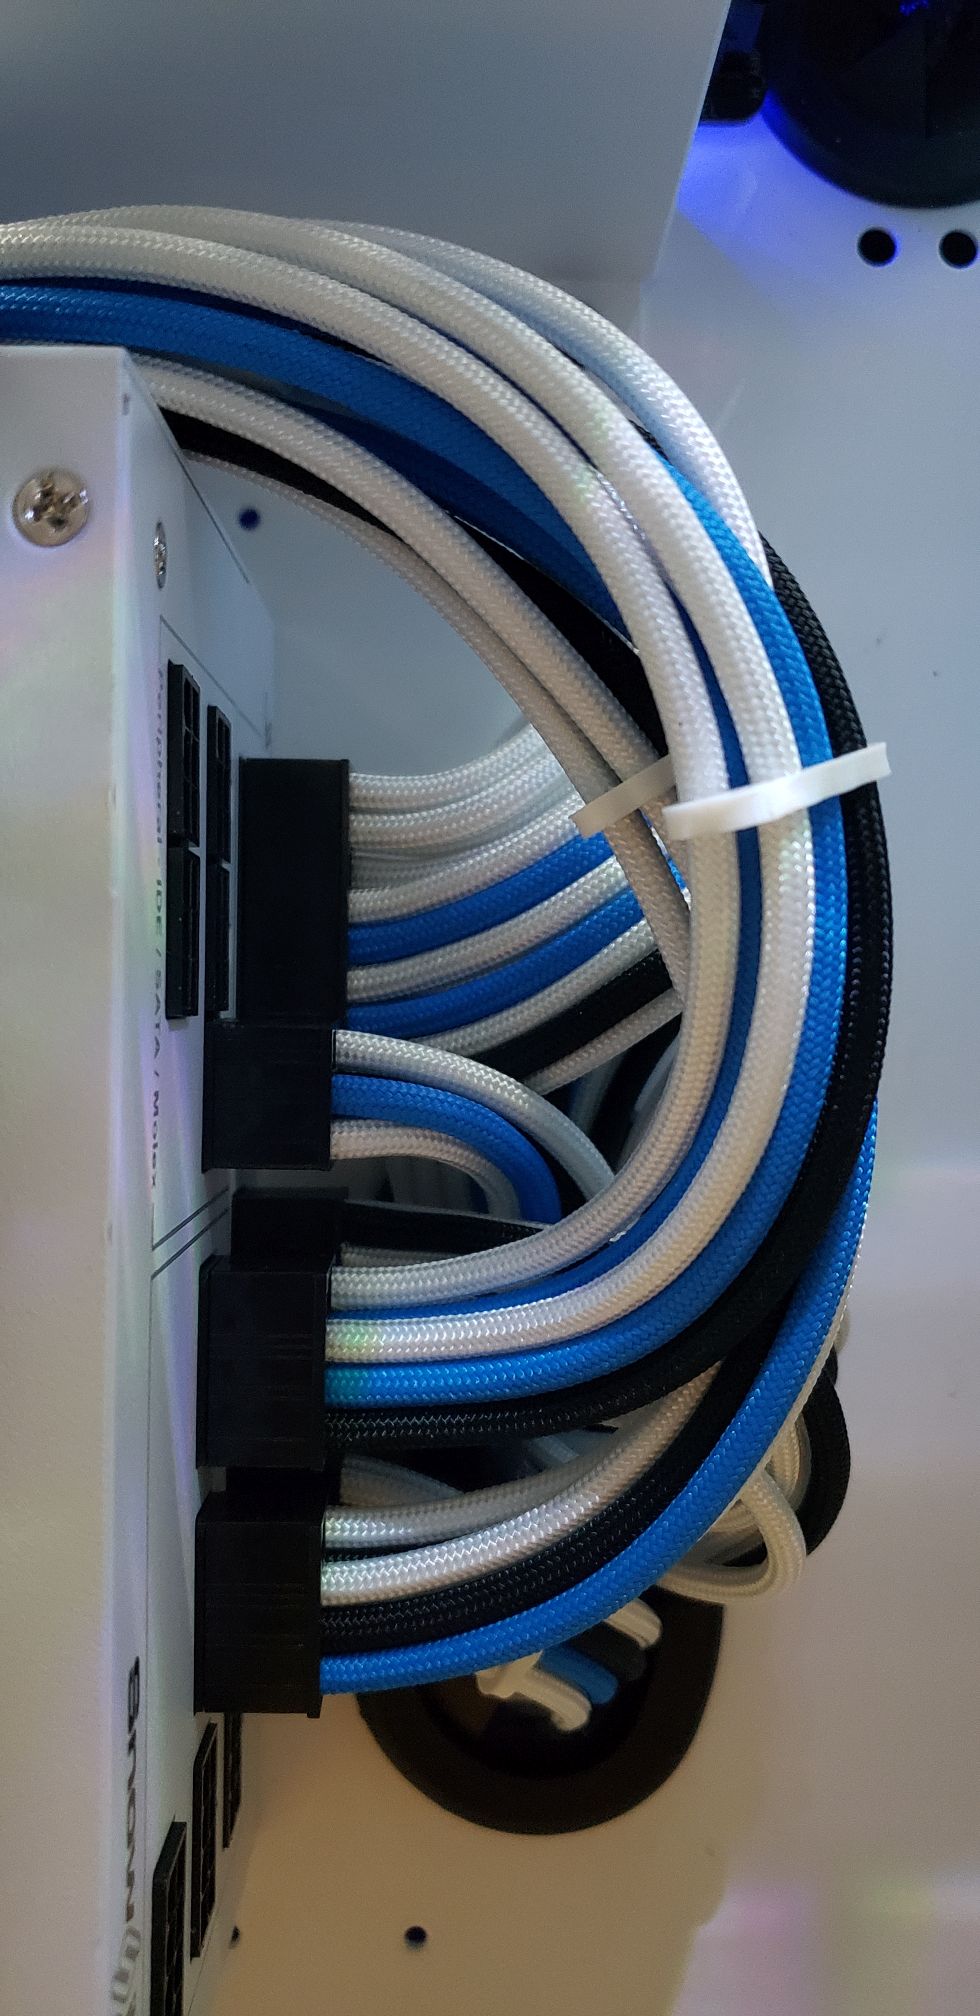
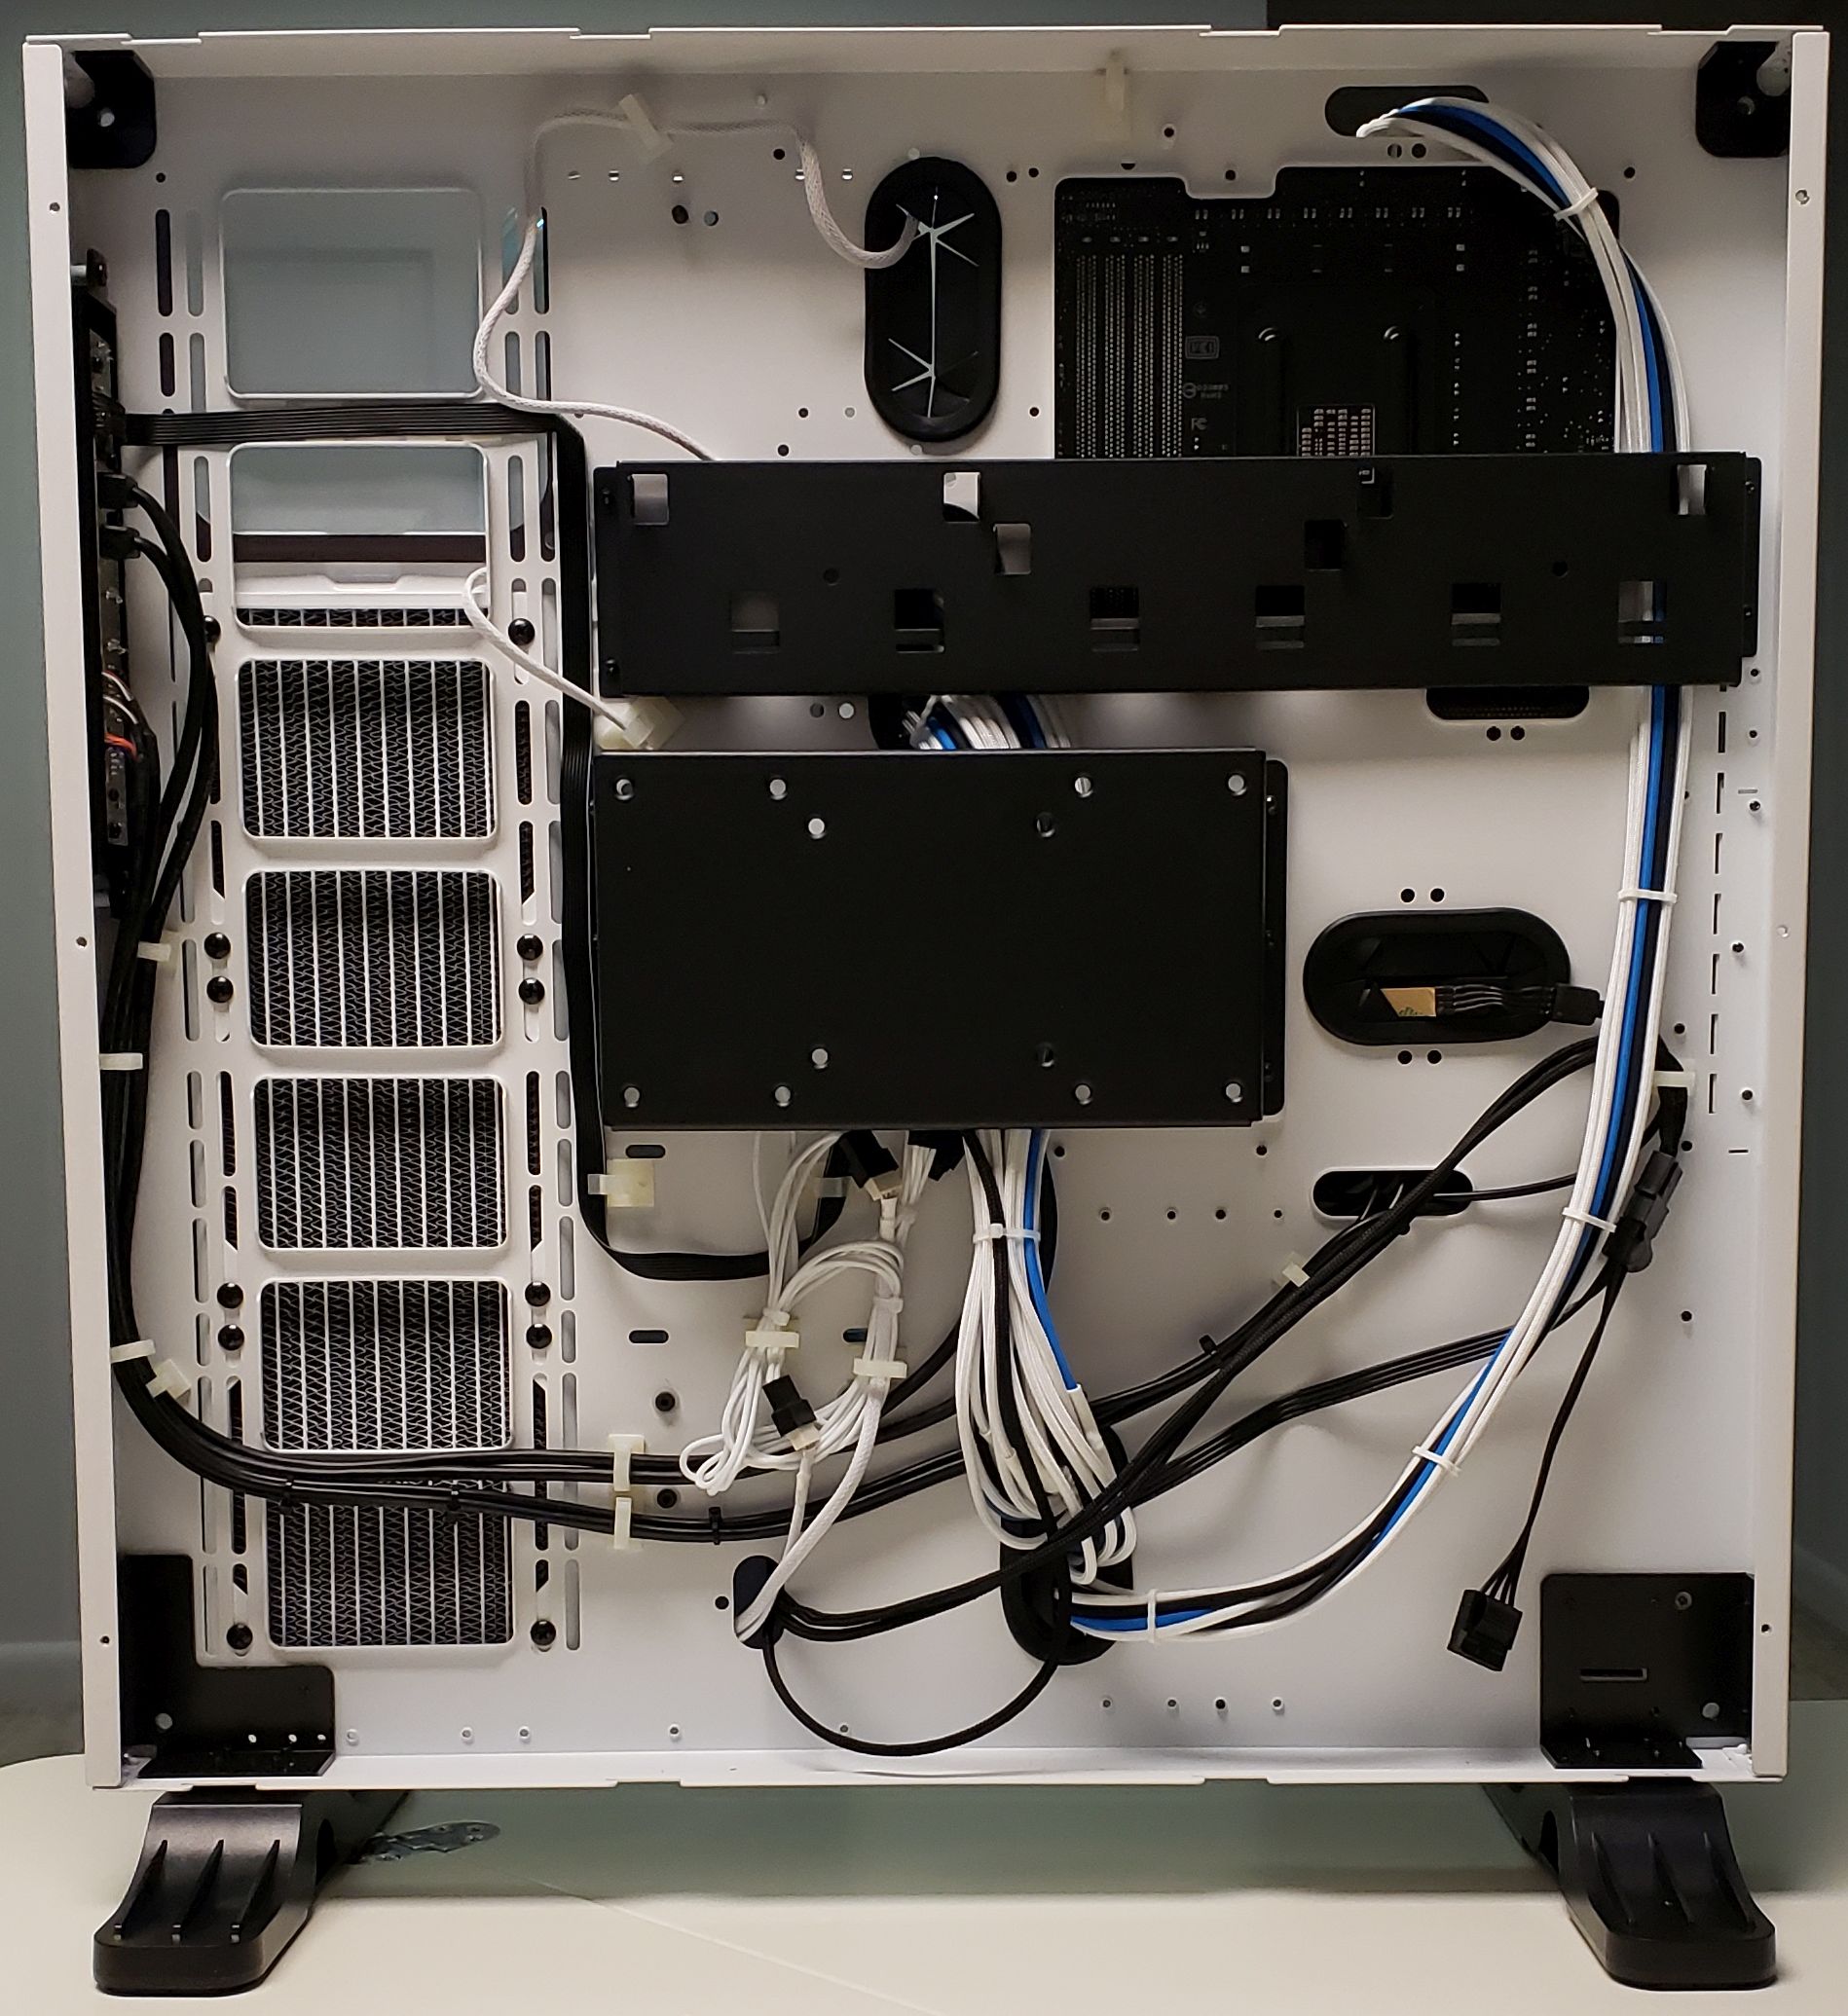
For the custom cables, I went with Ensourced special order cables that are primarily white with a streak of blue and black to go with my theme. These include the necessary number of cable combs. Due to the layout of the case, I needed an extra long 8-pin CPU cable to go from the PSU near the bottom of the case to the top of the case to the motherboard's CPU power connector. (See the picture of the cables in the back of the case below.) Ensourced gave me the longer cable for the same price. These aren't cheap and take a while to get, but wow, do they make the build look professional. They have dozens of colors in both solids and patterns. They also have a worksheet for creating the cables, which is pretty simple. I highly recommend these.
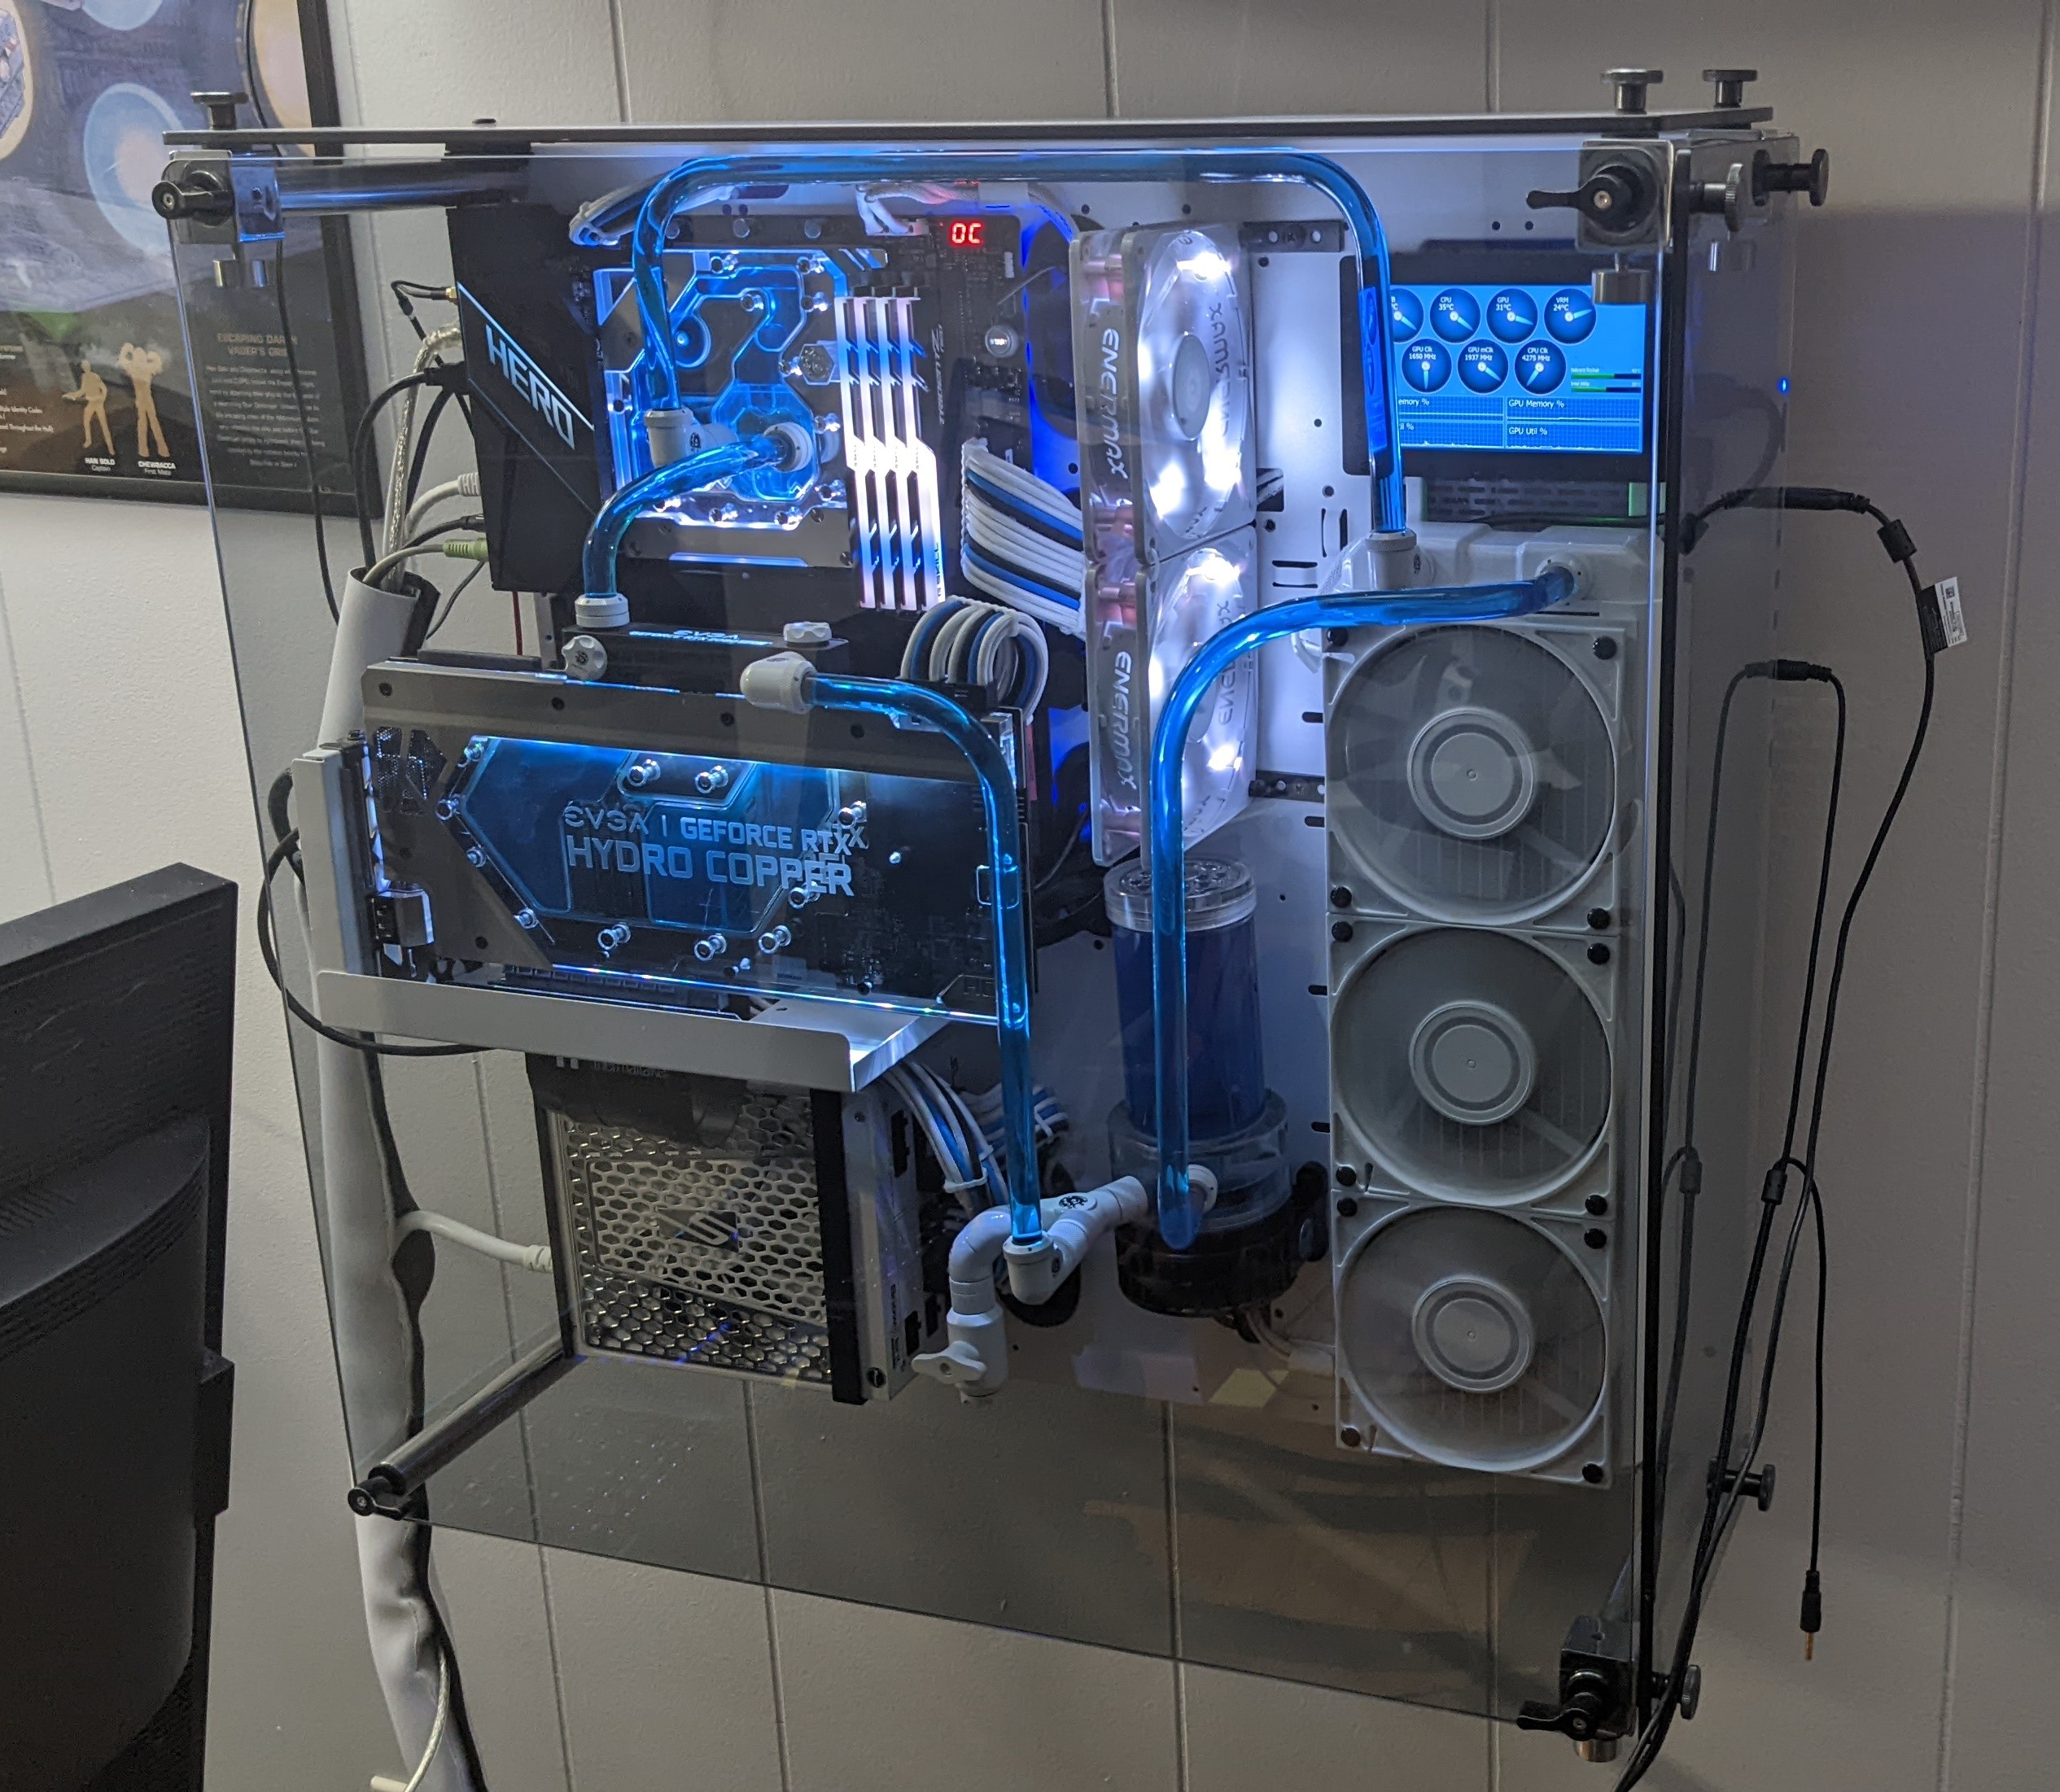
When I decided to build a new system, in addition to water cooling, I decided that I wanted to have a unique case and a unique look. I also wanted it to be wall-mounted. I found the perfect case, the Feros VM-Rigid Bravo or Charlie model. It was exactly what I was looking for. I didn't get it. You may have noticed that the URL for the link above was archive.org, not feros.us. That's because Feros tried a Kickstarter that failed. It appears they tried to make a go of it anyway. At some point, they just outright disappeared. A few of their cases exist (used, I suspect), but the prices were very high.
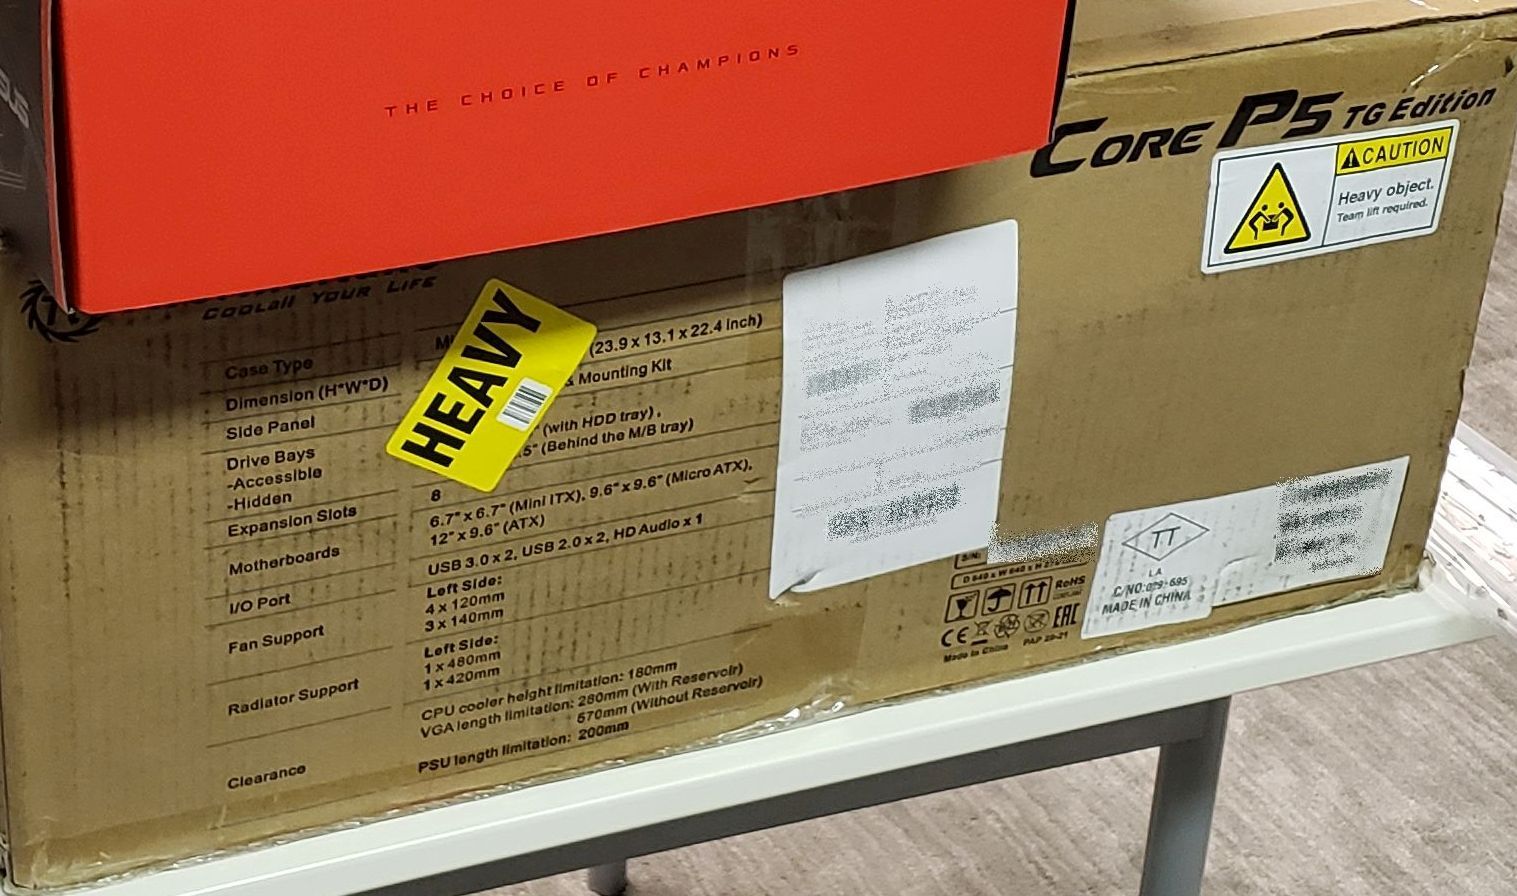
However, while researching wall-mounted cases, I also found the Thermaltake Core P5 and Thermaltake Core P90. I went with the white version of the Core P5 Tempered Glass Snow Edition. This case is exceptional to build into, but it is heavy. It weighs 40 lbs fresh out of the box, and it doesn't get lighter once components are mounted on it. My new system weighed 56 lbs when finished. I had to weigh it to ensure the wall mount could hold it.
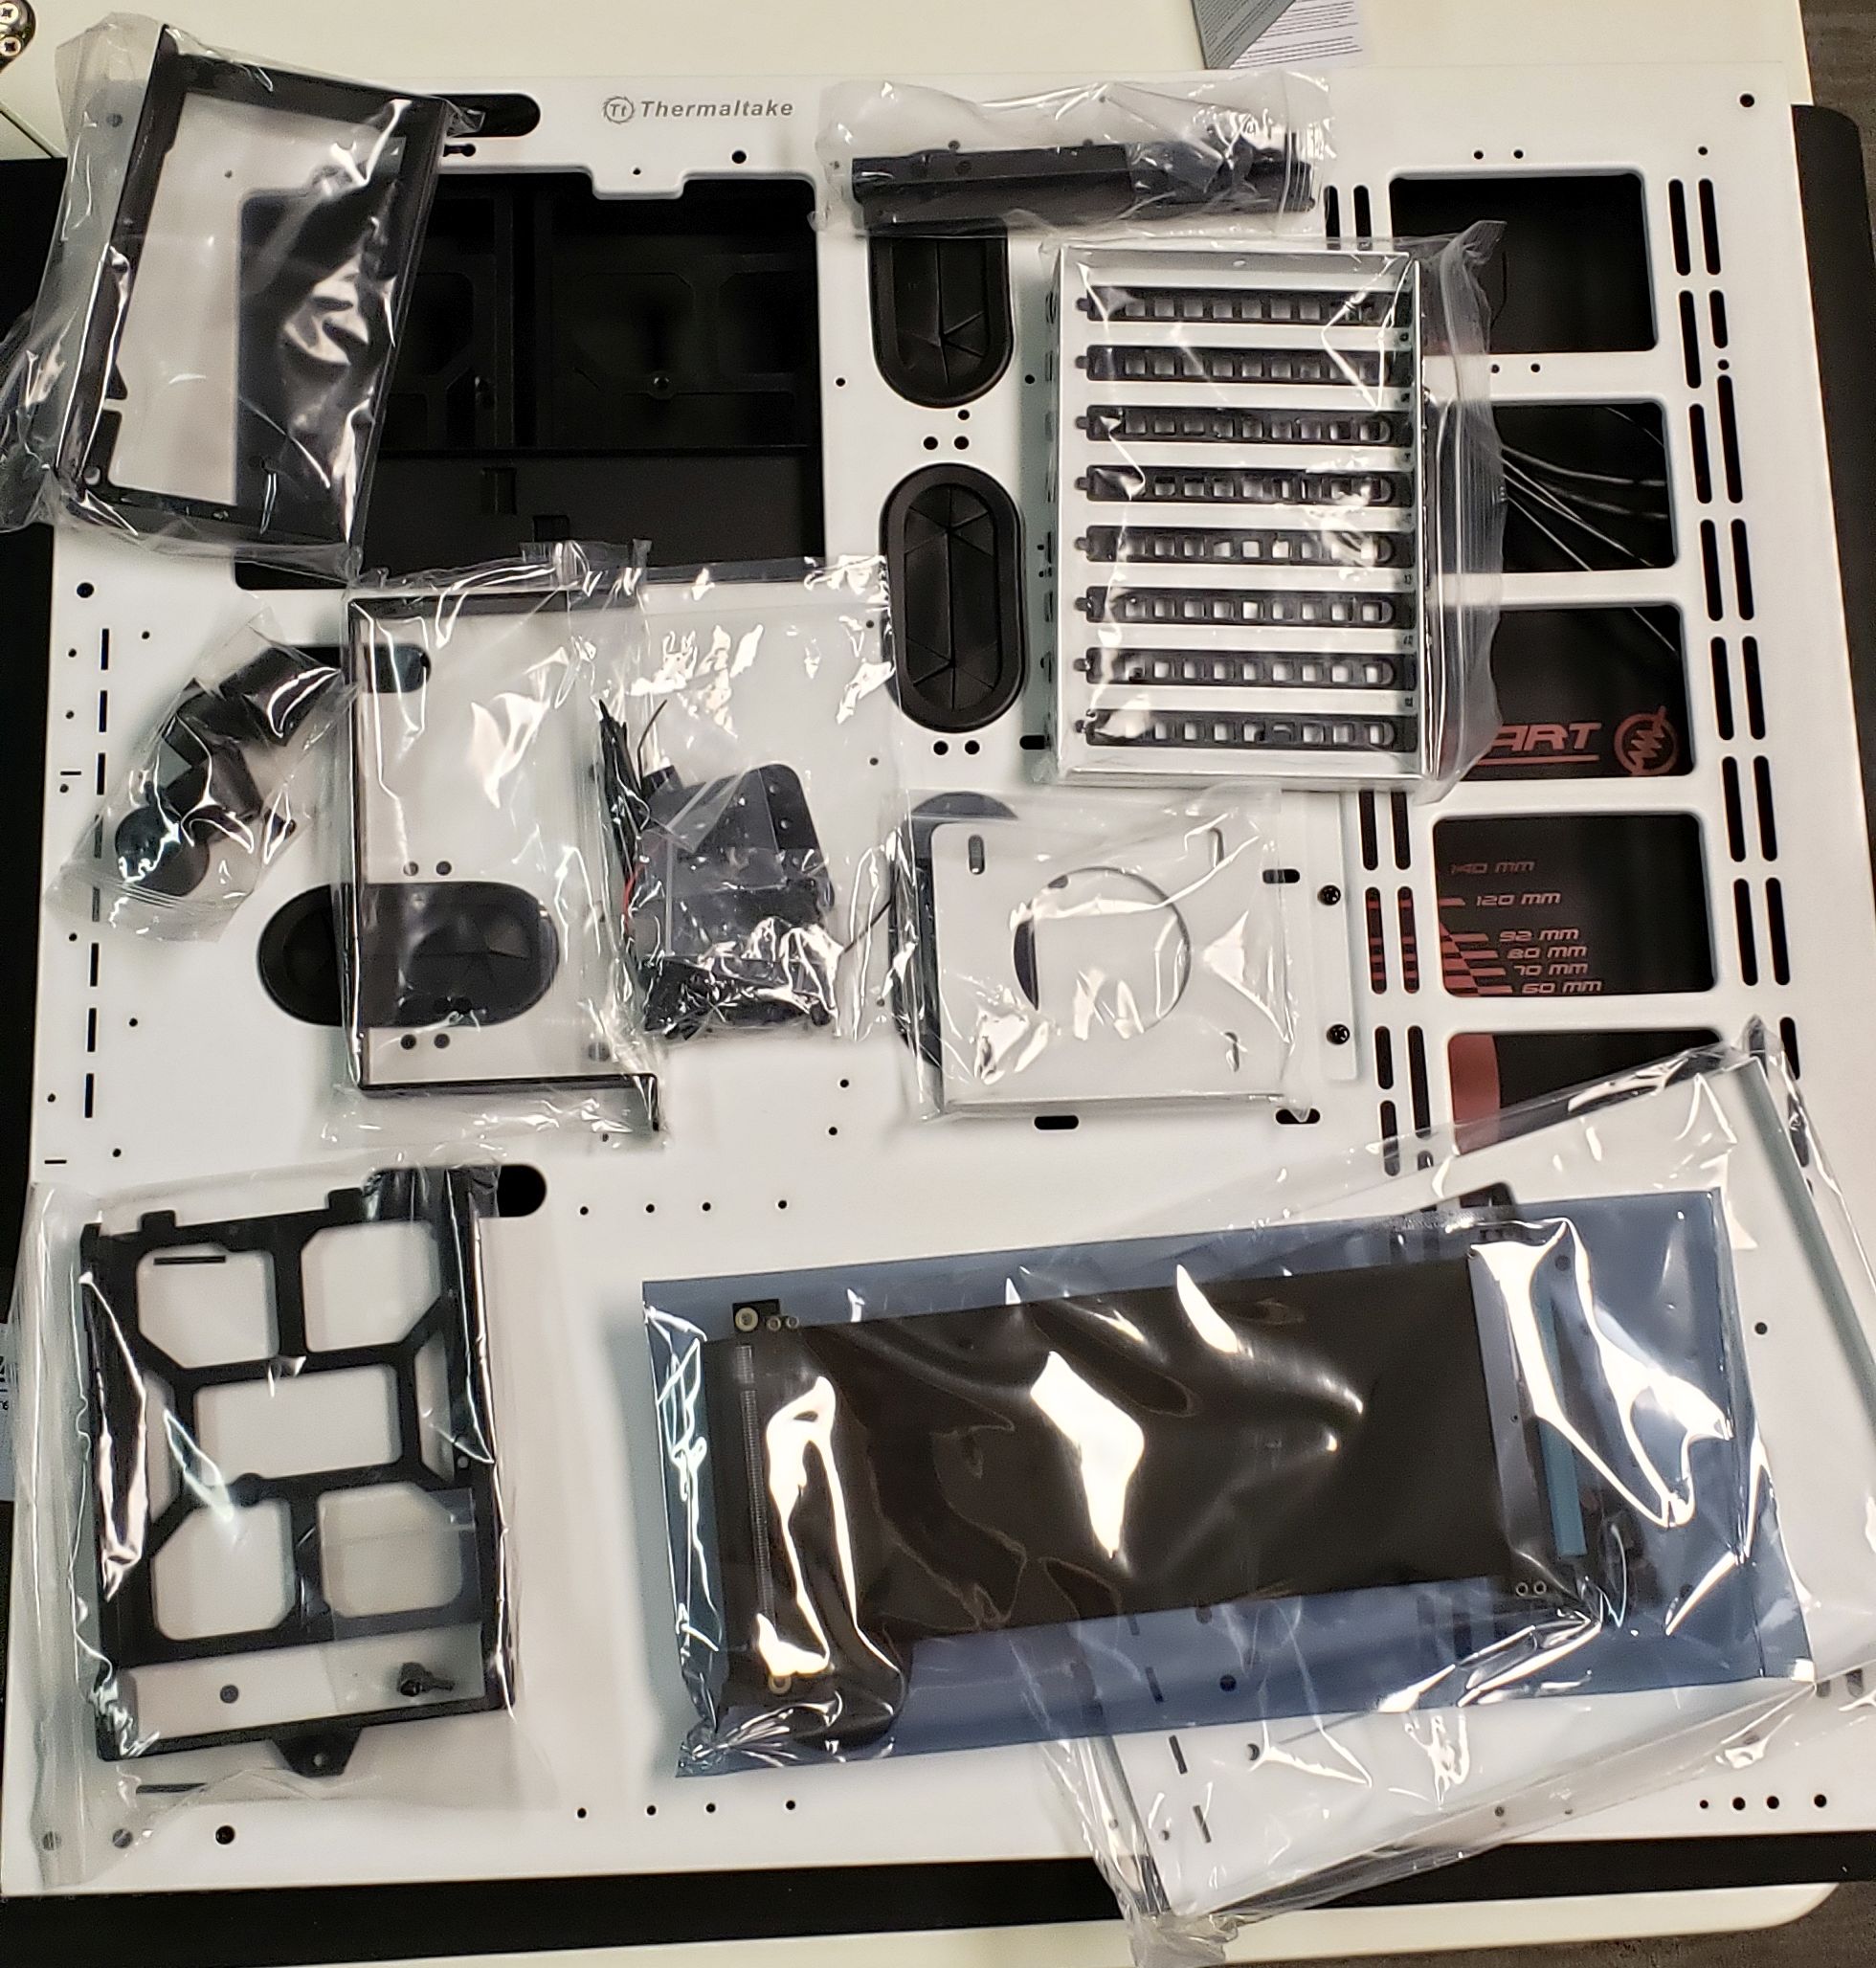


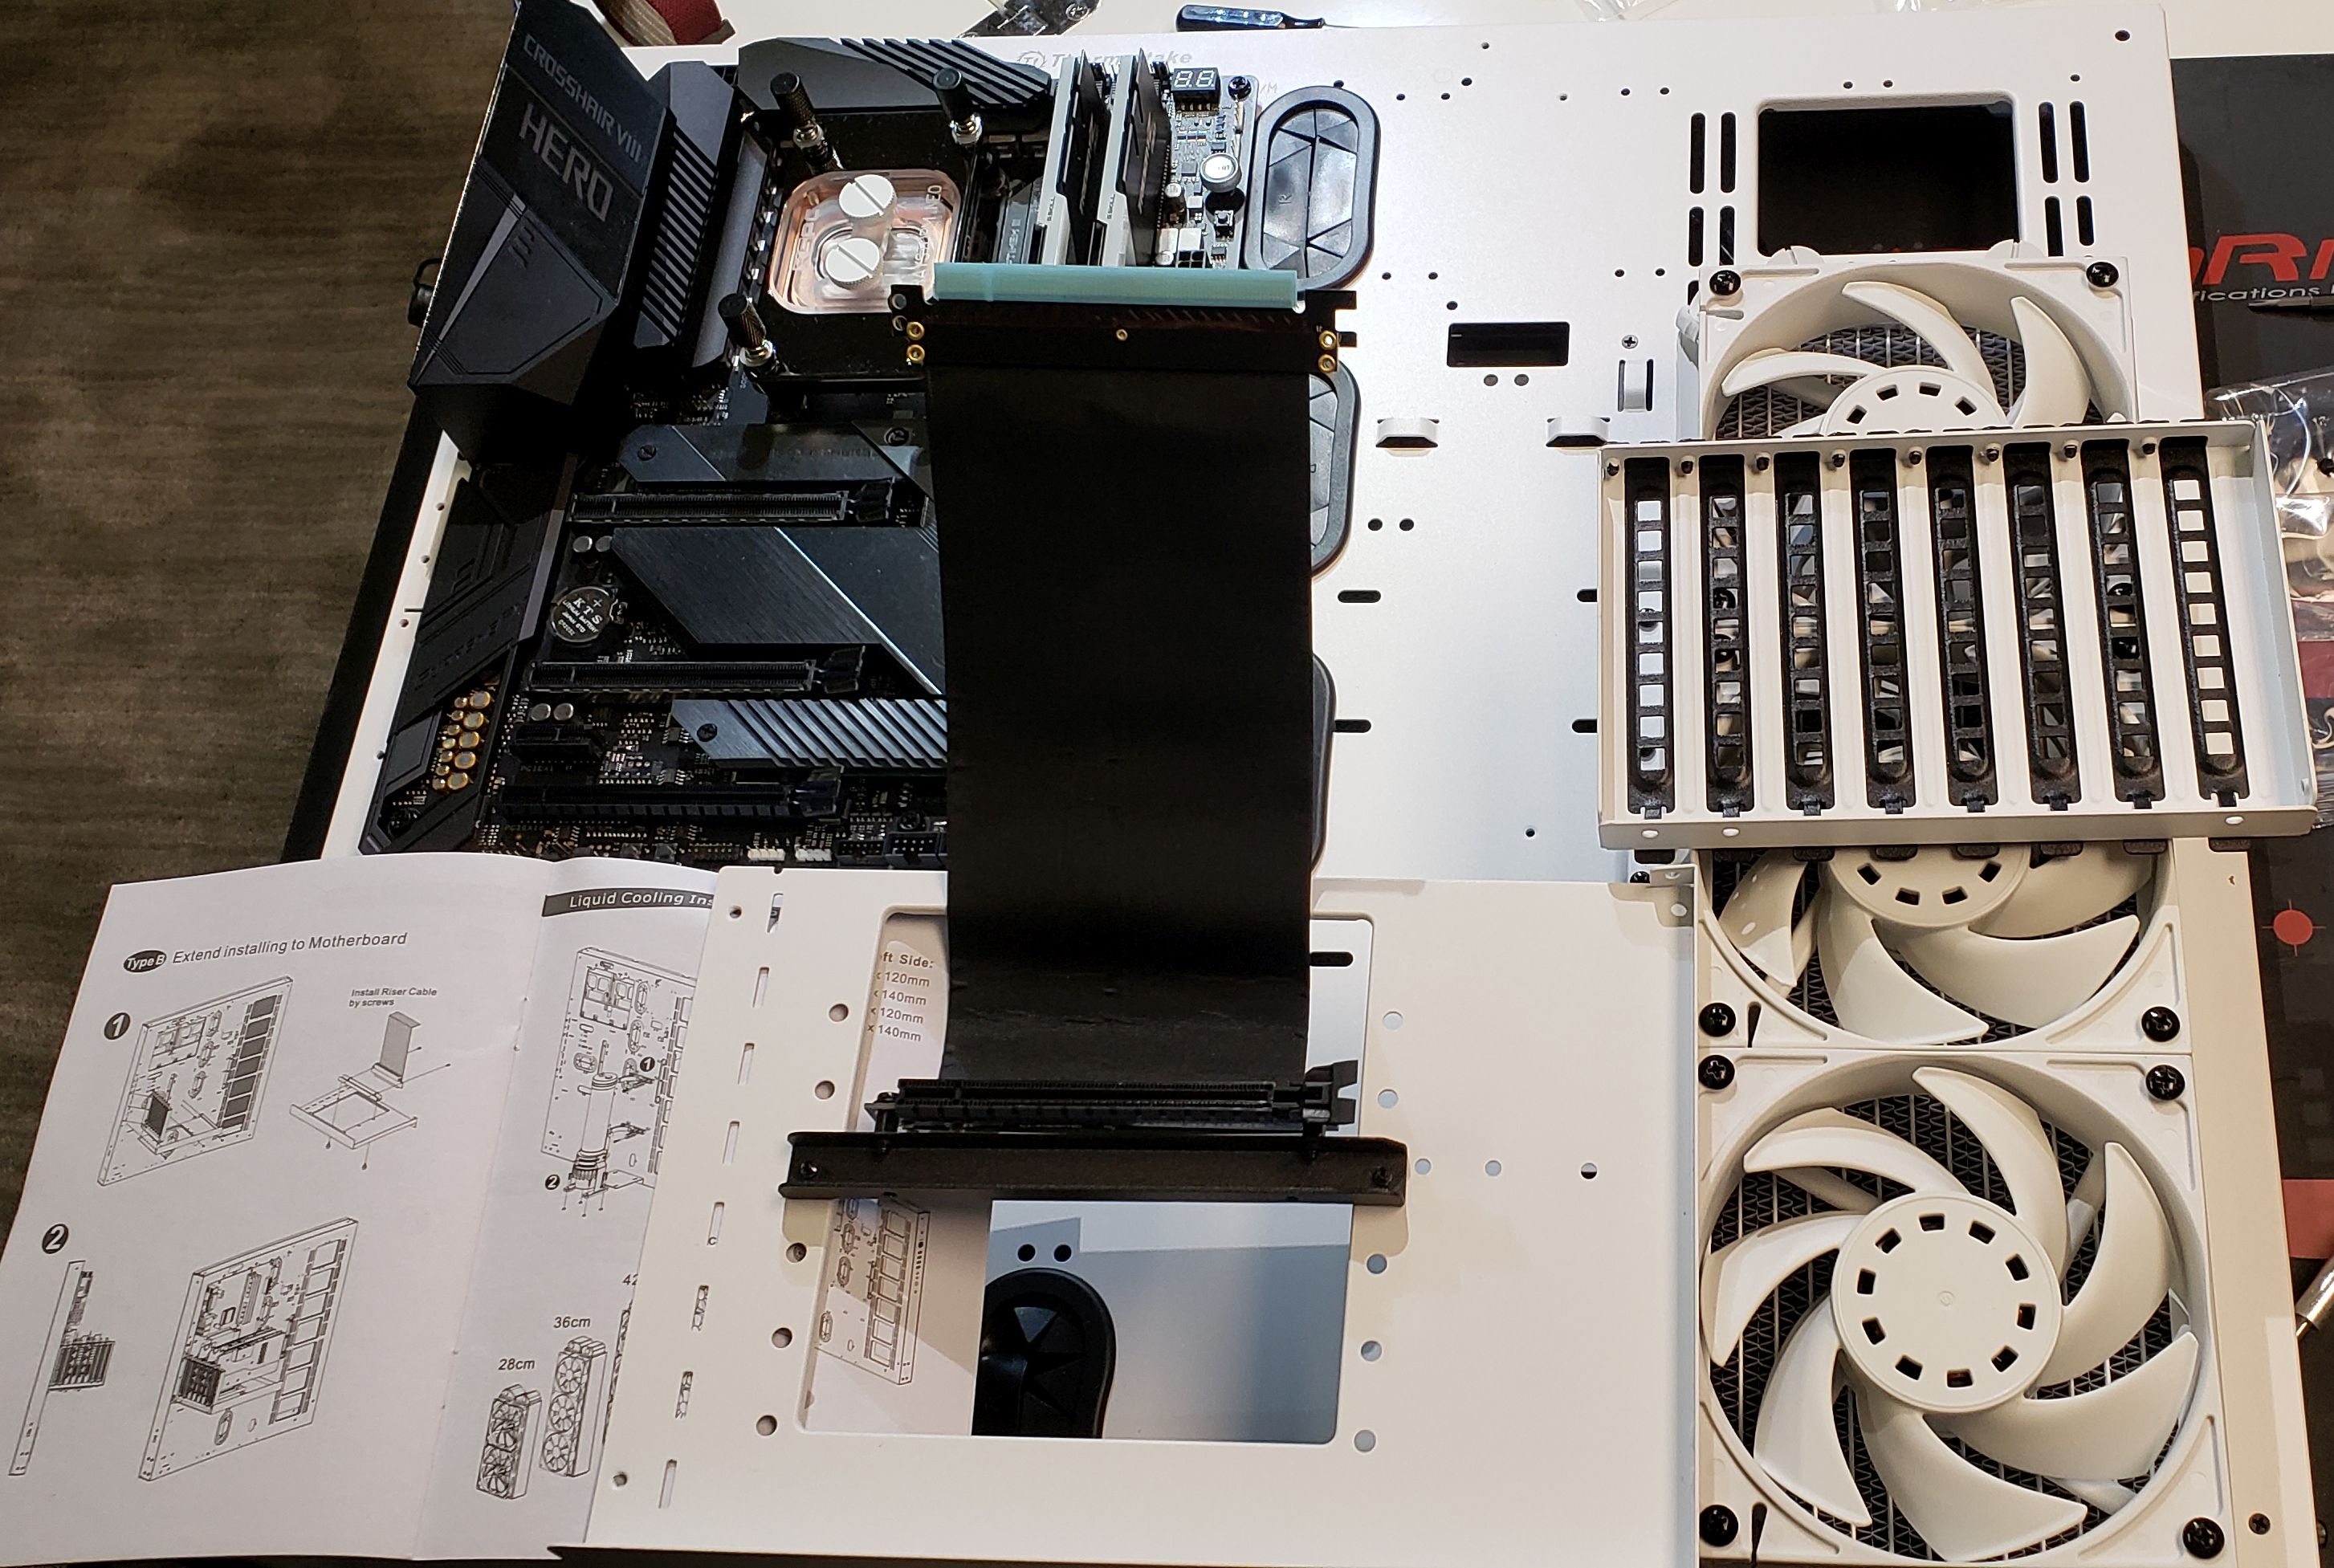
This case was made with the maker community in mind, but I wasn't considering modifications. I just hoped to mount everything nicely spread out and fairly flat. I still needed to maintain good airflow for the non-water-cooled components. This thing comes with all 3.5" / 2.5" drive bays - one on the front and three on the back - none of which I ended up using. The expansion card cage can be mounted either horizontally or vertically and comes with a PCIe riser cable. Also included is a water pump mount, which seems only to fit some Thermaltake Pacific PR22-D5 Plus water pumps.
Something I realized when building "into" this case is that it doesn't have an inside. It is just a raised back panel. After all the parts are mounted, the posts that hold up the tempered glass are installed, followed by the glass panels. There are no tight corners or reaching down into the case, making assembling this system the easiest one I've ever used.
I have two dings against this case. The first ding I have against the specific unit that I got was that it was missing one of the 12 very unique thumbscrews. (See the fourth picture above.) I filled out the Technical Support form at Thermaltake, including a (reduced-resolution version) of that image (to fit their 500K file limit). Amazingly, I heard back .. never. I'm not convinced anyone ever reads the submitted forms. Thermaltake, when you offer a technical support form on your site, you should answer the requests. This is a $250 case, not a $50 case. I found some matte black thumbscrews that look better, but I should not have had to.
The second ding was that the upper left post was too close to the motherboard (when the motherboard has a fixed IO shield anyway) for one of the square glass mounts to clear the motherboard. So, as it turns out, I only needed 11 of those thumbscrews, which I figured out after my substitute thumbscrews arrived.
So as not to end this section on a low note, I like the final look of this case. It's unique enough that people who have seen it really take notice. It's practical enough that it's a pleasure to build on top of it. It looks fantastic on the wall, even if it is a two-person lift.
Since this was my first time using any custom loop cooling, I researched and watched YouTube videos. The YouTube channel by Jay of JayzTwoCents has a lot of good information. I started with Watercooling for Beginners 2018, but he has many more. Watching the later ones was also interesting because as Jay got more experienced, he changed some of the things he had recommended earlier. (e.g., He went from using colored coolant to just water with a few drops of coloring.) The guides at EKWB are also pretty helpful. Since I wanted to use hardline PETG tubing, I watched Jay's How to Bend PETG tubing. (He has other soft, acrylic, and metal tubing videos.) I also recommend Jay's The Beginners Guide to Shopping for Water Cooling Parts! and A Guide to Watercooling Fittings. People have different methods and suggestions, so don't be afraid to watch a bunch.
Watercooling parts are expensive, so you want to get them right the first time. The tubing itself is the cheapest part. The fittings that connect the tubing to the various cooling blocks, radiator, and pump range from under $10 (for plugs to close various holes) to over $40, depending on their complexity. I watched a video in which the person works for one of the water-cooling companies. He said it's a good idea to have a few of these in case you need some flexibility in height, a few for spacing, etc. It was obvious he wasn't paying. He was up to hundreds of dollars worth of fittings that one might need. Yeah. Well, I was spending real money - my money. I made my best guess for the minimum number of parts, knowing that I would probably need a second or third purchase of parts once everything was mounted. I bought the majority of my water-cooling parts from Performance PCs. Jay got many of his parts from there, and I highly recommend them as a one-stop shop.
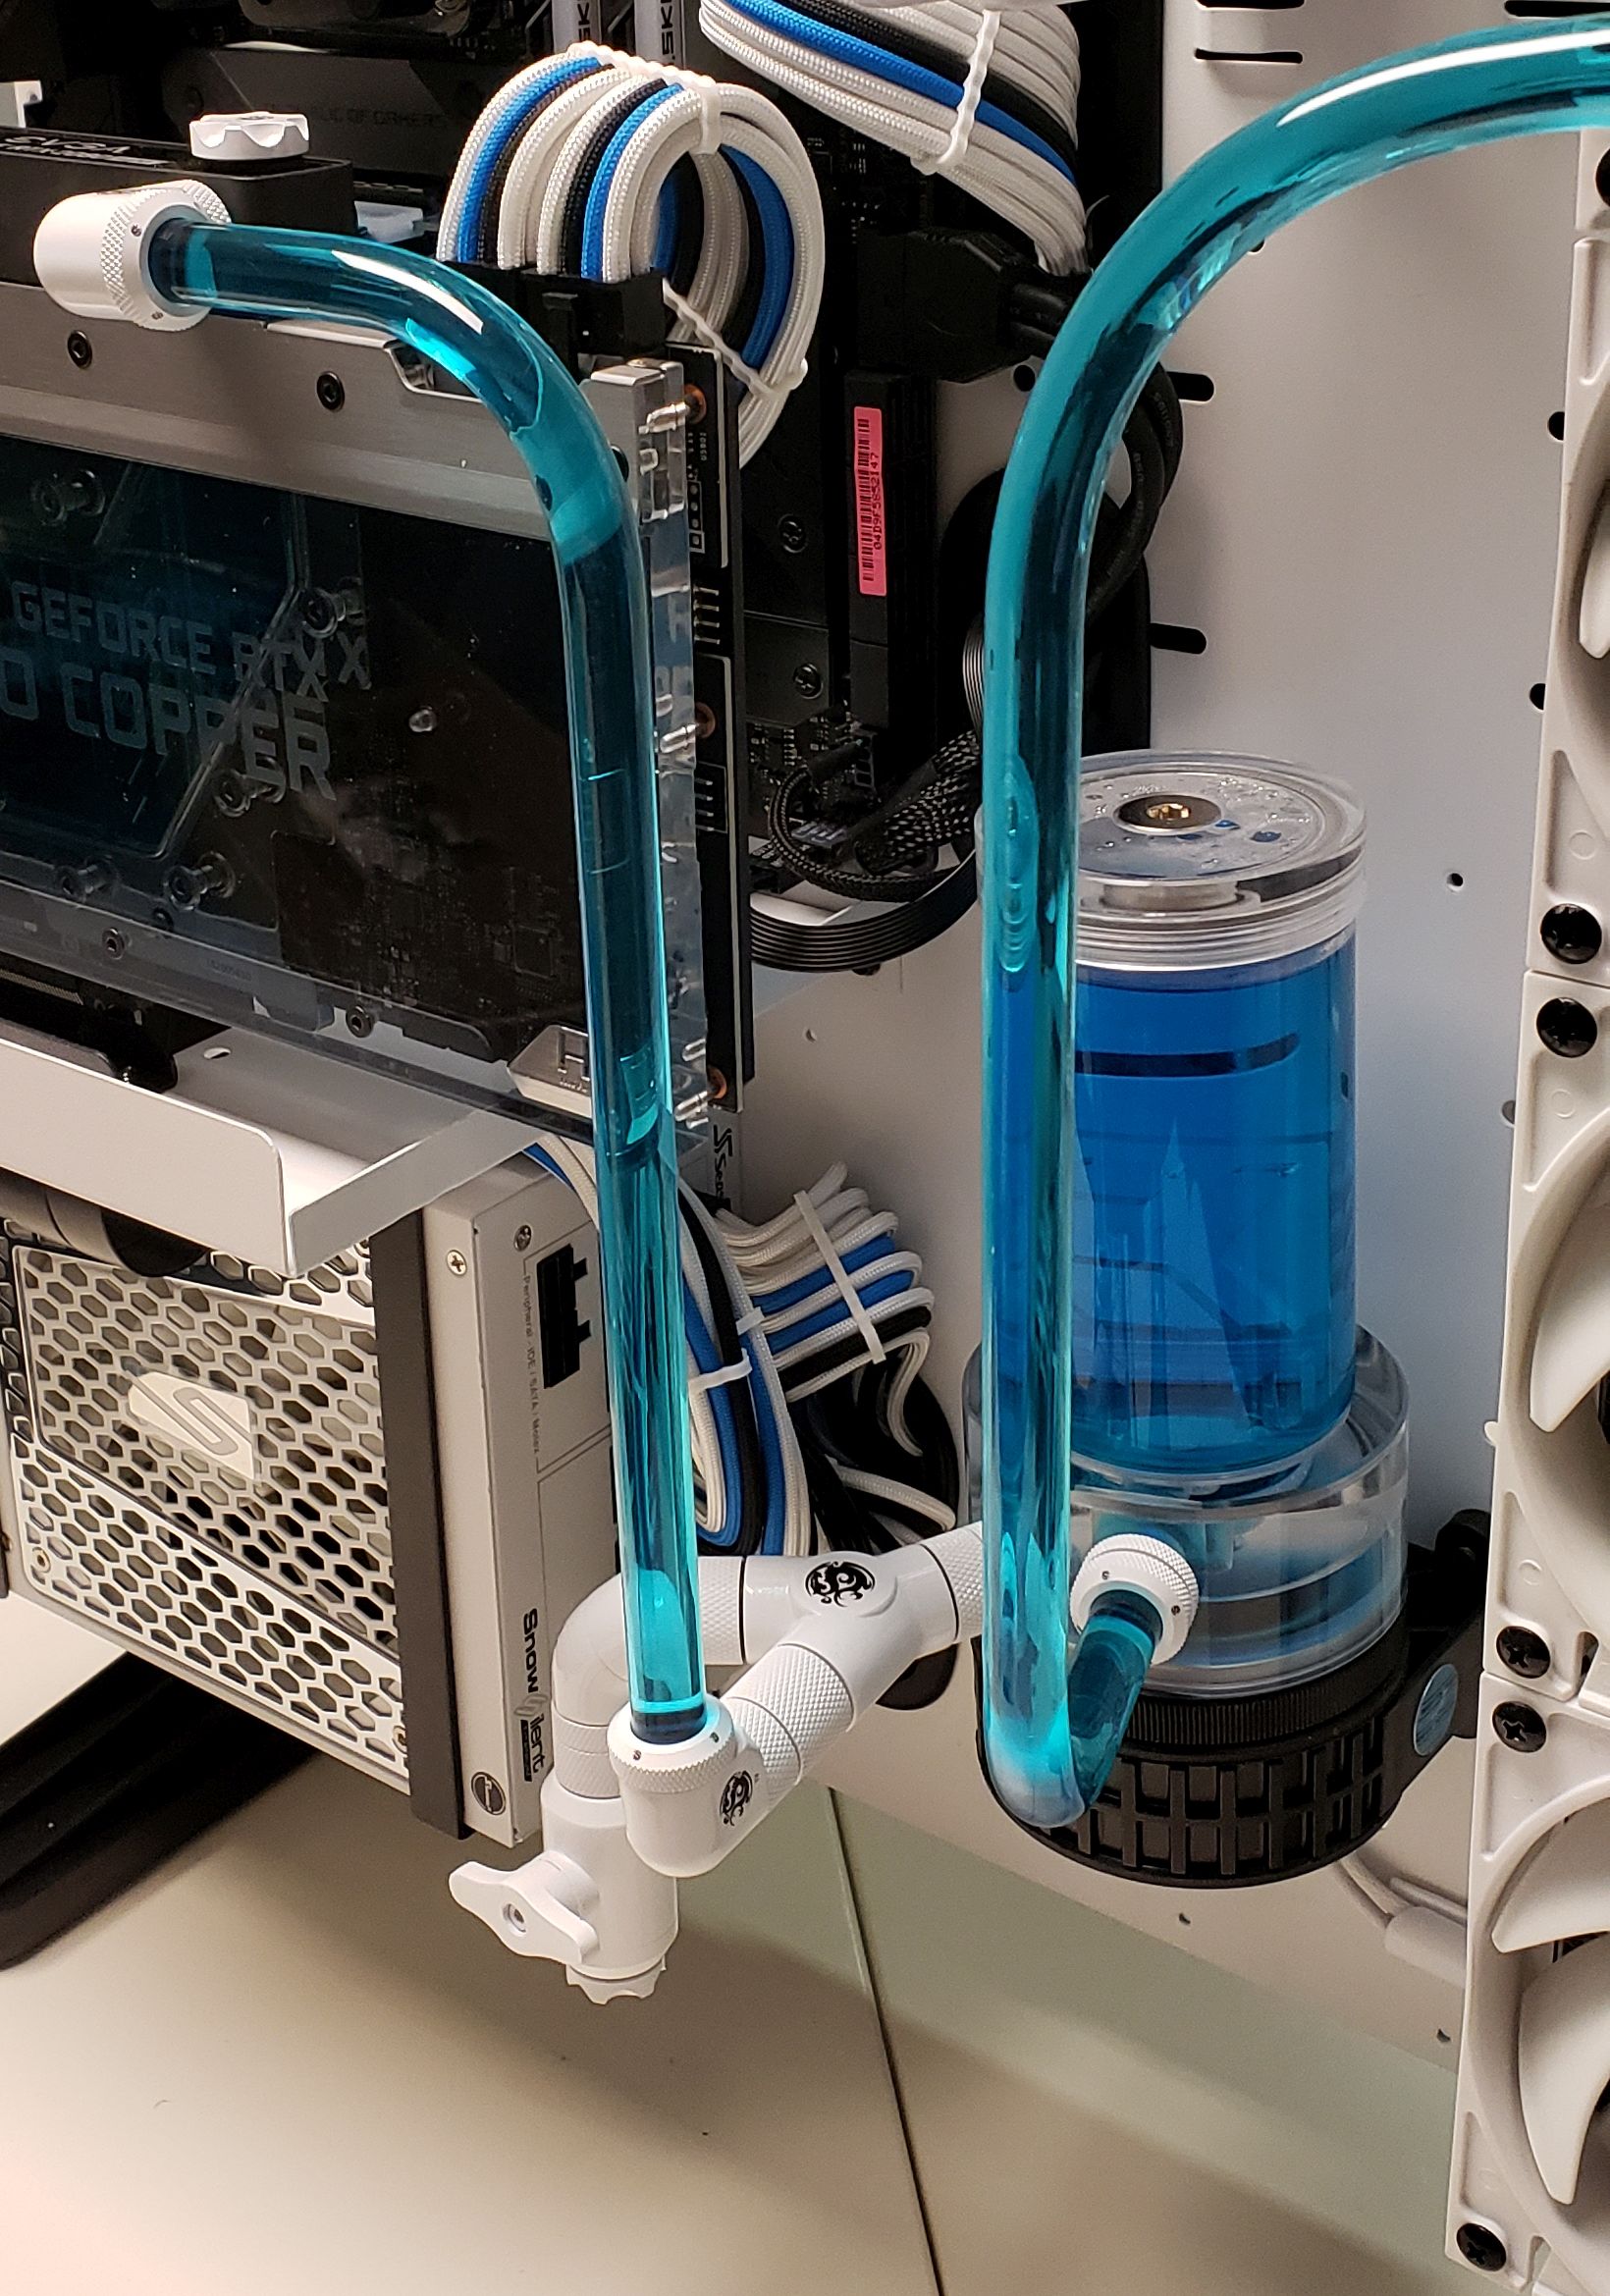
After seeing enough horror stories about leaks and failing pumps, I decided to go with what seemed to be rated the best for every part. That would mean a more expensive open-loop system, but I was willing to pay for peace of mind. After finishing the build, I was happy with all the parts I chose but realized most of my fears were probably unjustified. I went slow. If a bend or tube raised any doubt, I remade it. I never had any leaks; my only near leak was forgetting to replace a plug in the reservoir.
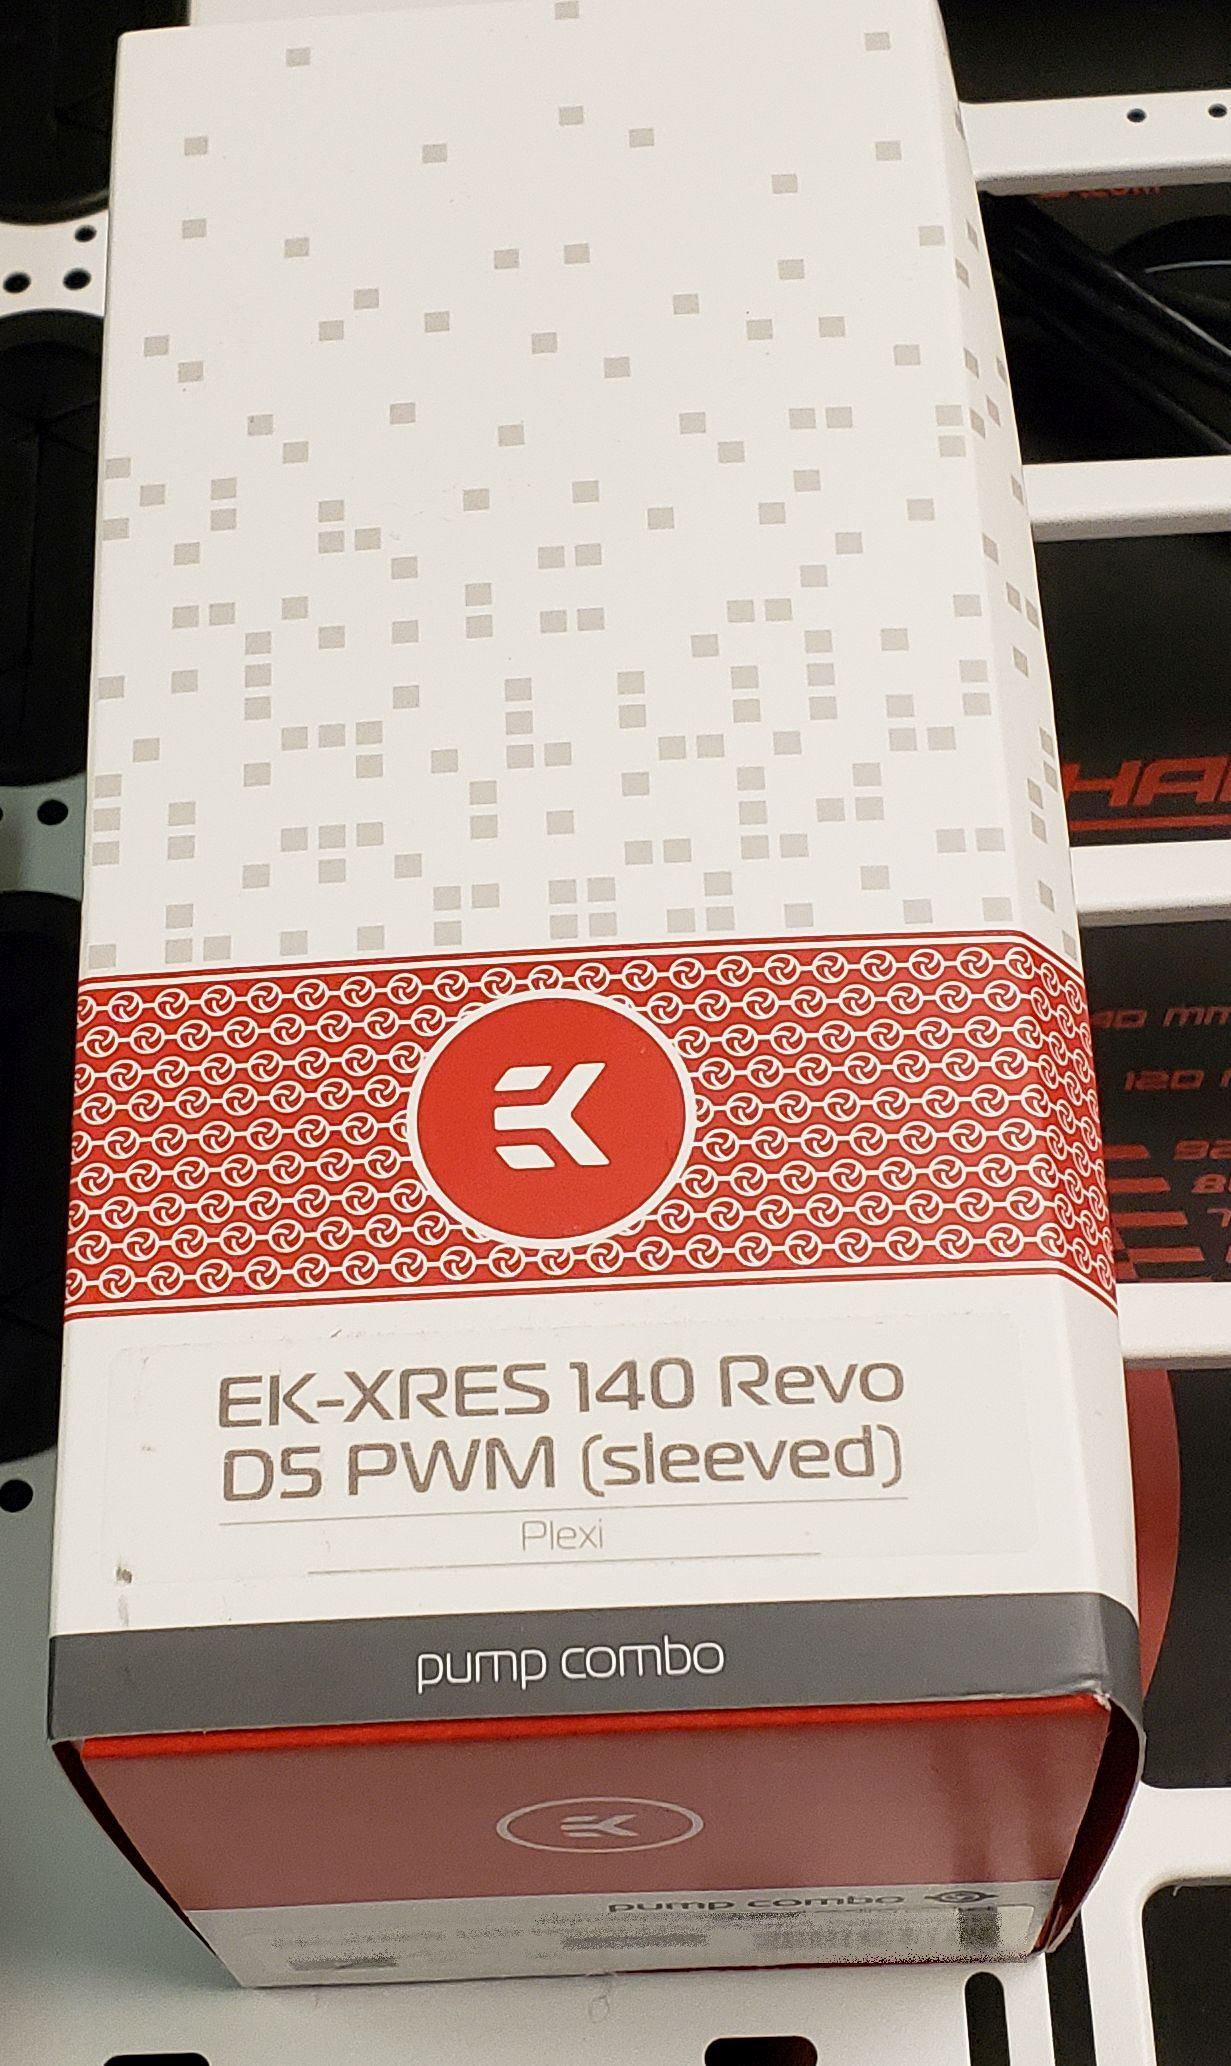
For the water pump, I chose the EKWB EK-XRes 140 Revo D5 Plexi, which is an integrated water pump and reservoir. This has recently been replaced with the EK Quantum pump/reservoir combo series. They have both flat (distro plate), and tube models and the closest one to what I have is the EK-Quantum Kinetic TBE 200 D5 PWM D-RGB - Plexi. The reservoir is 200 mm high, only about 10 mm higher than the old one. The new combo holds 205 ml, the same as my current one. The new one has RGB, and as every gamer knows, it works better. (Let's assume you can see the sarcasm tag around that sentence.)
Many YouTubers I followed stressed that the radiator is the most critical part of the system - even more so than the pump. This is the part responsible for removing heat from your system and dumping it into the air while taking cooler air to reduce the heat of the liquid. This part's efficiency dictates how well the water loop works. The Thermaltake Core P5 case allows for up to a 480mm radiator. Radiator sizes are measured by the size of the fans mounted to them, so a 480mm radiator requires four 120mm fans. The width is fixed at about 120mm. Some radiators use 140mm fans, which have corresponding sizes of 140mm, 280mm, 420mm, and 560mm.

The Thermaltake Core P5 case seems to have screw slots for the 140mm radiators, but the cutouts that let air pass through the radiator out the back of the case are made for 120mm fans. So it was a matter of finding a radiator capable of dissipating the wattage the rest of the system could produce. The general rule of thumb I heard from multiple sources is one 120mm radiator section per component being cooled, which for me is the CPU and GPU. Jay of JayzTwoCents suggests following that rule for sizing, but double it if you are overclocking. I planned on overclocking the (AMD 3900X) CPU, and the GPU (EVGA RTX 2080 Super FTW3 Hydro Copper) comes overclocked from EVGA. So, with that advice, a 480mm radiator seems the right choice. However, Jay also points out that width and height are only two factors. Radiator thickness also counts, as does fin density.
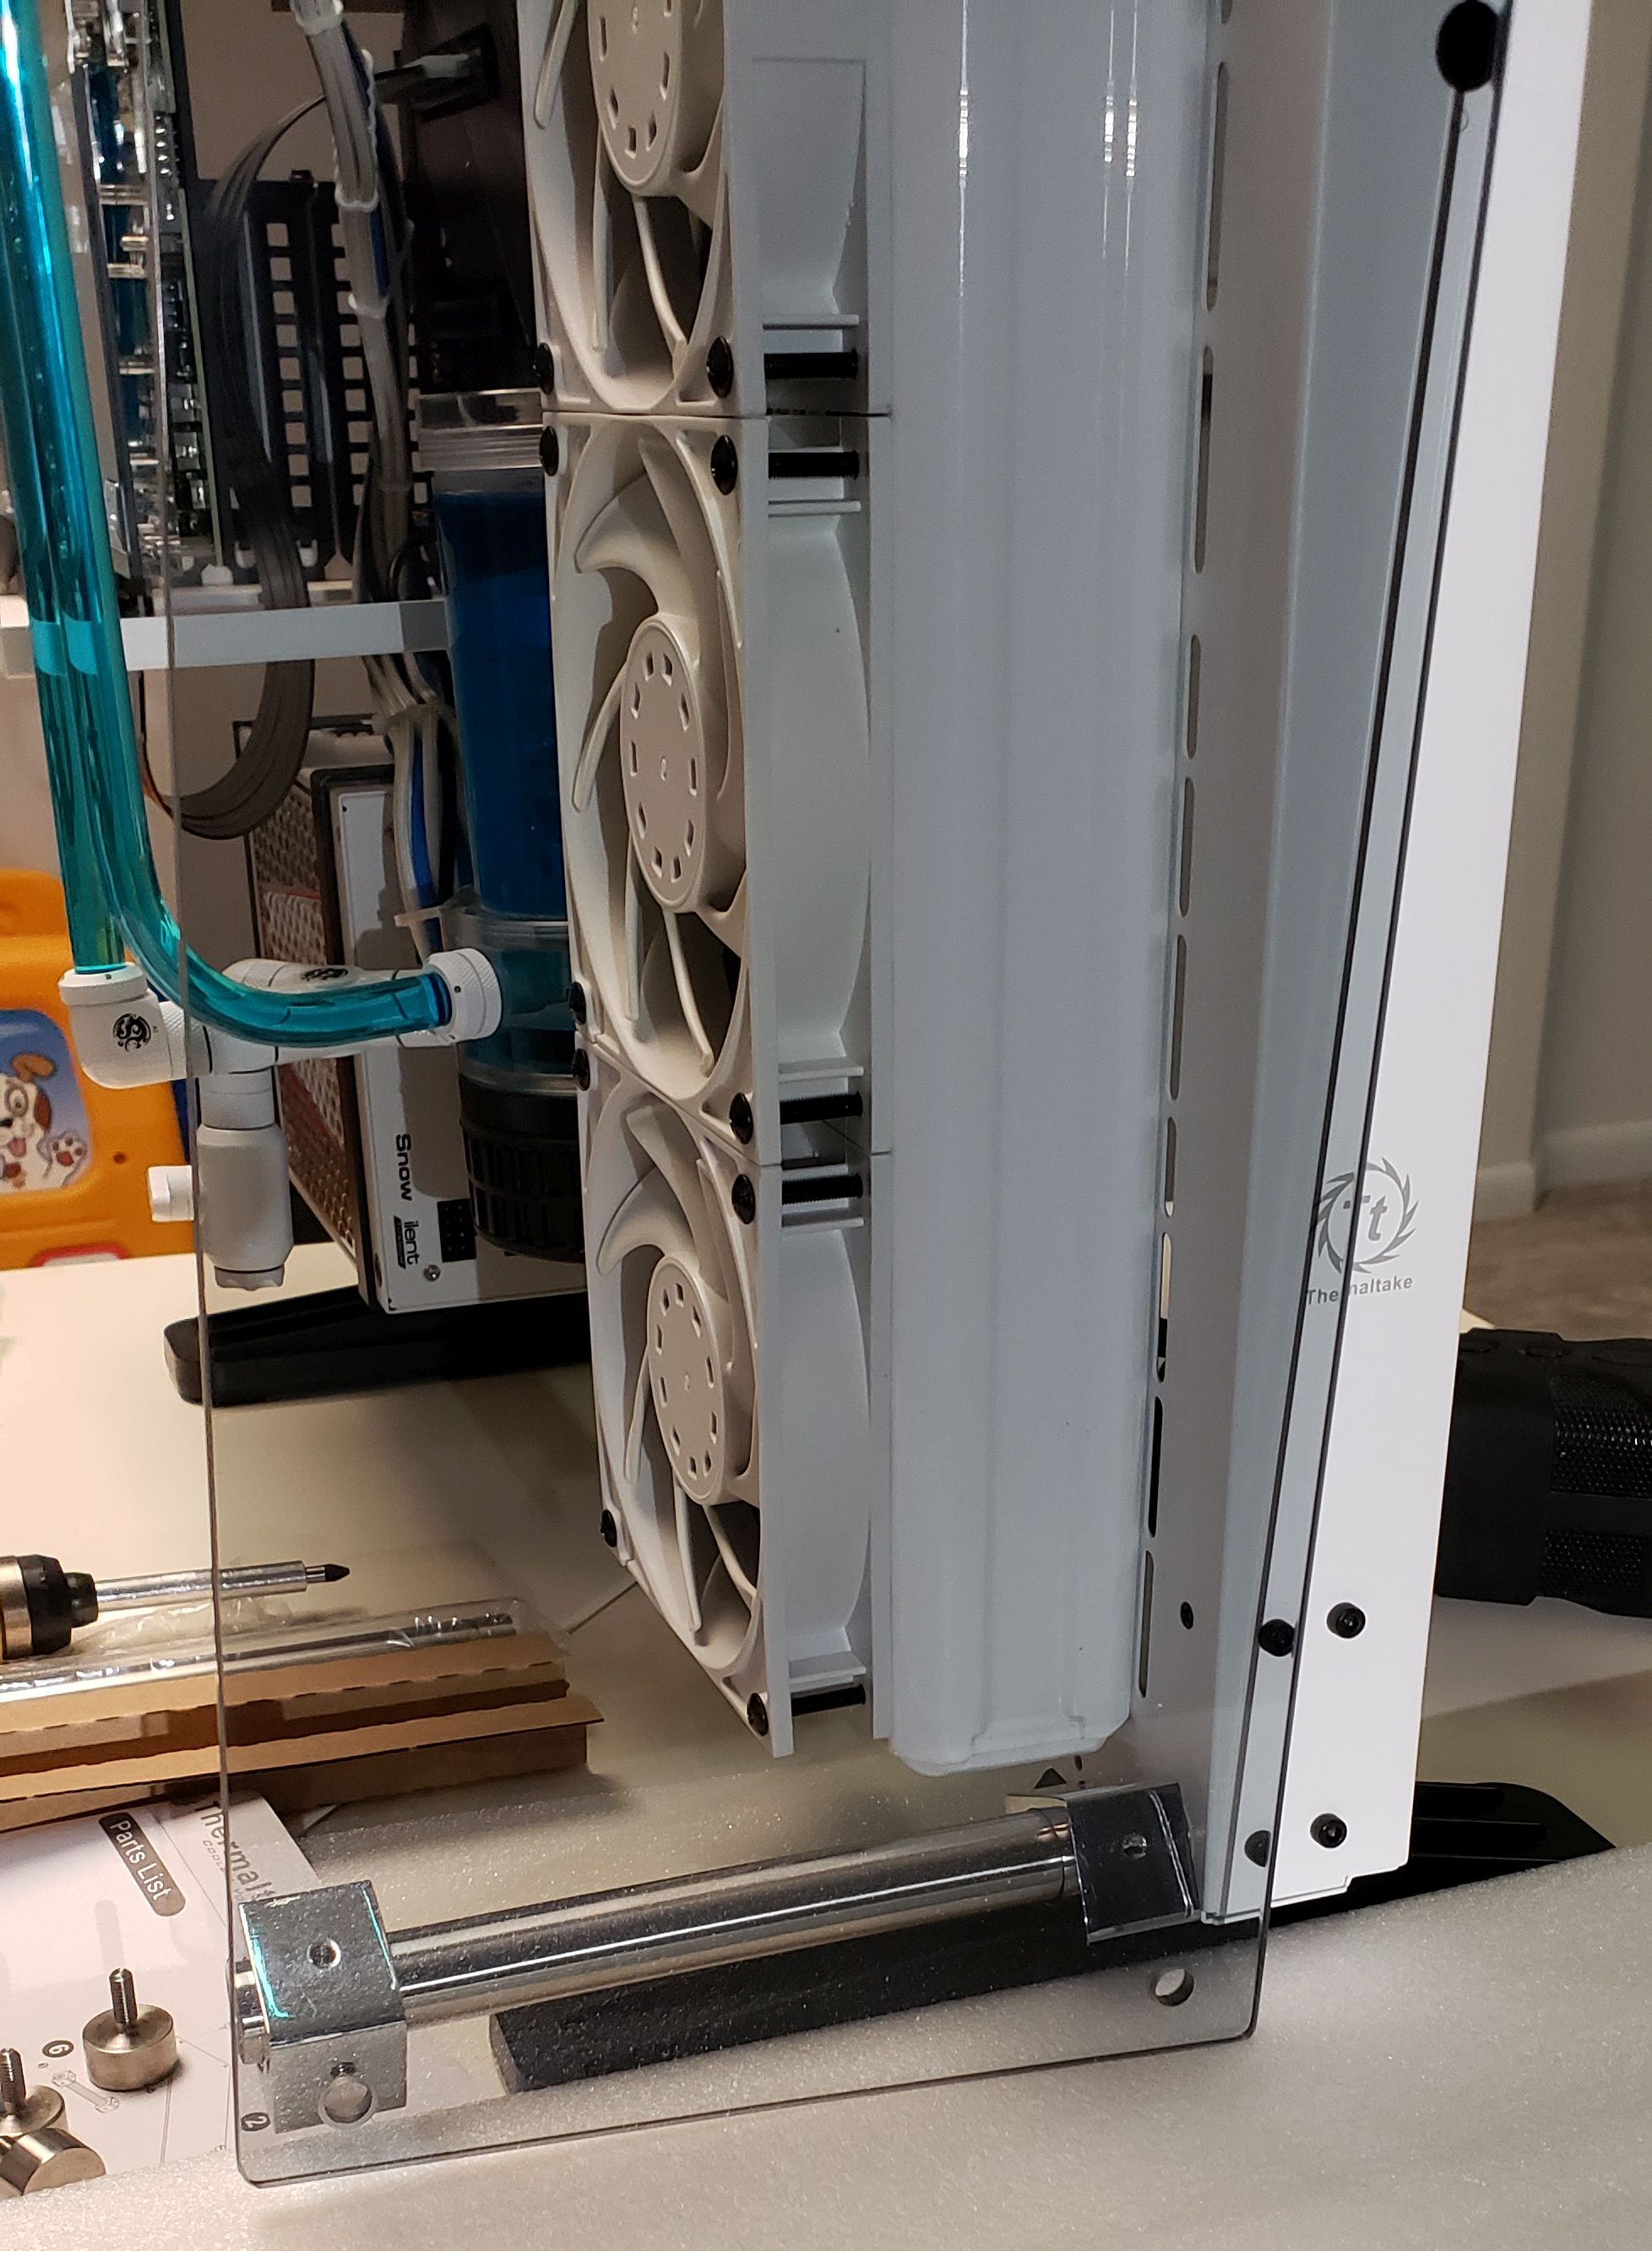
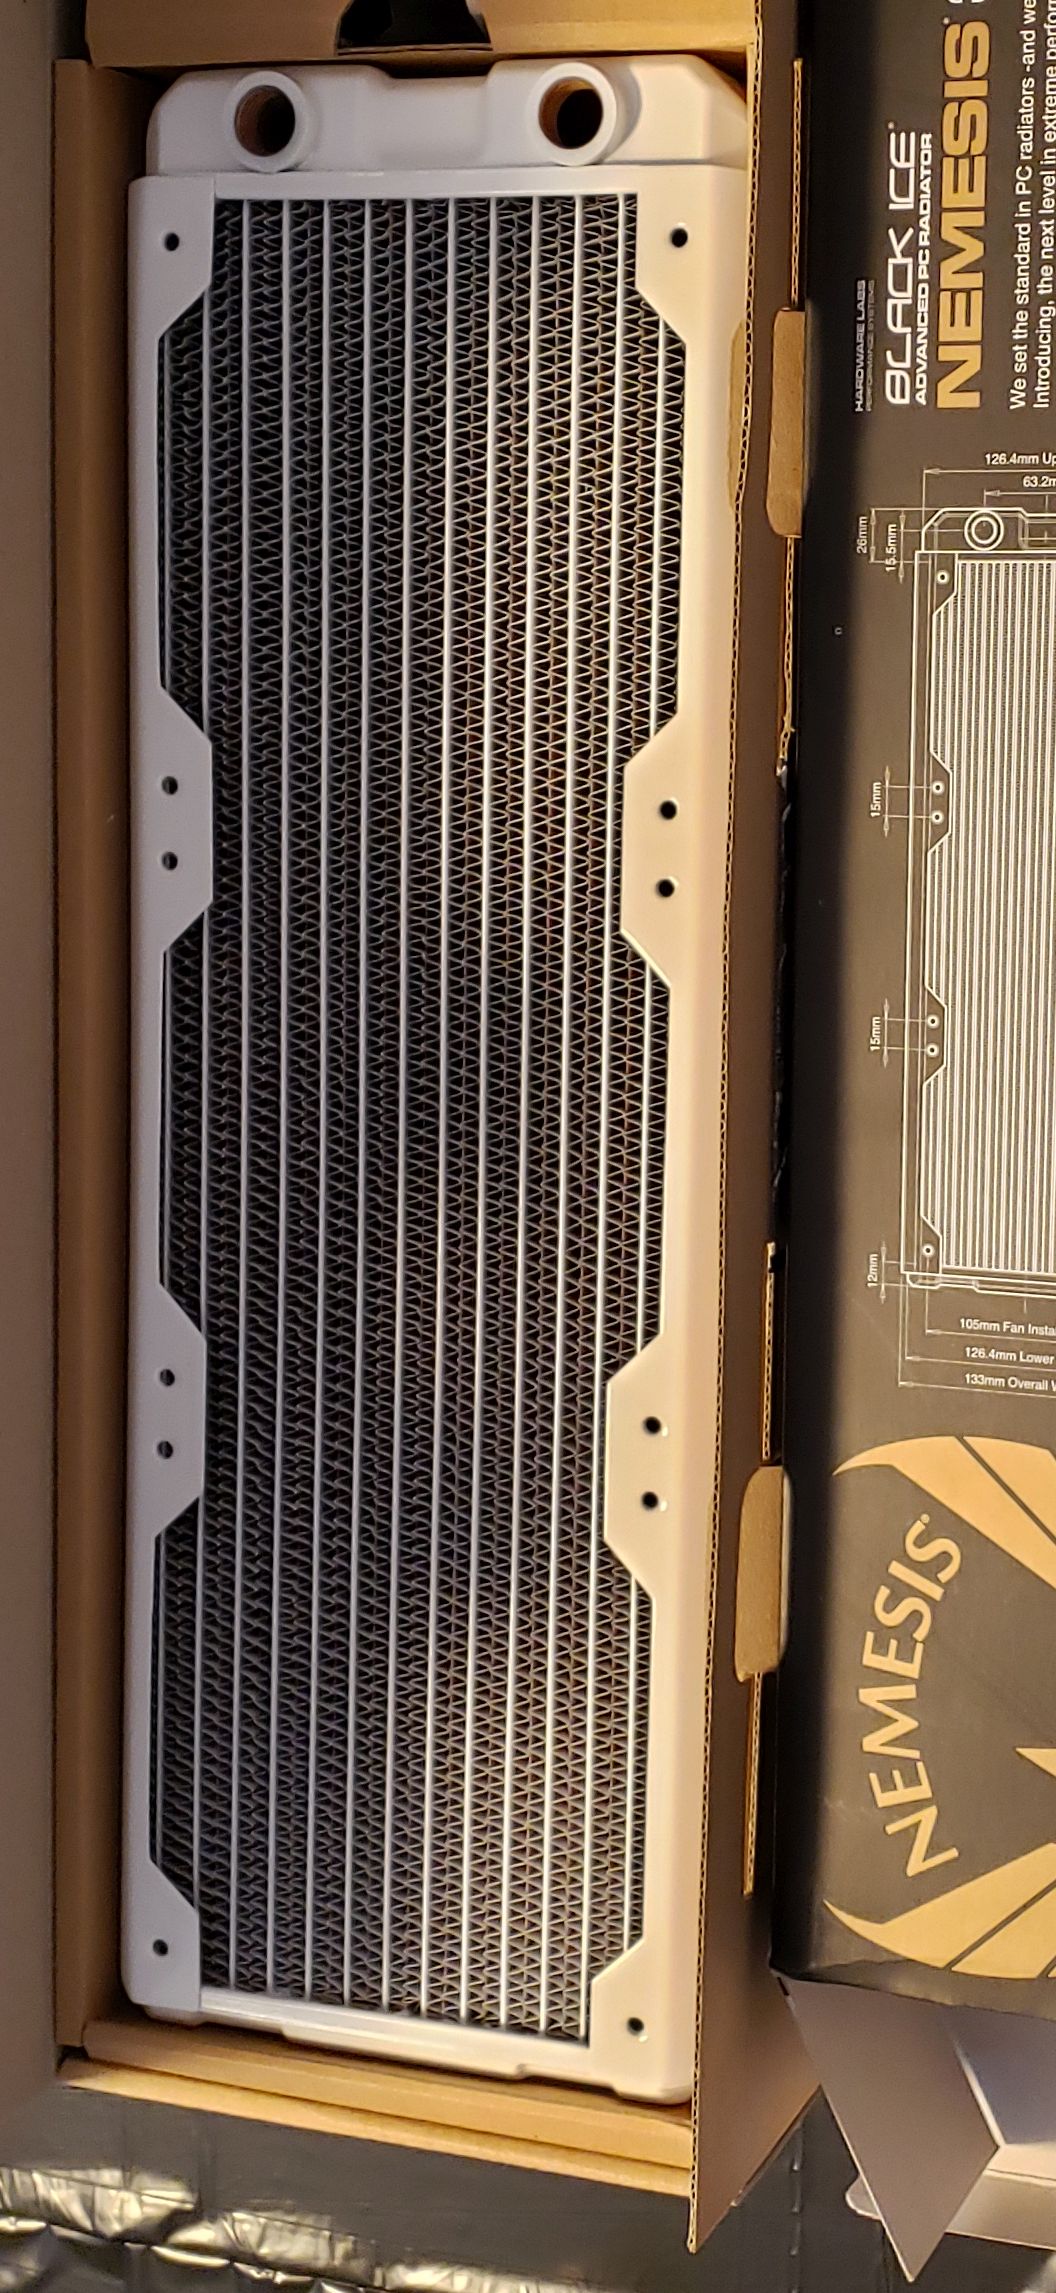
On top of those factors and the constraint that I wanted the radiator to be all white, the choices narrowed considerably, but I went with the Hardware Labs Black Ice Nemesis 360GTX Dual-Core Xtreme Profile Radiator (White). (They seem to have discontinued the white model.) Hardware Labs rates it at 1800W of capacity, which was way overkill for my system. Hardware Labs claims it would be able to support a quad GPU configuration. Even the core of the radiator is white. Often, only the outer reservoir is white, and the core (where the fins are) is black. So, while it is only a 360mm tall radiator, it is 54mm thick and has a high fin density (16 fins per inch [FPI] with 25-micron copper fins); it acts like a much bigger radiator if the fans used with it are efficient enough. This radiator can be used in a push-pull configuration, where fans are mounted on both sides, pushing air into (on the intake side) and pulling air away from (on the output side) the radiator. I decided to start with just a set of push fans and see if the system needed more air movement when under load. (Spoiler alert: It didn't.)
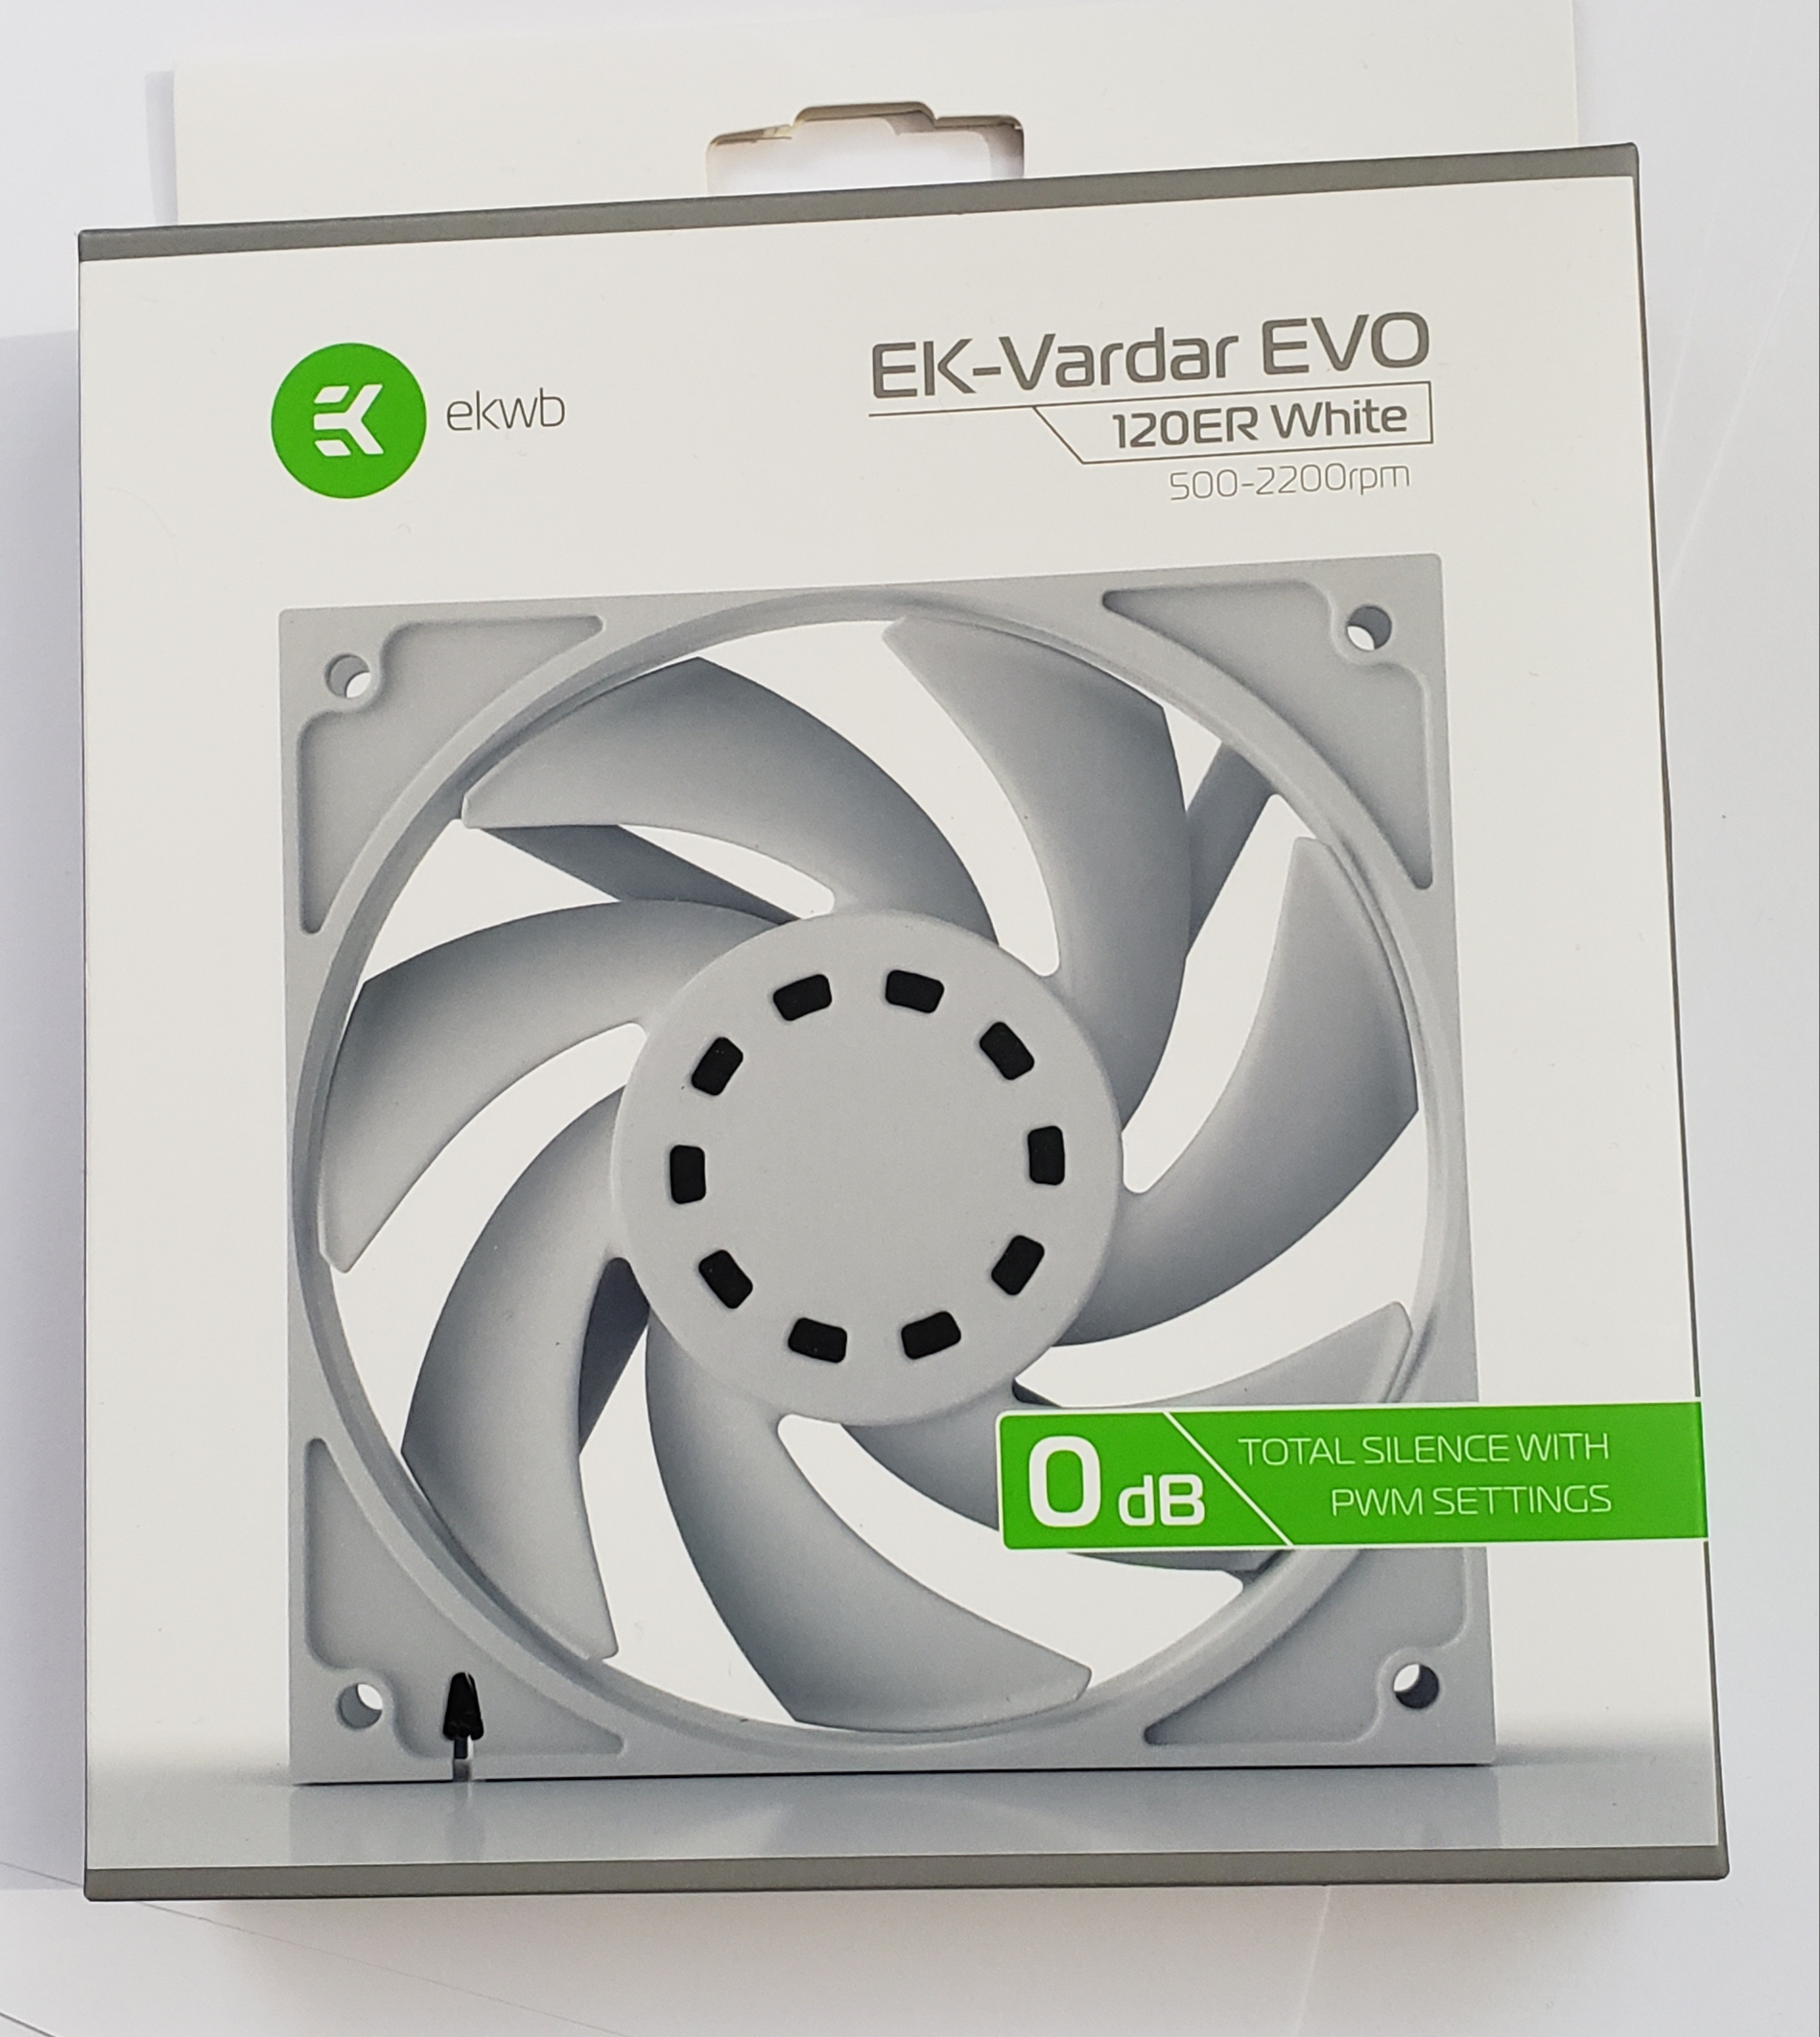
The fans that I paired with the radiator were three of EKWB's EK-Vardar EVO 120ER White BB high-static pressure fans specifically designed for radiators. These matched the white radiator and were not excessively expensive at $20 each. That's a bit more than I usually pay for fans, but these are very task-specific. Unlike most fans currently for sale, these fans have no RBG, and that's what I wanted. I don't hate or love RGB, but I wanted the RGB for this build to be subtle. One of the features of these fans that I like is that when they are set below a certain threshold for temperature, they turn off. When the computer is idle or doing light work (like editing a web page, for example), the fans will stop for a while.

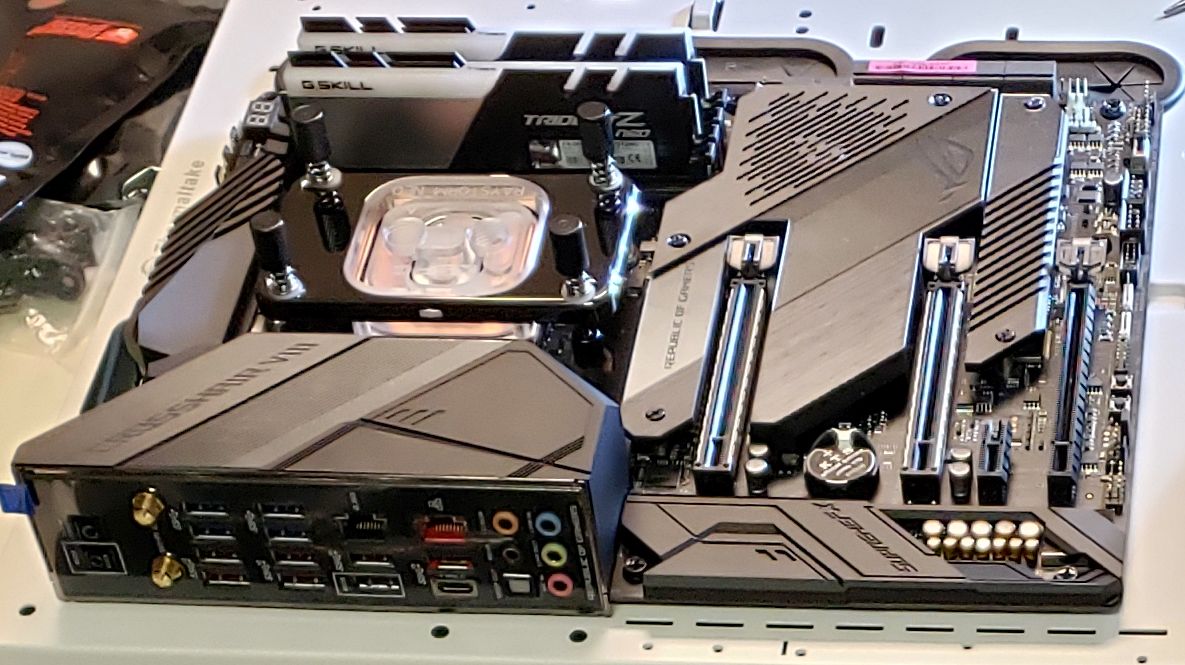
For the CPU waterblock, I originally went with the XSPC Raystorm Neo AM4 Black Chrome. However, I switched to the Bitspower Crosshair Hero VII Mono Block, which also cools the VRM. This block has a flow indicator (though it doesn't include a sensor to monitor the flow indicator's speed). It also comes with RGB lighting (which is set to white to keep with the theme). I had to remove the VRM heatsinks and apply new thermal tape.


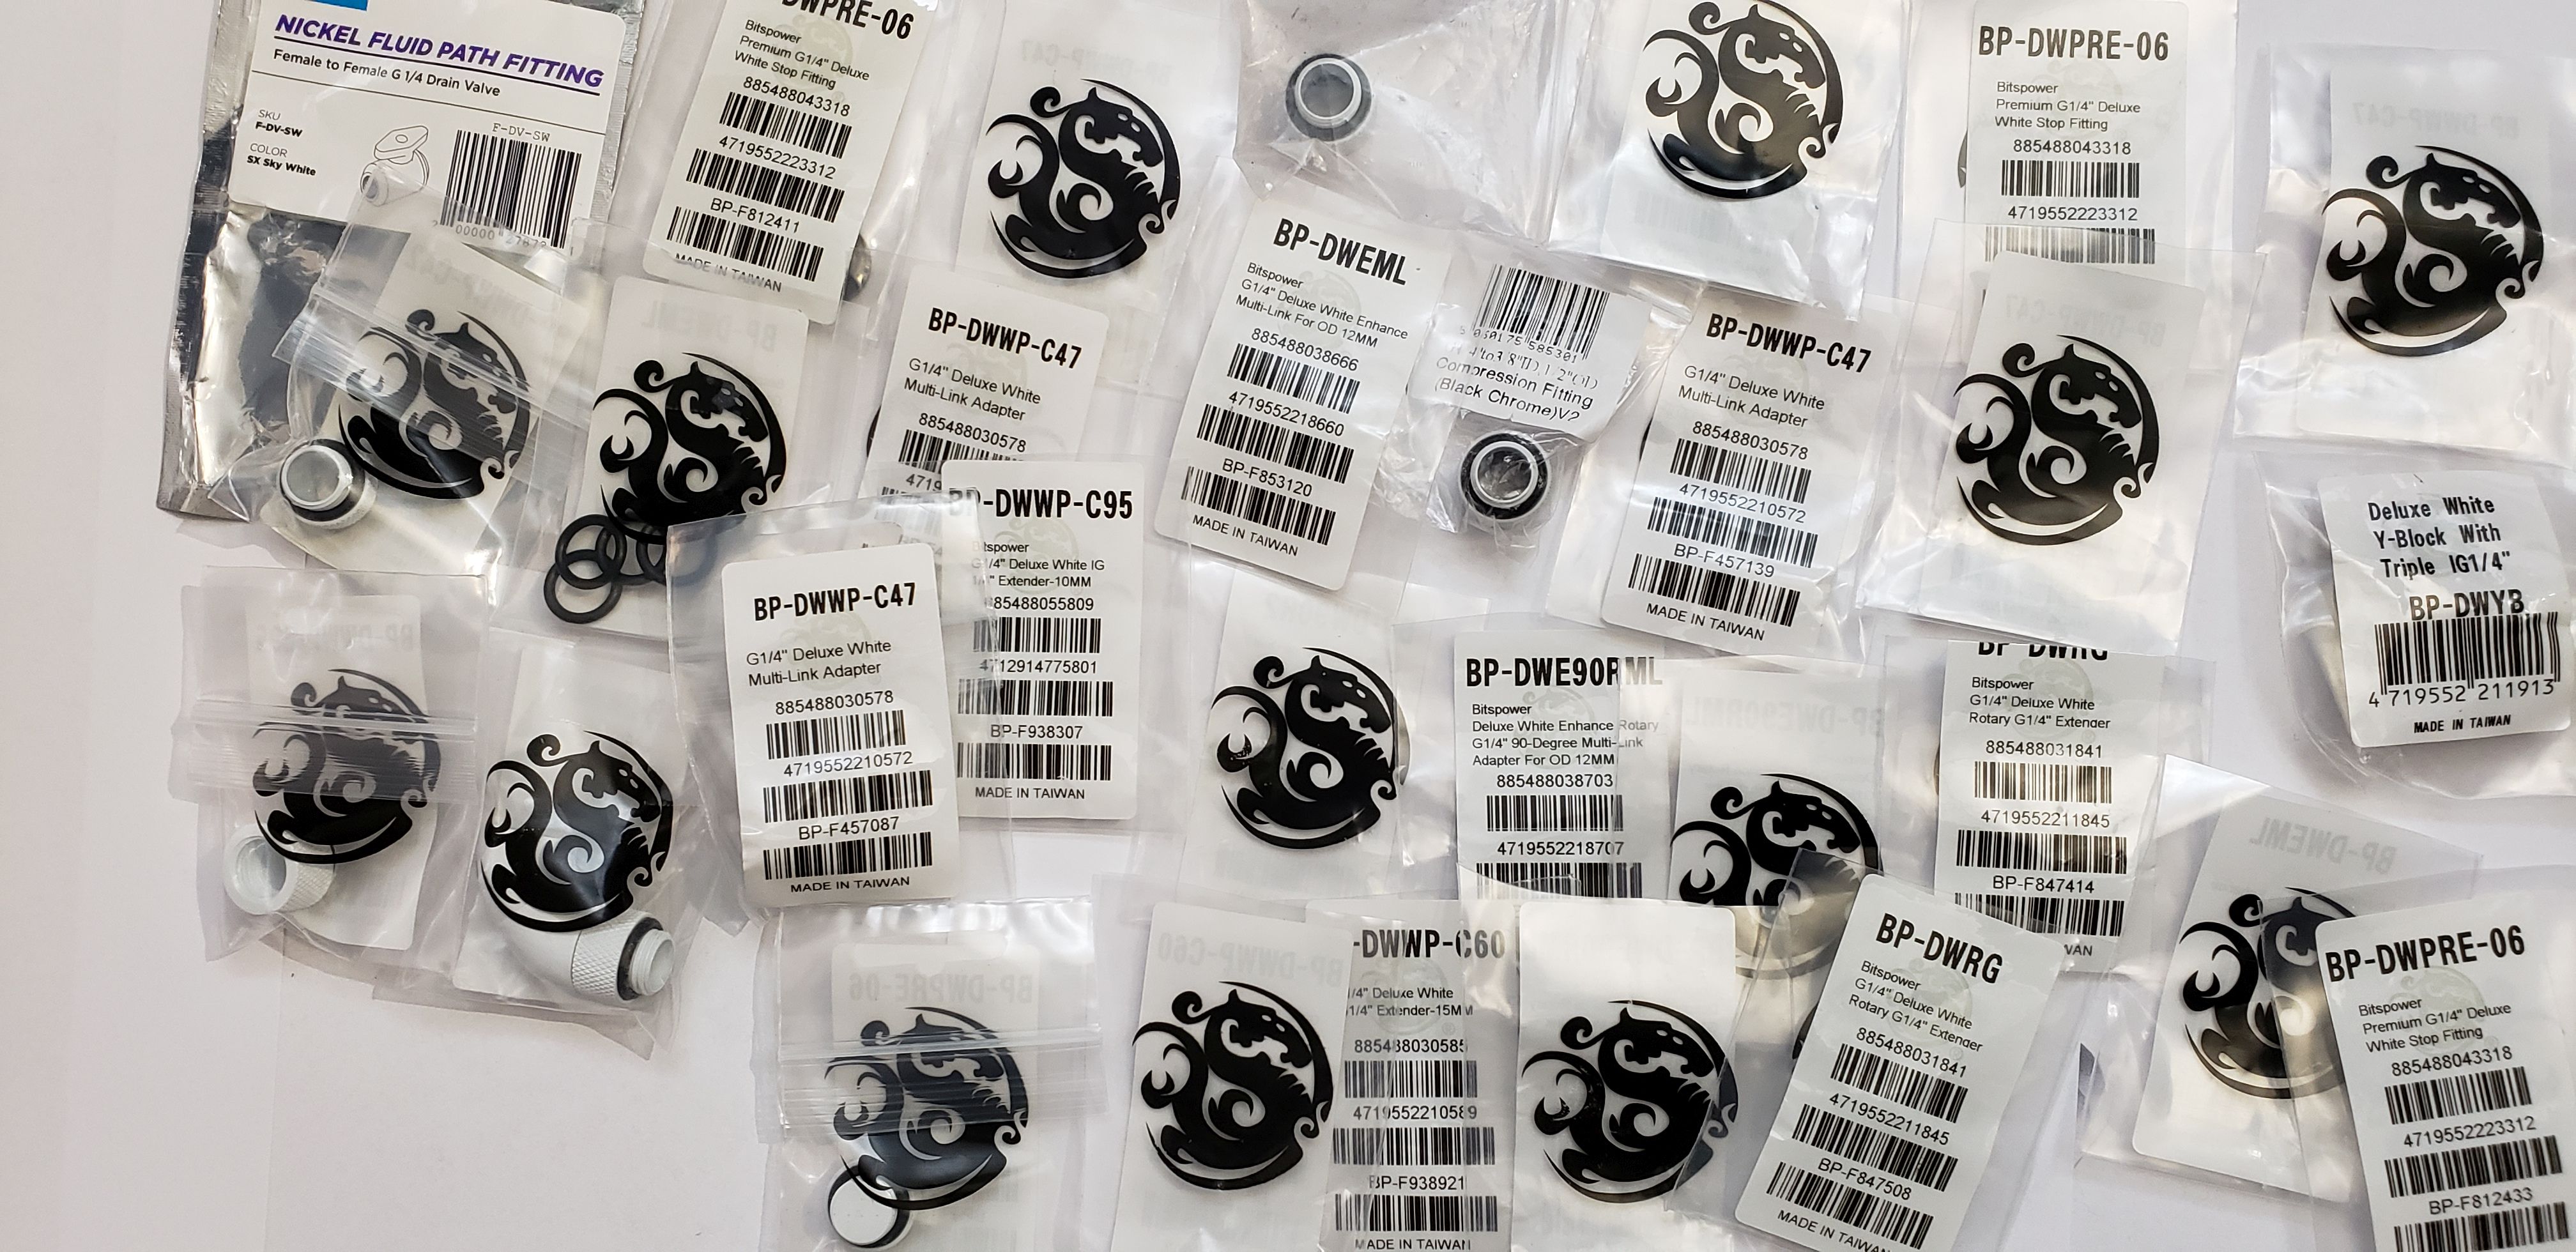
I agonized for quite a while over the brand of fittings to get. I finally settled on the Bitspower brand based on reviews (of them not leaking) and the fact they have a bazillion different fittings (even in white). I wasn't sure what corner I might back myself into when running the tubing, but I was pretty sure that Bitspower would have a fitting that would let me buy my way out of it. I didn't expect my first attempt at guessing what fittings I would need to be perfect. It wasn't. It took me three orders to get everything right. The last order was mostly extenders of various sizes to get the tubing to line up nicely.
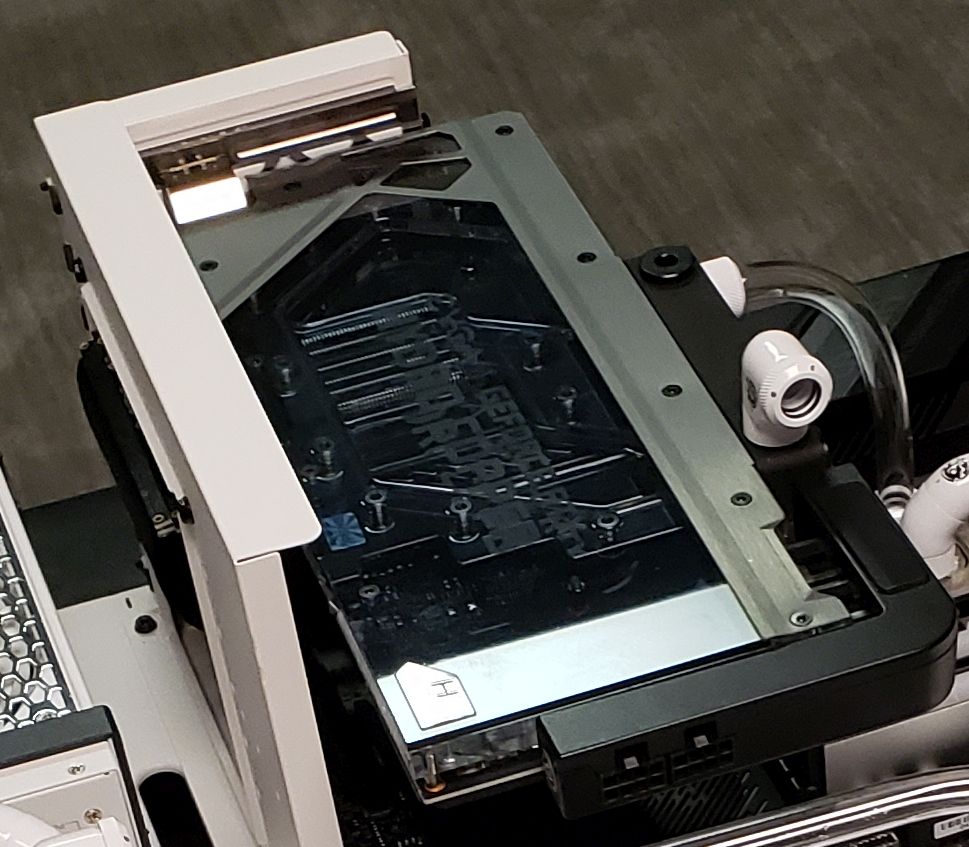
I didn't mention the water block on the GPU, but there's not much to say. EVGA ships it already mounted and ready to go. They even include some very nice black plugs. In the end, it all came together to look quite nice, in my opinion. I wondered if the manufacturers of the various components have some common specifications for what "white" means. I have parts from several manufacturers, and there are a lot of shades of white, but the various parts match up well.


My speakers are the same ancient speakers I've had since 1999. They are the Klipsch 4.1 Promedia surround sound speakers. I very nearly bought another speaker system because both subwoofer speakers had just rotted out with age. Someone clued me in that Klipsch sells replacement parts, and I took advantage of that. It's still going, and the repair mentioned above sounds great. I paid $400 for these (as part of a system from Falcon Northwest - the only gaming system I ever bought instead of made myself). The replacement speakers were something like $60. They can put out more than the volume needed to enjoy any game, video, or audio. The volume knob is starting to go, but I'll hold onto these as long as possible. I'd buy another set of these exact speakers, but Klipsch stopped making the four-speaker (4.1) version years ago. They still have the Klipsch 2.1 Promedia two-speaker plus subwoofer version for sale.
I've had more headsets than I care to recall. My current one is the Kingston HyperX Cloud Gaming Headset (KHX-H3CLW) - the white and black ones. They weren't super cheap at $70 (on sale) from Amazon, but they sound better than headsets for which I paid more. They are comfortable for hours, too. That's what the "cloud" part is. It's like putting a comfy cloud over my ears. At least, they stay on my head without putting it into a vise. The mic is detachable; I leave it off when I don't need it. The mic is the only part of these I'm less than thrilled with. To others, it sounds "OK," but not great. I've started using a separate microphone instead. These headphones come with every connection option I've ever seen. I can connect these to every device in my house (and my phone in my pocket) using one of the included adapters. They even have an airplane adapter (and come with a carrying pouch). I still recommend these.
I still use an ergonomic keyboard as my daily driver, as I have for the last 20 years. The Microsoft Natural Pro came out in 1999, and to this day, I think it is the best affordable ergonomic keyboard ever made. When I found out they were discontinuing them, I bought five. Unfortunately, gaming is hard on keyboards, and the WASD and left control (CTRL) keys eventually gave out on all. It took years to go through my stash, but I eventually did. For the next several years, I used the Microsoft Ergonomic Keyboard 4000. The 4000 has an issue in that the keycaps wear off completely in a very short time. I am primarily a touch typist, but sometimes, I need to look at the keys. The one thing both of these keyboards lack, and I would like to see, is some form of backlighting.
I finally broke down and bought a mechanical ergonomic gaming keyboard, the Kinesis Gaming Freestyle Edge RGB with Cherry MX Brown switches. It's a split keyboard, and I found I like it with the two halves about 5" apart at the top and maybe 7-8" apart at the bottom. (I have the two halves at roughly the same angles as a fully ergonomic keyboard, but further apart and at less of an angle. The keyboard doesn't have a numeric keypad, so I bought a Rottay 22-key Numpad. I put it in the middle between the two halves of the Kinesis keyboard. I took a bit of getting used to it, but I now like it. I seem to be able to type more quickly and accurately (except I seem to hit caps lock a lot).
For my mouse, I am using the Logitech G602 wireless gaming mouse, which has been replaced with the Logitech G604 wireless gaming mouse. I preferred the wired Logitech G502 Proteus because it had adjustable weights (a feature they removed). Now, Logitech has the G502 Hero, which does have a weight system. That may be my next mouse after I kill this one. (It's holding up well, though.)
I'm currently using two monitors mounted on a dual-screen support arm. One is the monitor I've had for quite a while now - the Dell U2713HM 27" Widescreen IPS Monitor that I bought from B&H Photo Video for $518 in December 2014. It is 2560 x 1440 pixels but only has a 60 Hz refresh rate, which constrained even the GTX 1080 I had in my previous system. That's now my secondary monitor.
My primary monitor is the Acer Predator XB271HU bmiprz 144Hz 2560 x 1440. I also got that from B&H Photo Video but had to pay a whole dollar more at $519. I purchased it as a black Friday special in November 2018, but because of the really good price, it was back-ordered, and I didn't receive it until the end of Jan 2019. The monitor can be "overclocked" to 165Hz, but other than to ensure it works at that rate, I leave it at the default 144Hz. I can tell the difference between games on a 60Hz and 144Hz display, but I doubt I could discern any differences between 144Hz and 165Hz. This monitor also has Nvidia G-Sync built-in, which pairs with the RTX 2080 Super to eliminate screen tearing at lower refresh rates.
Radiators, radiate - OK. This should be obvious, but until I had the system up and running in my office (10 1/2 ft x 13 ft) for a while, I didn't realize how much heat this radiator would pump into the room. The components stay at or below the mid 50°C range even after hours of gameplay, but my office temps rise about 1°C per hour. Eventually, the room reaches saturation, and both the system and the room would start rising in temperature. My takeaway from this is if your water-cooled system is going into a small room, ensure you have a good way to cool the room.
Water-cooled systems are extremely quiet - I expected the water-cooled system to be quiet at idle compared to an air-cooled system. I didn't expect it to be virtually silent. When the system isn't playing games that load the CPU and GPU, the PSU fan shuts off, and the radiator fans run (slowly and) intermittently as needed. I added a case fan to blow air over the motherboard VRM section, but even that runs slowly when the VRM is cool. Even under heavy load, the radiator fan noise is negligible, and the case fan is slightly noticeable. I'm not exactly comparing apples to apples against my previous system, as those were just higher air-flow, higher-speed fans.
Water-cooled systems are expensive - I had initially budgeted about $700 for the water-cooling parts: radiator, pump, fans, CPU water block, GPU water block, tubing, fittings, and chemicals. (However, my GPU came with a water block, which added to the cost of the GPU but eliminated the separate cost for the water block.) In total, it turned out to be about $1000. This is a simple open-loop solution. It is a single pump/reservoir combo with one loop from the radiator to the pump, from the GPU to the CPU, and back to the radiator. The drain valve and fittings for that added $30-40, and the extensions and other fittings to make everything line up cost another $50-60. Out of fear of dealing with leaks, I went with a more expensive pump, radiator, and fittings than I could have gotten, but I didn't have leaks and never had any during the build.
After two years with this system, I have to say I'm very happy with it. I'm almost to the point where I would consider a new GPU - if there were GPUs to be found. EVGA has announced new 3080, 3080 Ti, and 3090 Hydro Copper GPUs, but at this time, I can't even get on a waitlist for any one of those. I've added a second case fan, changed out the CPU water block for one that also cools the VRM section, and added a small LED screen that I use with AIDA64 to display statistics and dials. I've also changed the coolant a few times - about every 9 months. Other than that, it's been a reliable workhorse of a system.