2023 (September) Build
2023 (September) Build
I didn't start out doing a complete upgrade. Mostly, I just wanted to upgrade my GPU. The EVGA 2080 Super's 8GB of video RAM was insufficient to run newer games at higher settings. I decided to change from water cooling to air cooling as well. As much as I liked the temperatures and silence from water cooling, changing the fluid every six to nine months was annoying. I wrote about the steps in maintaining the system in this blog post. It took hours every time. It had been two major GPU generations since my last upgrade.
I decided to go all in on an Nvidia 4090 since prices were (finally) nearly at MSRP. (The prices went back up briefly but are now coming back into the range of the actual MSRP [or even lower].) Since 8GB of graphics memory wasn't enough, the 4090's 24GB of GDDR6X memory would make sure that wasn't an issue in the future. I upgraded the PSU to 1000W as recommended by Nvidia for 4090 GPUs. It's a Seasonic Vertex GX. Since the CPU also needed air cooling, I got a DeepCool AK620 CPU cooler (white). I reused the case, CPU, motherboard, and memory. I thought that would be fine for at least a while.
"A while" turned into about two weeks. I wasn't happy with how much the AMD 3900X CPU seemed to hold back the GPU, so I bought an AMD 7800X3D CPU, B650 motherboard, and DDR5 memory. Other than the case, I switched out everything—even the fans.
Contents
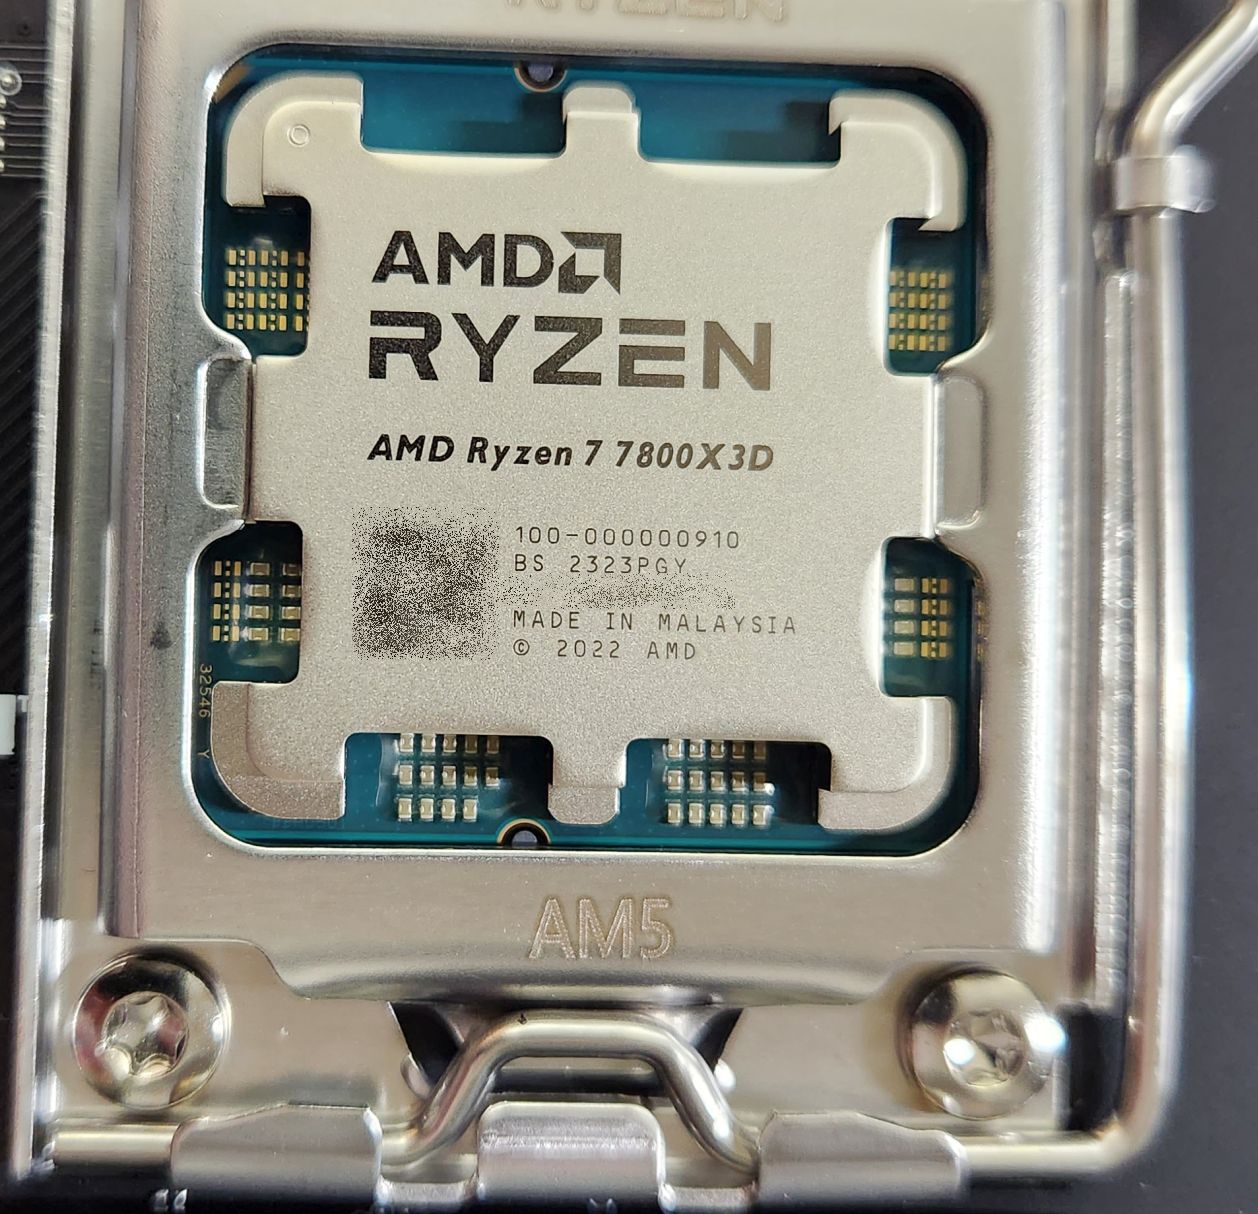
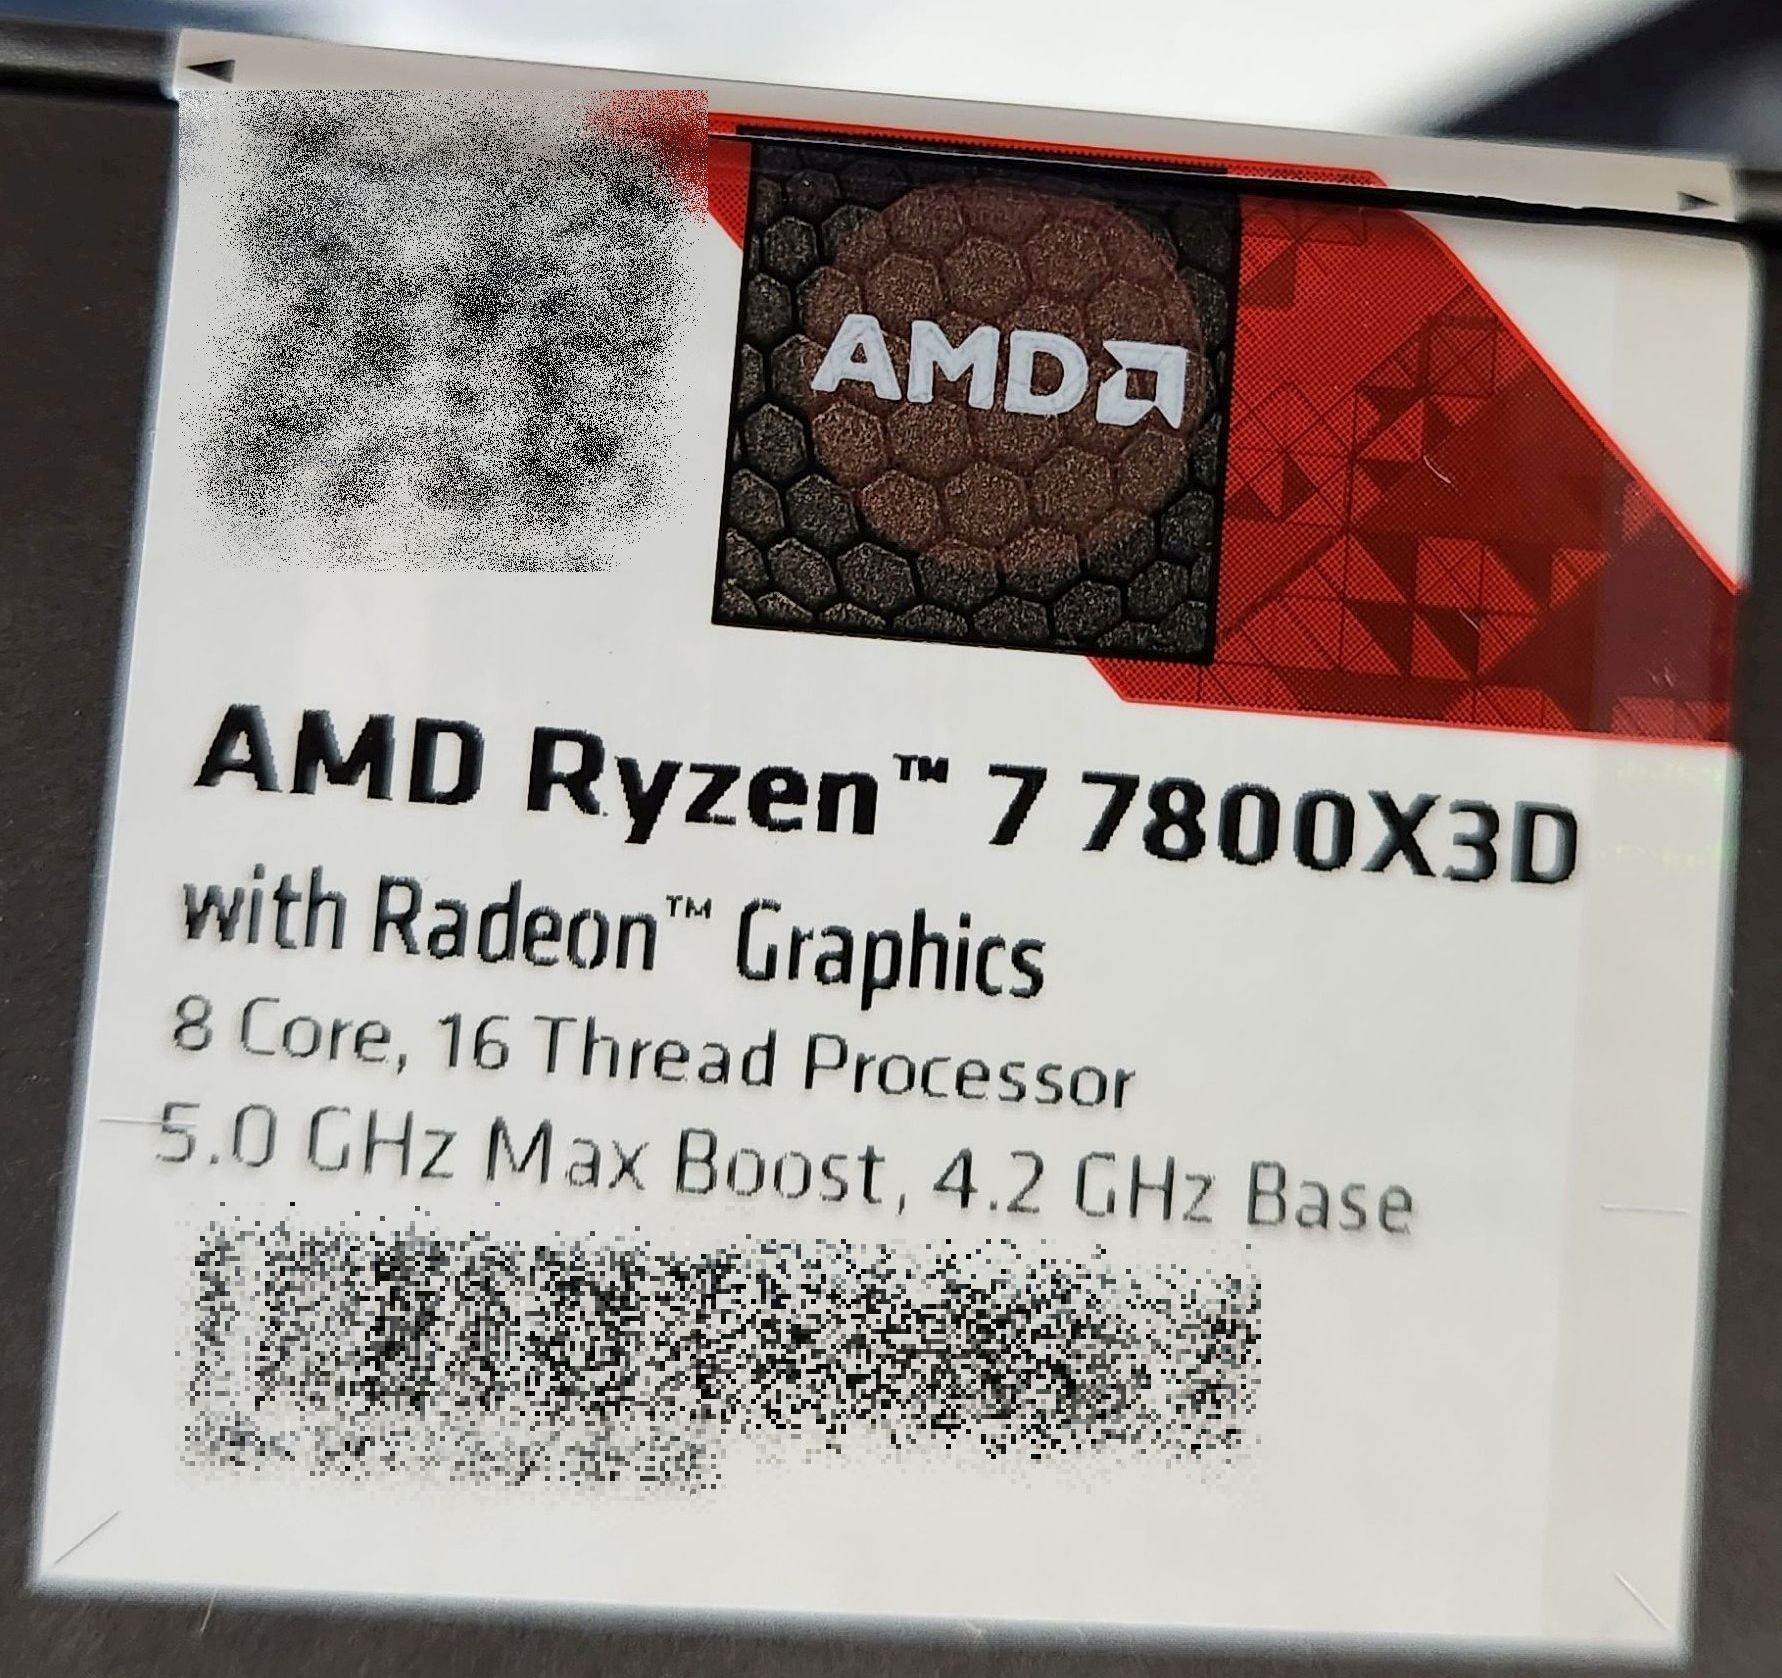
I switched from the AMD Ryzen 9 3900X to the AMD Ryzen 7 7800X3D for this build. After years of Intel CPUs, this was the second AMD processor in a row that I used in a gaming build. I was very impressed with the performance boost of the extra 3D cache in many games that several benchmark tests found.
I do a bit of video editing, and this CPU is slightly slower than the 3900X for that. That said, the base clock for the 7800X3D is the same as the all-core boost clock of the 3900X at 4.3 GHz. The boost clock of the 7800X3D is just under 5 GHz. In games, I noticed less stuttering. It just feels smoother overall.
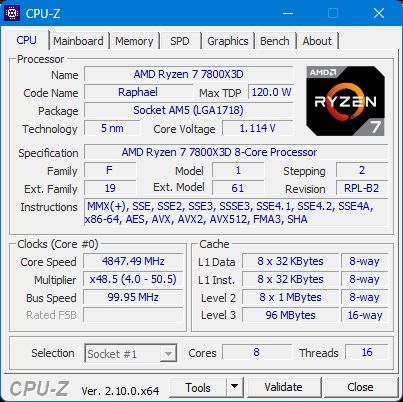
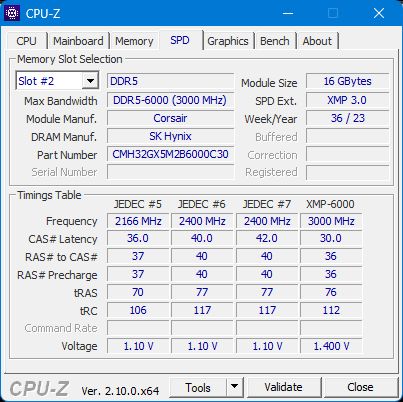
I am air-cooling this system, but it's still running relatively cool. Here are the specs according to CPU-Z (Version 2.10.0 x64 - July 2024).
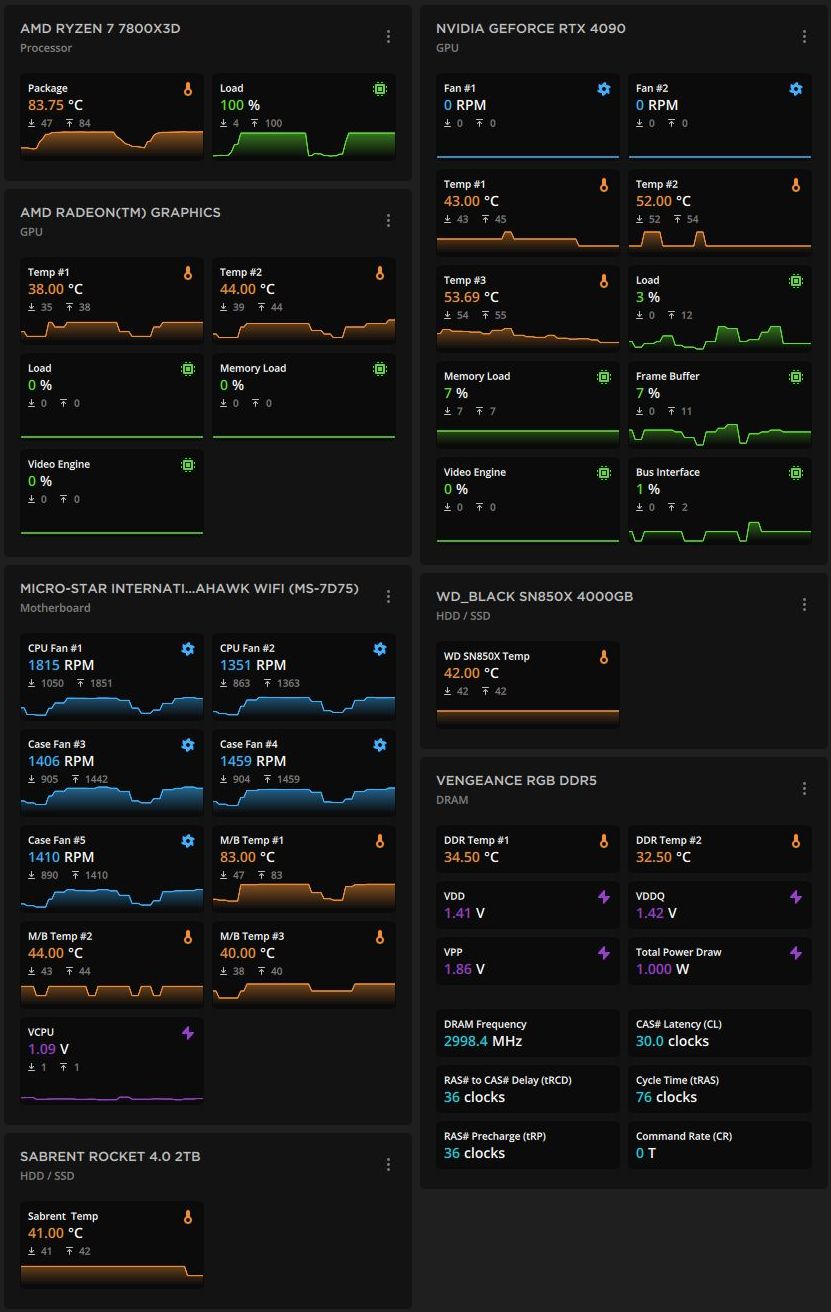
With the system built in 2019, I ran Cinebench 20 (CBr20) multi-core and single-core benchmarks. That benchmark has been superseded by Cinebench 2024. Still, I ran the older version against this CPU to see if the four fewer cores (8 cores in the 7800X3D versus 12 in the 3900X) and eight fewer threads (16 versus 24, respectively) would be countered by the higher clock rate and improved number of instructions executed per clock cycle (IPC) of the 7800X3D. In addition to the benchmark scores, I added a dashboard (from Corsair's iCUE software) showing the temperatures near the end of the multi-core run.
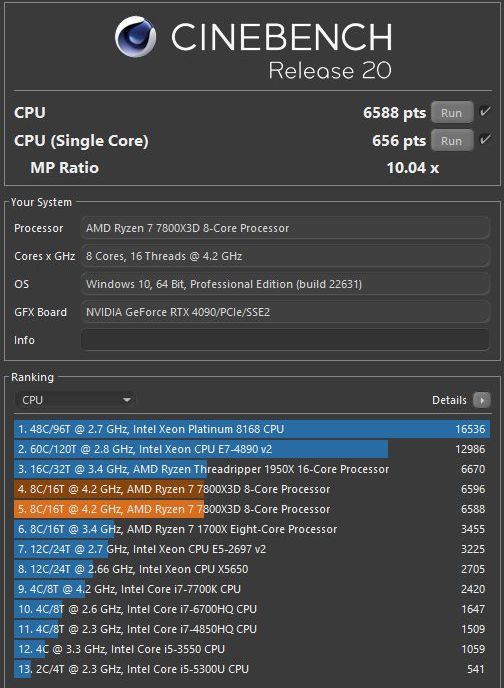
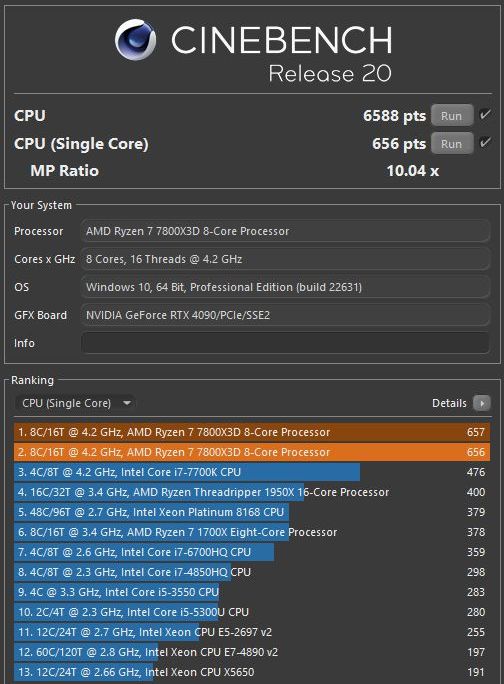
The multi-core benchmark for the 7800X3D is ~6596, compared to the score of ~7434 for the 3900X. That's lower but only by 11-12%, which is impressive since it has 33% fewer cores and threads. The single-core benchmark results show why it's that close; the 7800X3D scored 657 compared to the score of ~494 for the 3900X.
The 7800X3D's higher boost clock speed and better IPC make up quite a bit of ground, but for a multi-core workload, more cores from several generations back can still win. I also use this desktop to transcode and edit videos as I did with the previous system. The 3900X was faster. It's not a horrible difference, but the 7800X3D is slower. Since I use this system more for gaming than video editing, I'm okay with that.
When I ran these benchmarks, the CPU temperature never went over 83°C. That's not bad for air cooling, but water cooling kept the temperatures at about 55°C. Higher-quality air coolers would do even better, but other than in CPU benchmarks, I rarely see temperatures over 60°C.
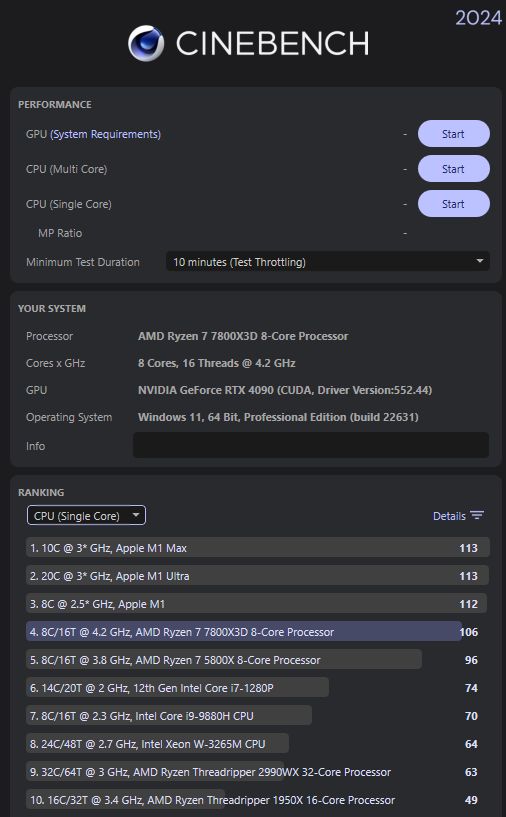
I also ran Cinebench 2024 (CBr24) against this CPU, so I will have numbers to compare with any future systems I build. The results are given in the graphics below. The first is a summary of the tests, followed by the multi-core results, the single-core results, and the temperatures during the multi-core tests. (The temperatures of the single-core tests are about 61°C.)
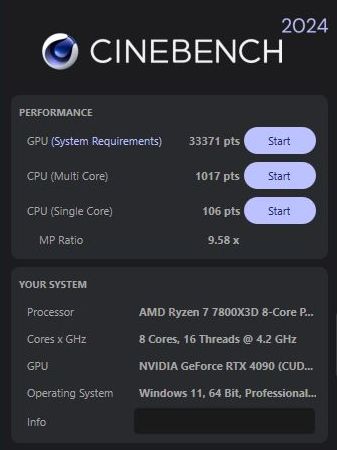
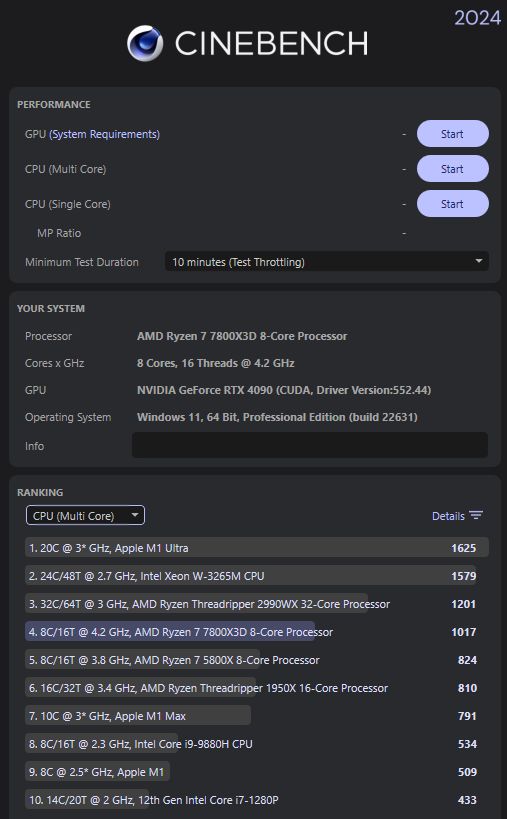
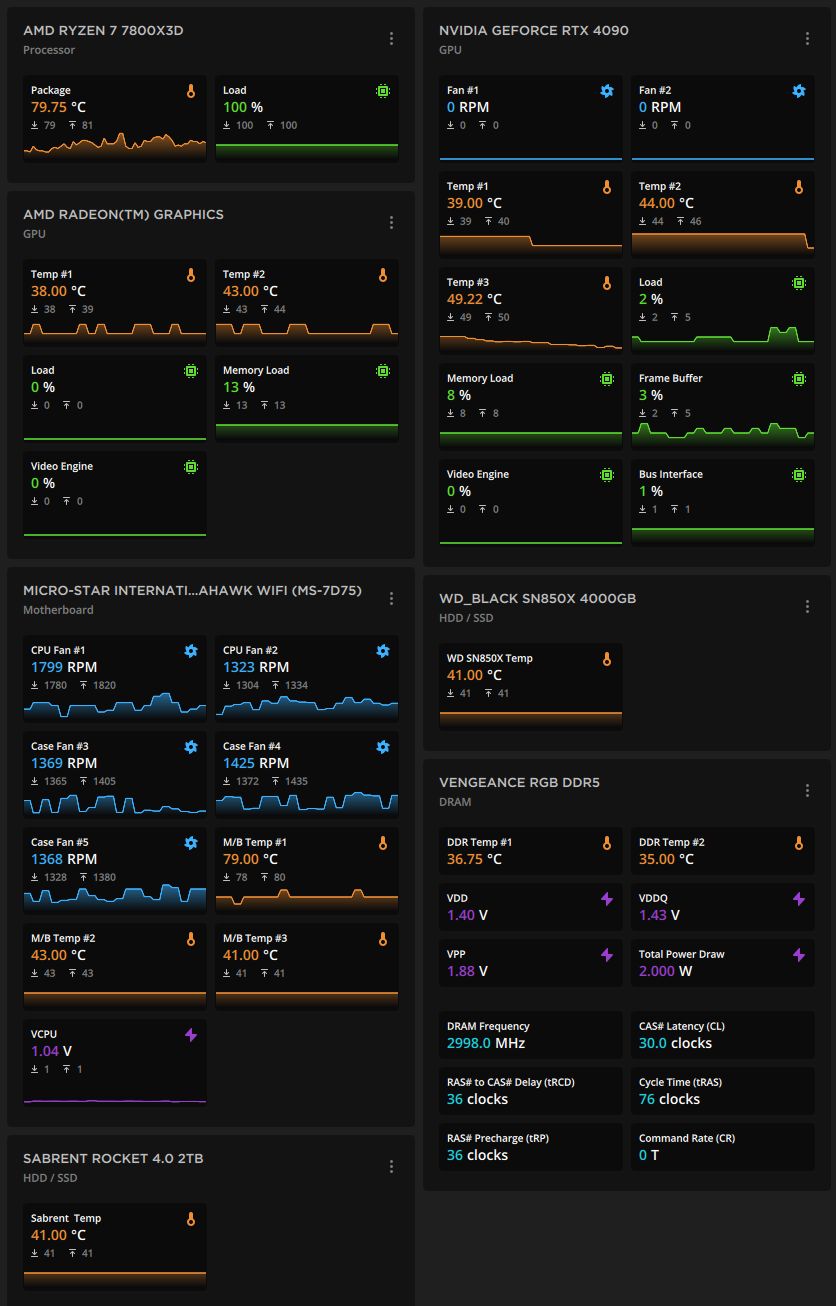
The result for the multi-core test, 1017, is about 100 points lower than other tests I've seen published (which are about 1115), but I didn't try to kill off unnecessary background processes to get the best possible result. Interestingly, the temperatures in Cinebench 2024 are a few degrees lower than I got with Cinebench r20. I have no idea why, but it was consistent.
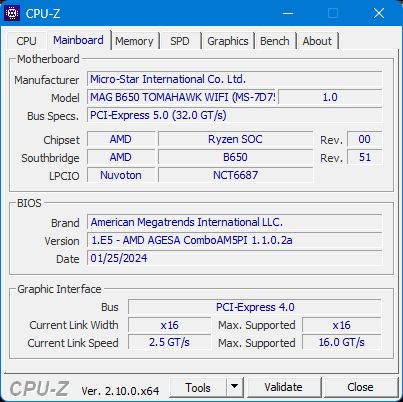
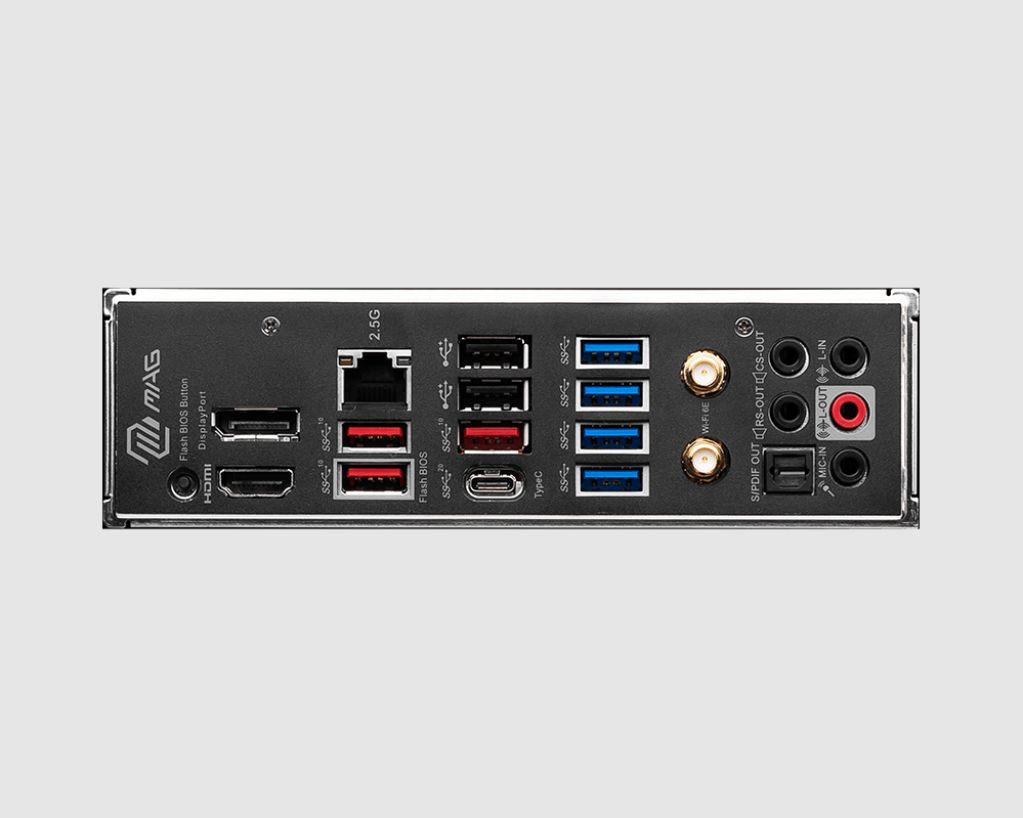
I chose the MSI B650 Tomahawk WiFi motherboard to pair with the AMD 7800X3D. I would have preferred getting a motherboard with the X670 chipset. However, when I bought this from Micro Center (to get their nice bundle discount), they didn't have one with enough USB ports on the back. This motherboard has one USB 3.2 Gen 2x2 (20 Gbps) Type-C port, three USB 3.2 Gen 2 (10 Gbps) Type-A ports, four USB 3.2 Gen 1 (5 Gbps) ports, and two USB 2.0 ports.
For storage, this motherboard has three PCIe Gen4 M.2 slots for NVMe SSDs. I'm using two of them. It also has six SATA 6Gbps ports, but I haven't used a SATA port in my last two or three personal builds and only once in the five or six builds I did in the past year. That one time was only because I was reusing a large pre-existing hard drive. I expect SATA ports to disappear in the future.
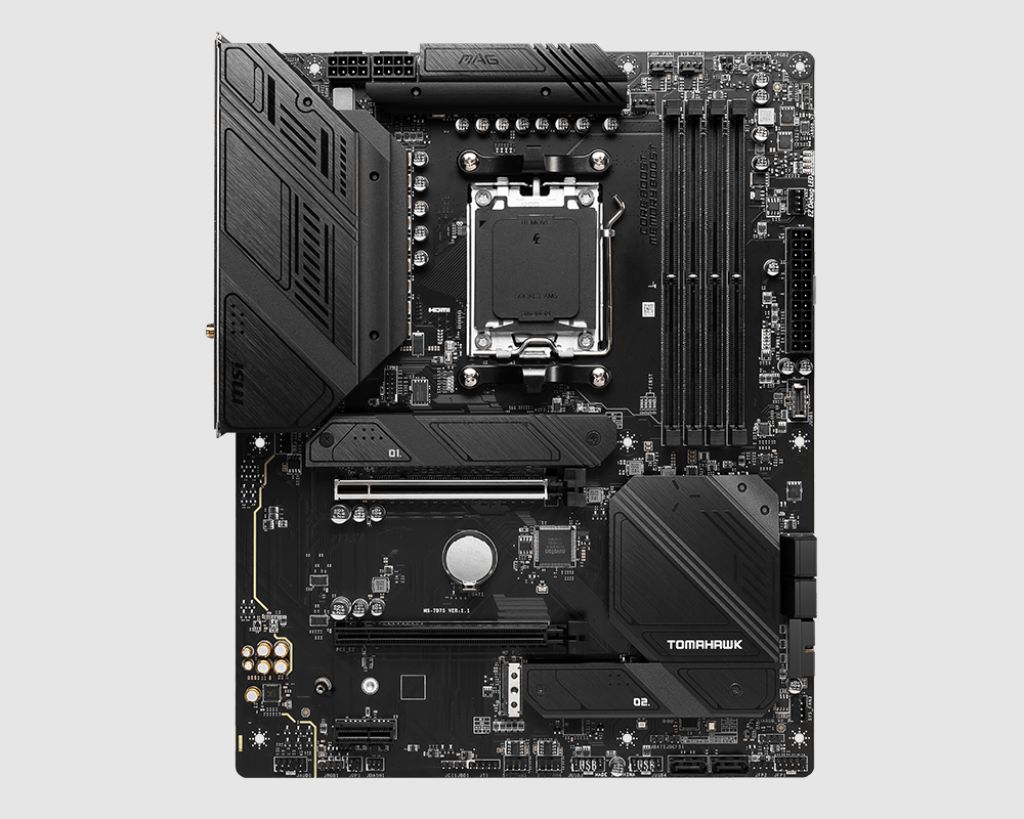
As with my previous build, I did not add a separate audio card to this build. Before that, I always used an add-on audio card, which was typically a version of a Creative sound card. However, motherboard audio is good enough since manufacturers isolate the audio traces and power separately from the other noisy components.
This motherboard uses a Realtek ALC4080 Codec, which, specification-wise, is very similar to the Realtek ALC1220 that was in my last motherboard. One interesting difference about the ALC4080 is that it uses an internal USB connection to the chipset to connect to the system rather than directly to the CPU. I can't tell any difference in the sound quality, and it uses the same Realtek Audio Console control panel. Igor's lab has a good post reviewing the Realtek ALC4080 Codec.
My main reason for upgrading was to get a better graphics card. I game at 1440p at 144 Hz, which is nothing outrageous. When I first got the EVGA 2080 Super in 2019, it handled most games at the highest settings without an issue. Even with ray tracing enabled, games were pretty playable (and stunning). However, a "GPU lifetime" later (i.e., four years), I had a couple of games that repeatedly ran out of video RAM (and crashed) and several that required me to turn down the settings to get good framerates. She was a good card, but it was time.
When I was looking, getting more than 8GB of VRAM in an Nvidia card meant the 4080 with 16GB or the 4090 with 24GB. I procrastinated upgrading long enough that both prices had come down to around their MSRP of ~$1000 for the 4080 and ~1700 for the 4090. My justification for the 4090 was that the system would be set for years. I would probably be OK with a 4080, too, but I was less confident. I wanted to upgrade to a larger 4K monitor sometime in the future, as those prices have been coming down, and the 4090 is a better card for that.
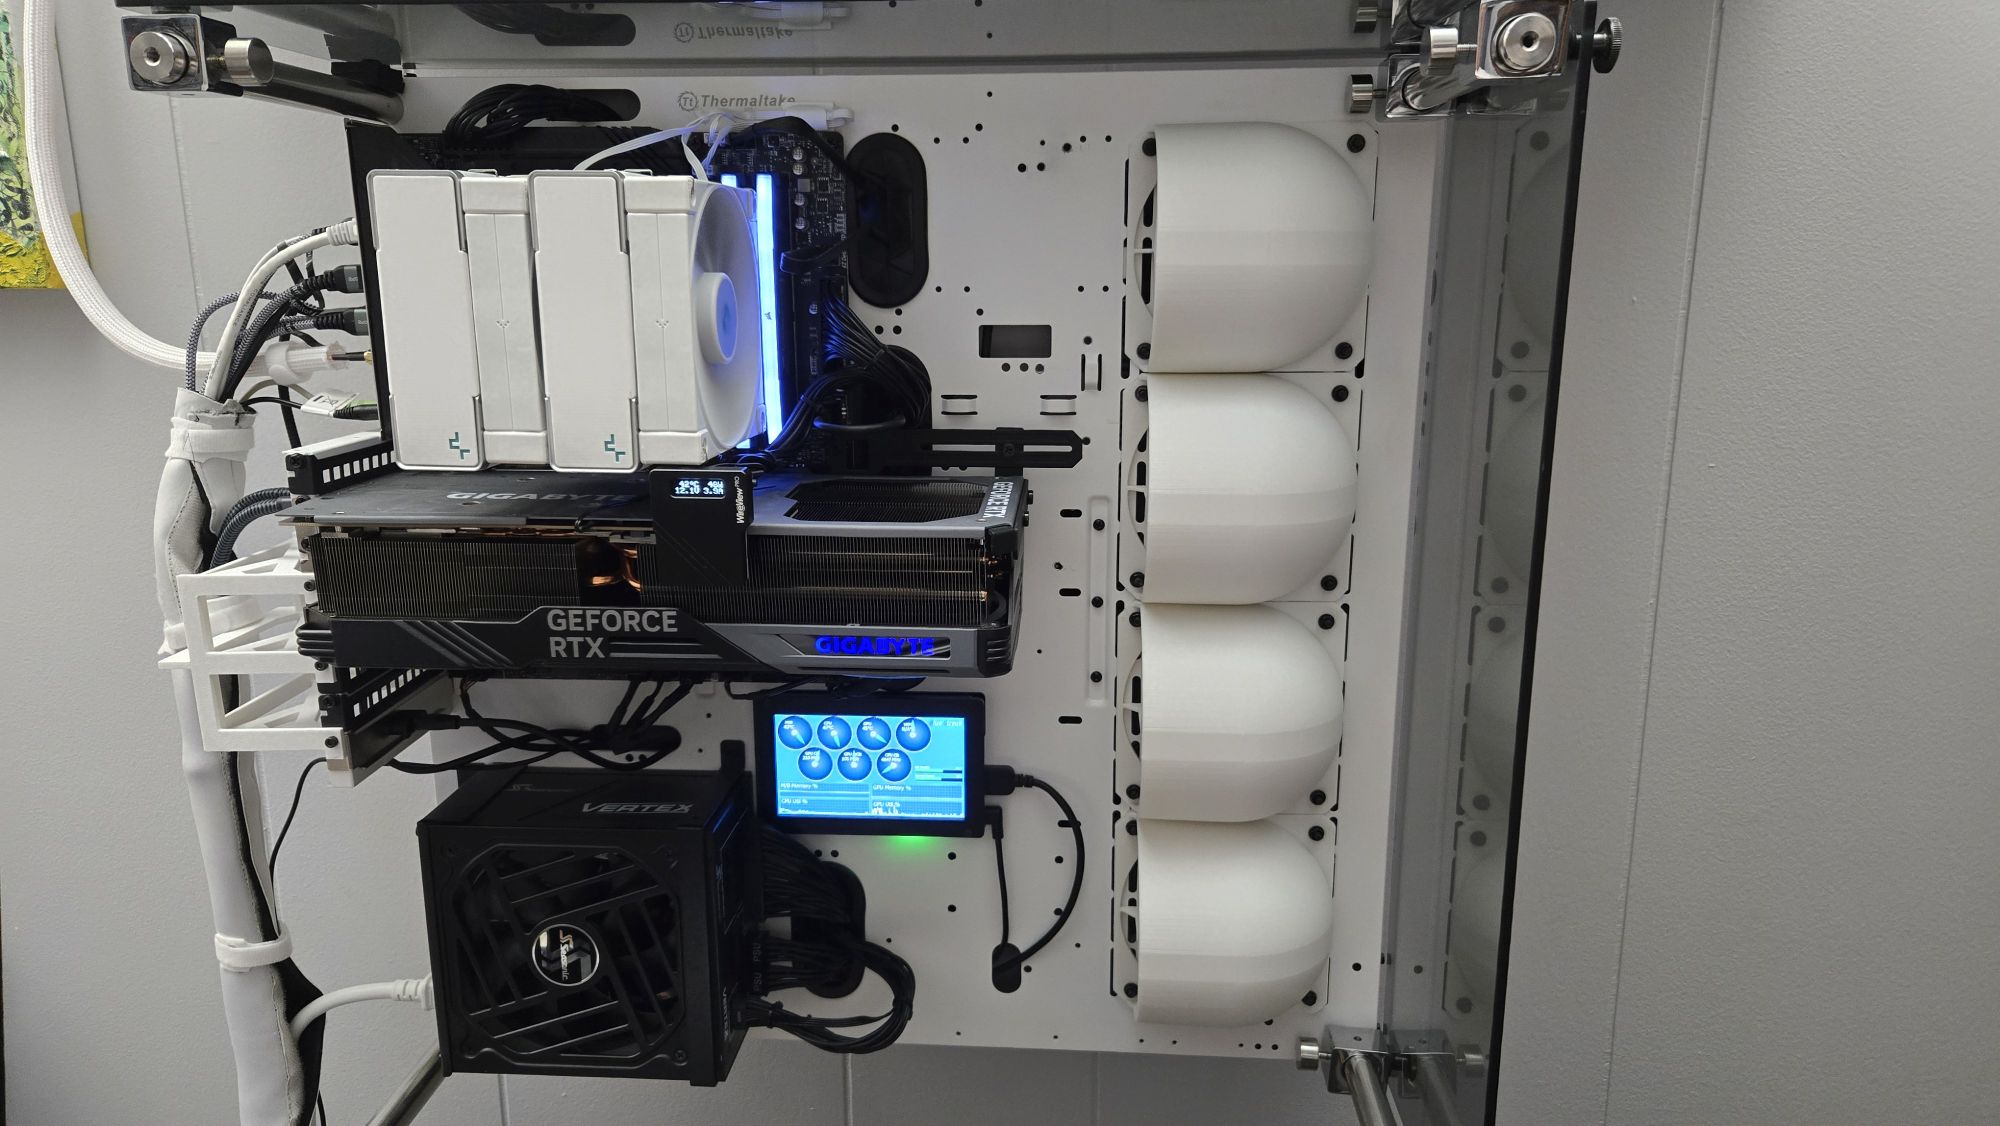
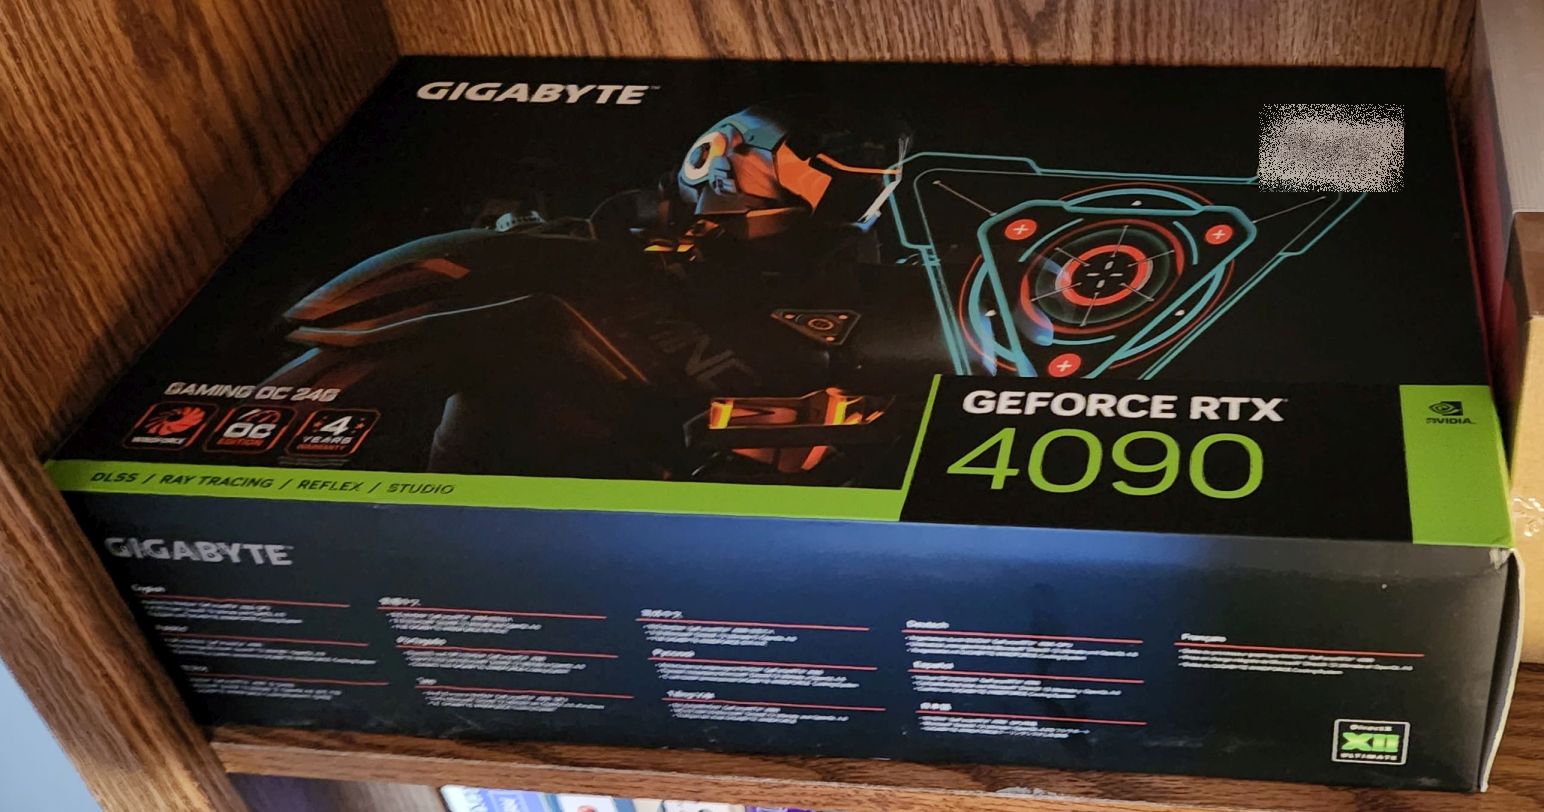
Since EVGA no longer makes graphics cards, the next decision was which manufacturer to go with. I want to say I did exhaustive research on each card and went with the best one I discovered. The truth is that I went with one that had good reviews, was not outrageously marked up, and was actually in stock at Micro Center. That turned out to be the Gigabyte RTX 4090 Gaming Overclocked. I've had it for a while, and it's been rock solid for me. Those games that crashed before are now stable.
The card is a beast physically—enormous and heavy. It includes an anti-sag bracket, which it needs. (Unfortunately, the bracket is only compatible with ATX motherboards. Smaller motherboards won't work with it.) Luckily, my case is a big, open-air model. There are many cases where this card won't fit.
The term "overclocked" regarding this card (and all 4090s I've looked at) should be in air quotes. This card's core (over)clock is 2535 MHz, whereas the reference card's is 2520 MHz. That whopping 0.6% overclock isn't going to be noticeable. Apparently, there isn't any headroom in these chips to squeak out.
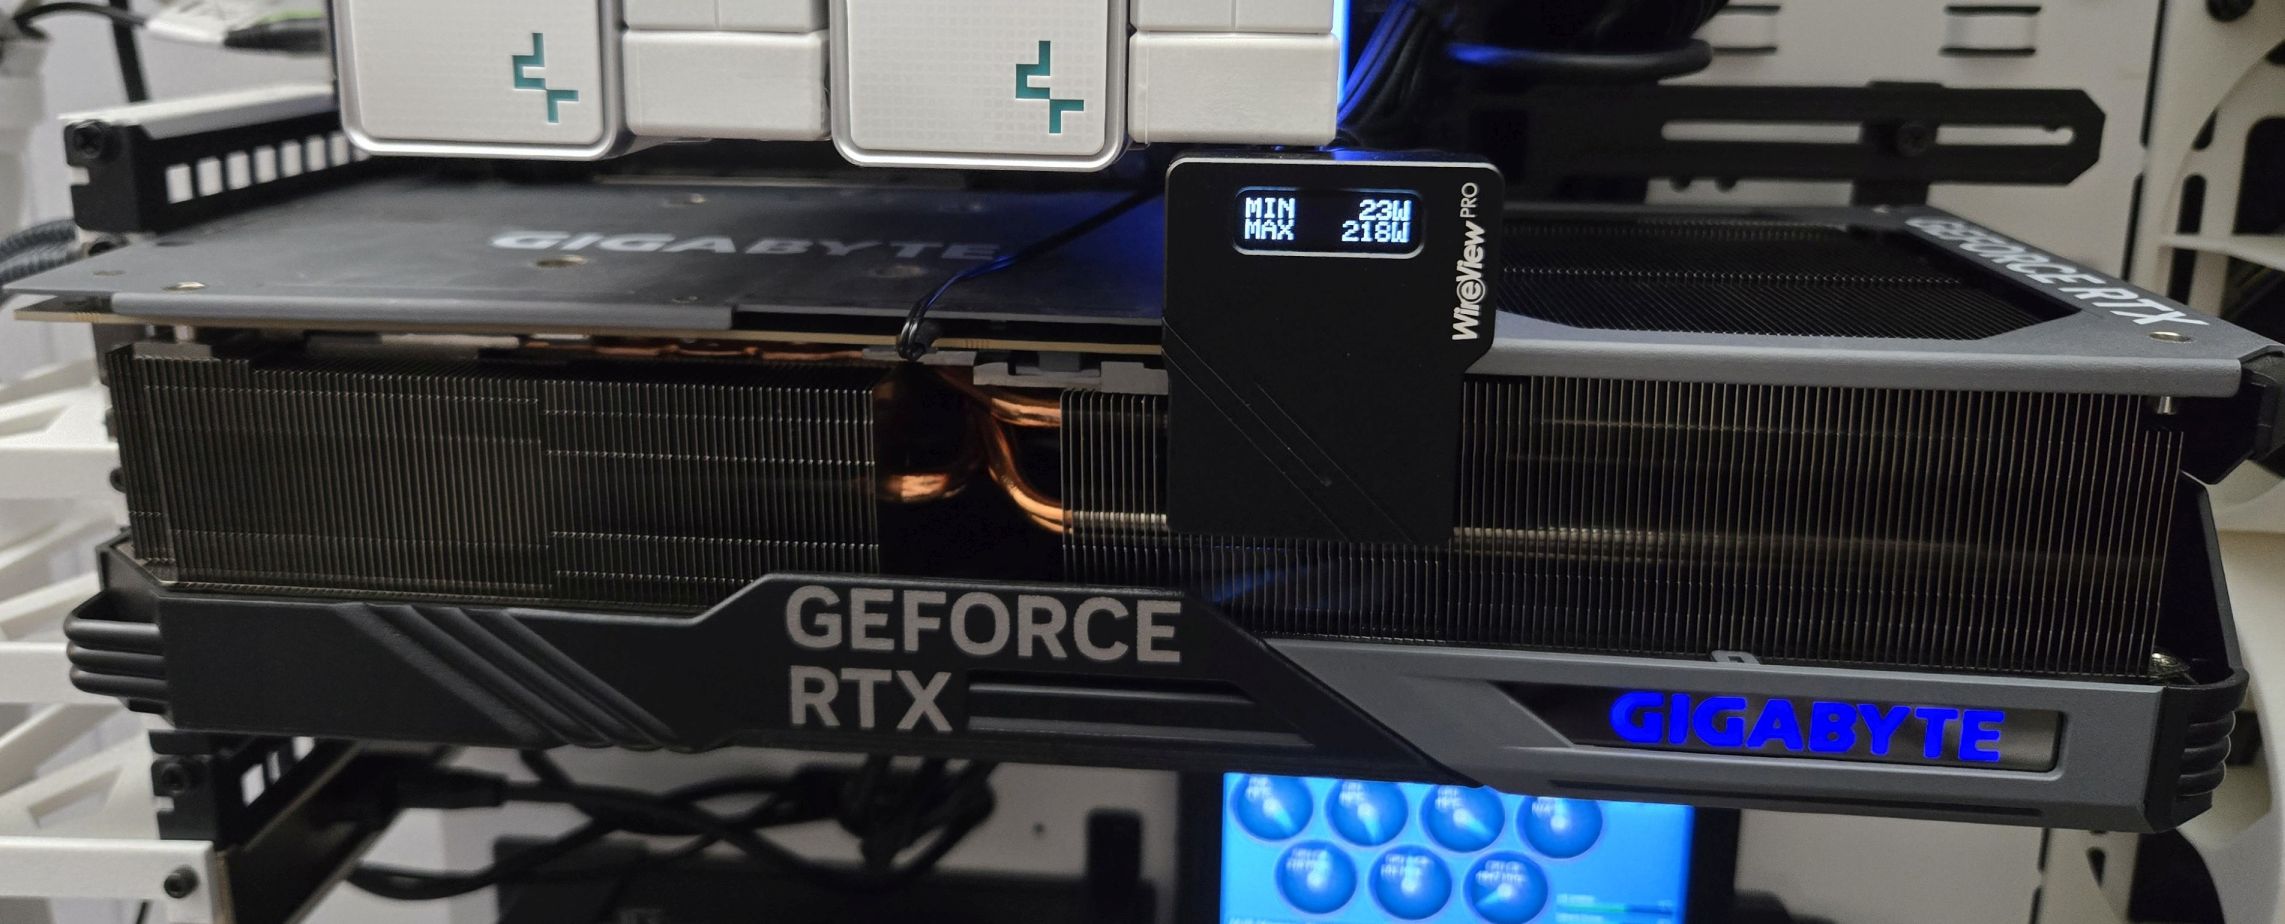
The power connections on these cards have been a concern because of melting and shorting issues. For power, I am using the 12VHPWR (16-pin) cable that came with the Seasonic Vertex GX 1000W PSU, coupled with a Thermal Grizzly WireView Pro. Even though my case is big and wide, I was concerned about bending the power cable against the side glass. The U-shaped connector of the WireView Pro solves that issue and helps hide the cable as well. I was still concerned about overheating, though. (If anyone reading this decides to get one of these, there are two models. The correct one depends on how the 12VHPWR connector is mounted on the GPU's PCB.)
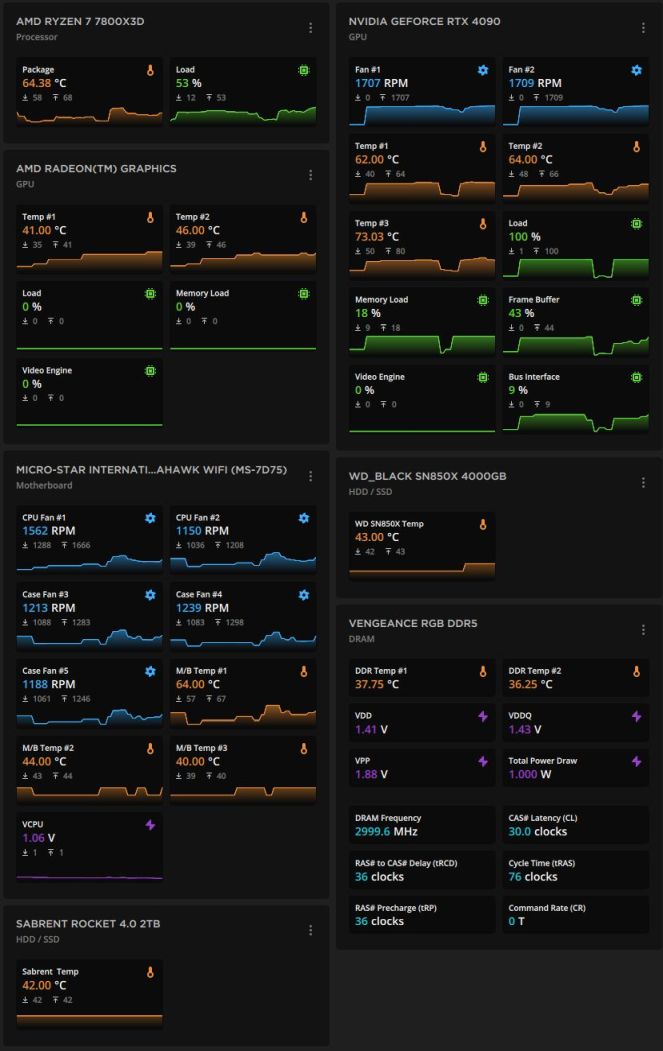
The Gigabyte RTX 4090 Gaming OC has three cooling fans on the shroud. From the Corsair iCUE dashboard, I can see that they don't start spinning until the card reaches ~50°C. I could change the fan's temperature curve, but it's not necessary. When doing productivity work, the fans rarely spin. When gaming, the fans spin but are never audible over the game. The temps usually stay at 60°C - 65°C. I occasionally see the mid-70s running 3DMark benchmarks.
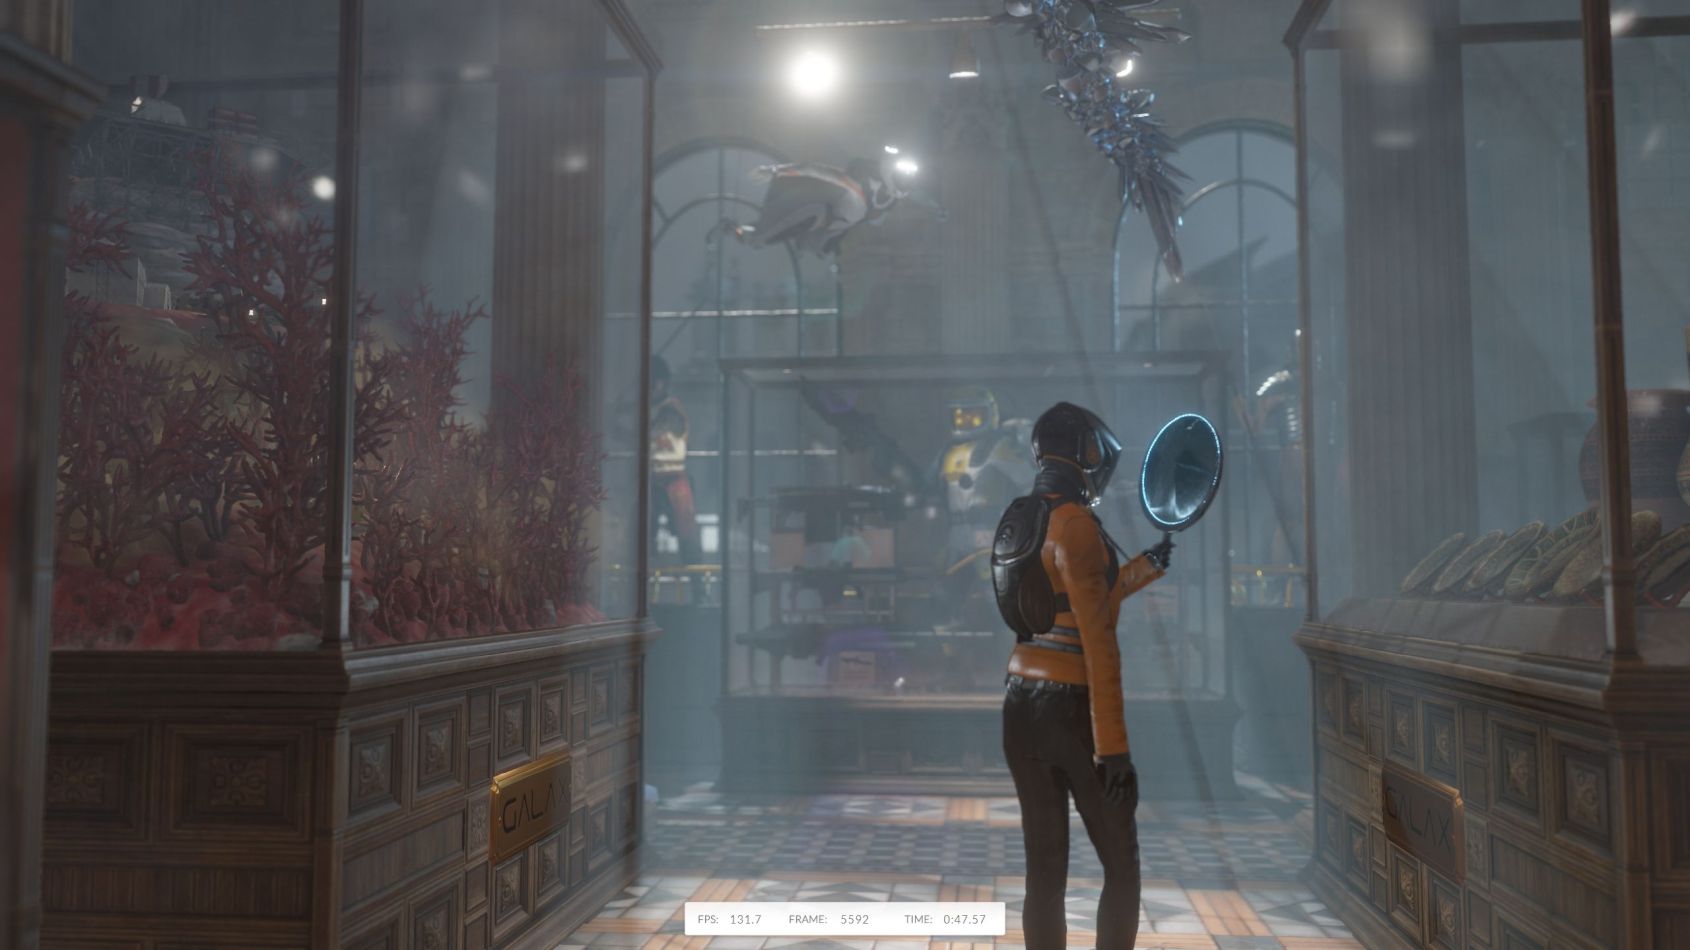
I won't delve into every 3DMark benchmark, but below are some results from Time Spy Extreme, a 4K gaming benchmark. Graphics test 1 averaged 121.74 FPS, and Graphics test 2 averaged 113.42 FPS. The GPU temperatures range from about 62°C to 73°C, depending on where the temperatures were measured. The final score with the Gigabyte GeForce RTX 4090 and AMD Ryzen 7 7800X3D was 14,267 for the test shown. (Graphics Score: 19,250 and CPU Score: 5,784)

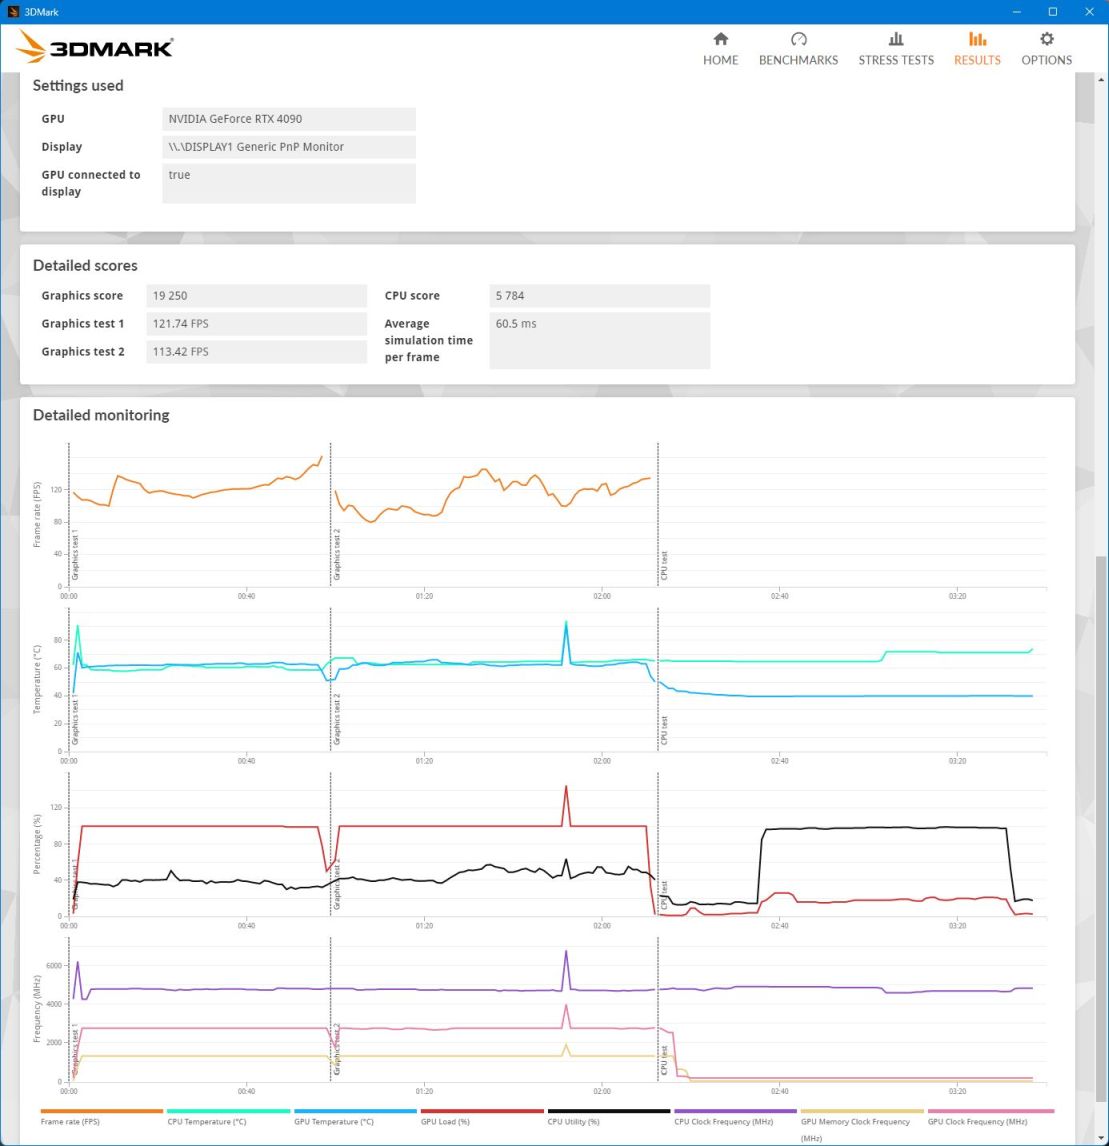
With the Gigabyte GeForce RTX 4090 and AMD Ryzen 9 3900X, I got a higher score of 14,897 (Graphics Score 19,238 and CPU Score 6,538). While the graphics score was nearly the same, the CPU score of the 3900X was higher because of its additional cores. I wish 3DMark had a way to score only the graphics tests.
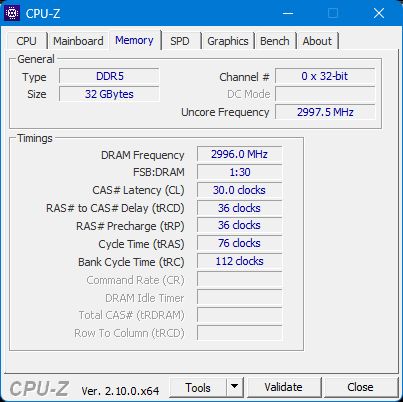
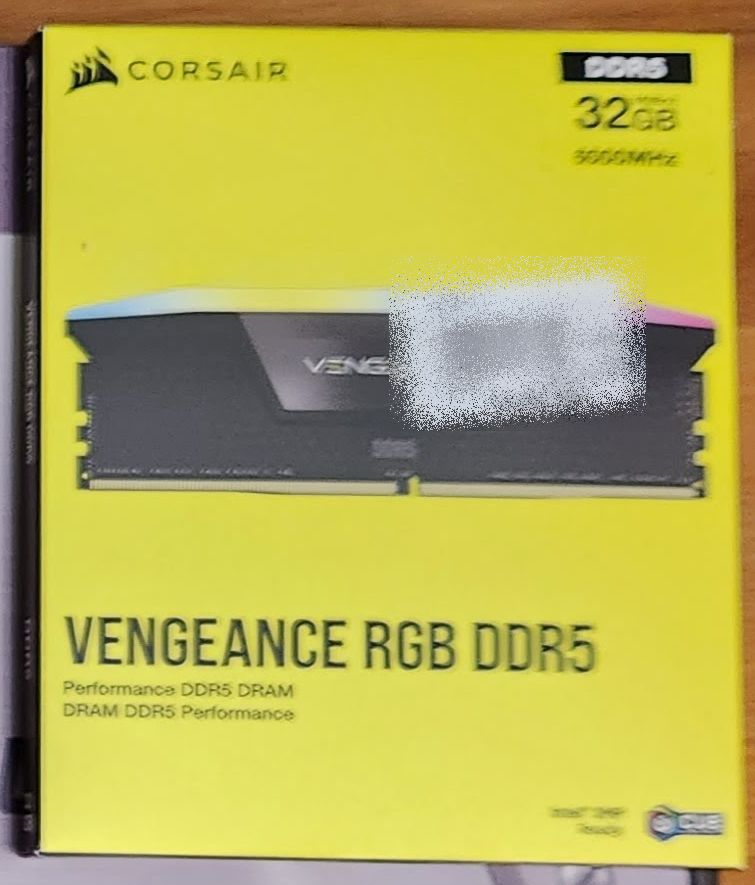
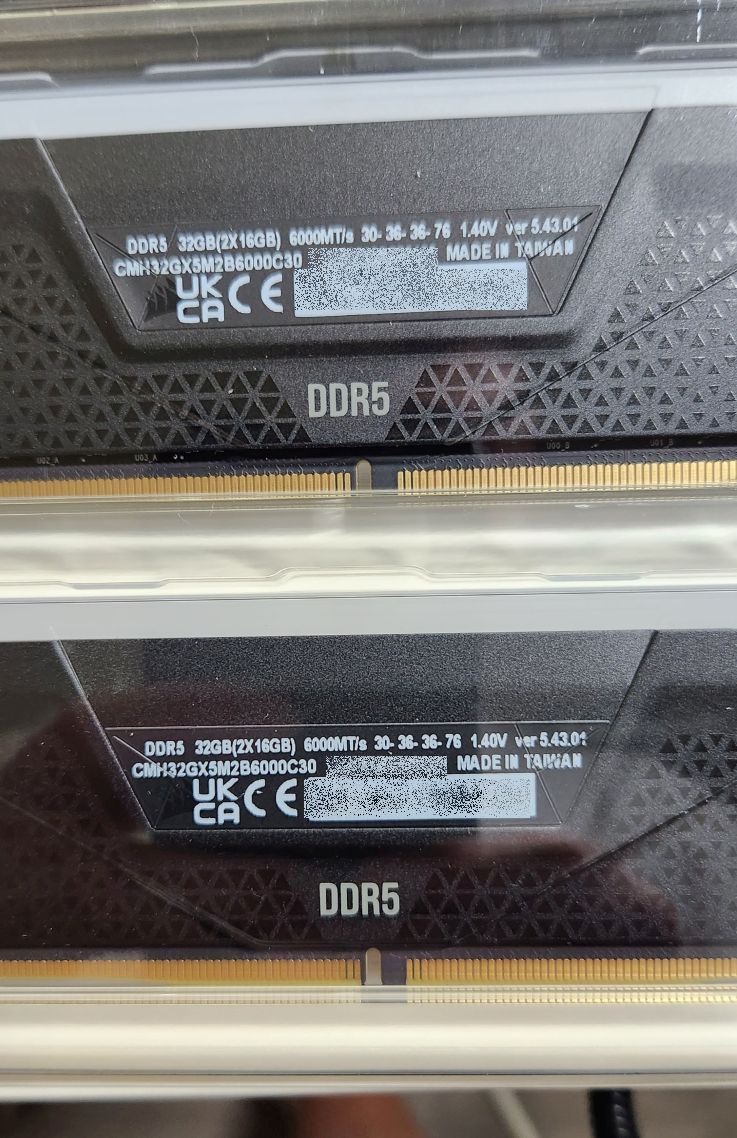
I used 32 GB of RAM in this build, just like my last one. While 16 GB seems to get filled up (or nearly so), 32 GB seems to be still fine. I used a Corsair Vengeance RGB 32GB DDR5-6000 CL30 Kit (CMH32GX5M2B6000C30). With my previous system, I found out that AMD CPUs (or AMD motherboards—I'm not sure which) don't seem to like four sticks of RAM. I recommend sticking with two regardless of whether 32 or 64 GB of RAM is installed. This does mean that having four DIMM slots is relatively meaningless, though. If I need to upgrade to 64 GB of RAM, I will likely replace the two 16 GB sticks with a pair of 32 GB ones.
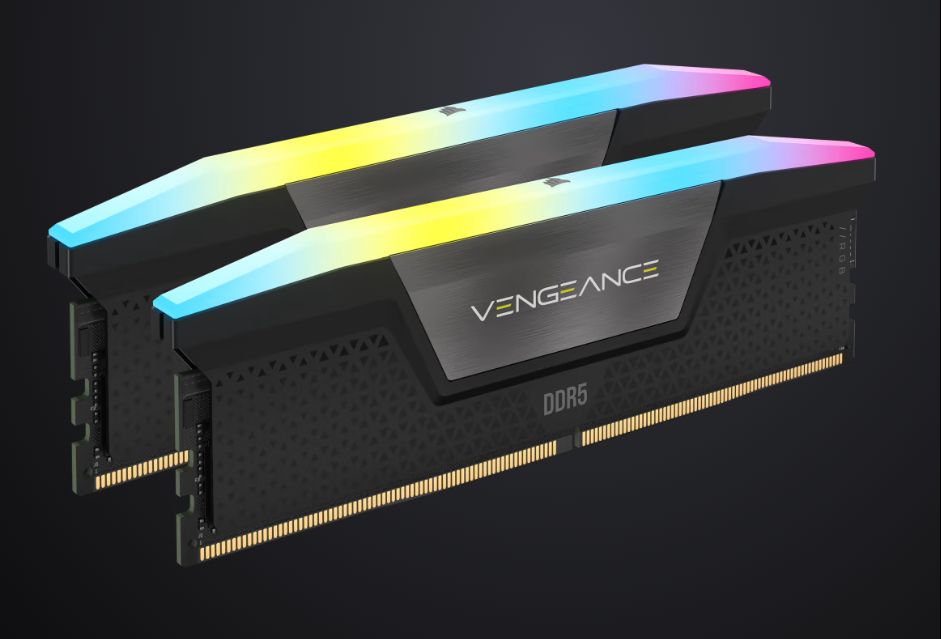
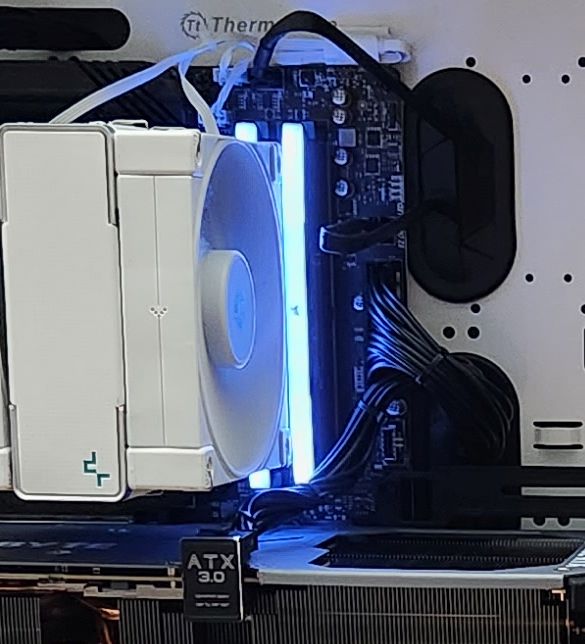
I'm still not a big fan of RGB. My previous water-cooled system was flashy without any extra RGB, so this memory's RGB is a nice touch, but I didn't go overboard with RGB in this system. If a component came with it, I used it but didn't go out of my way. I set the RGB to a light, solid blue, and that was it.
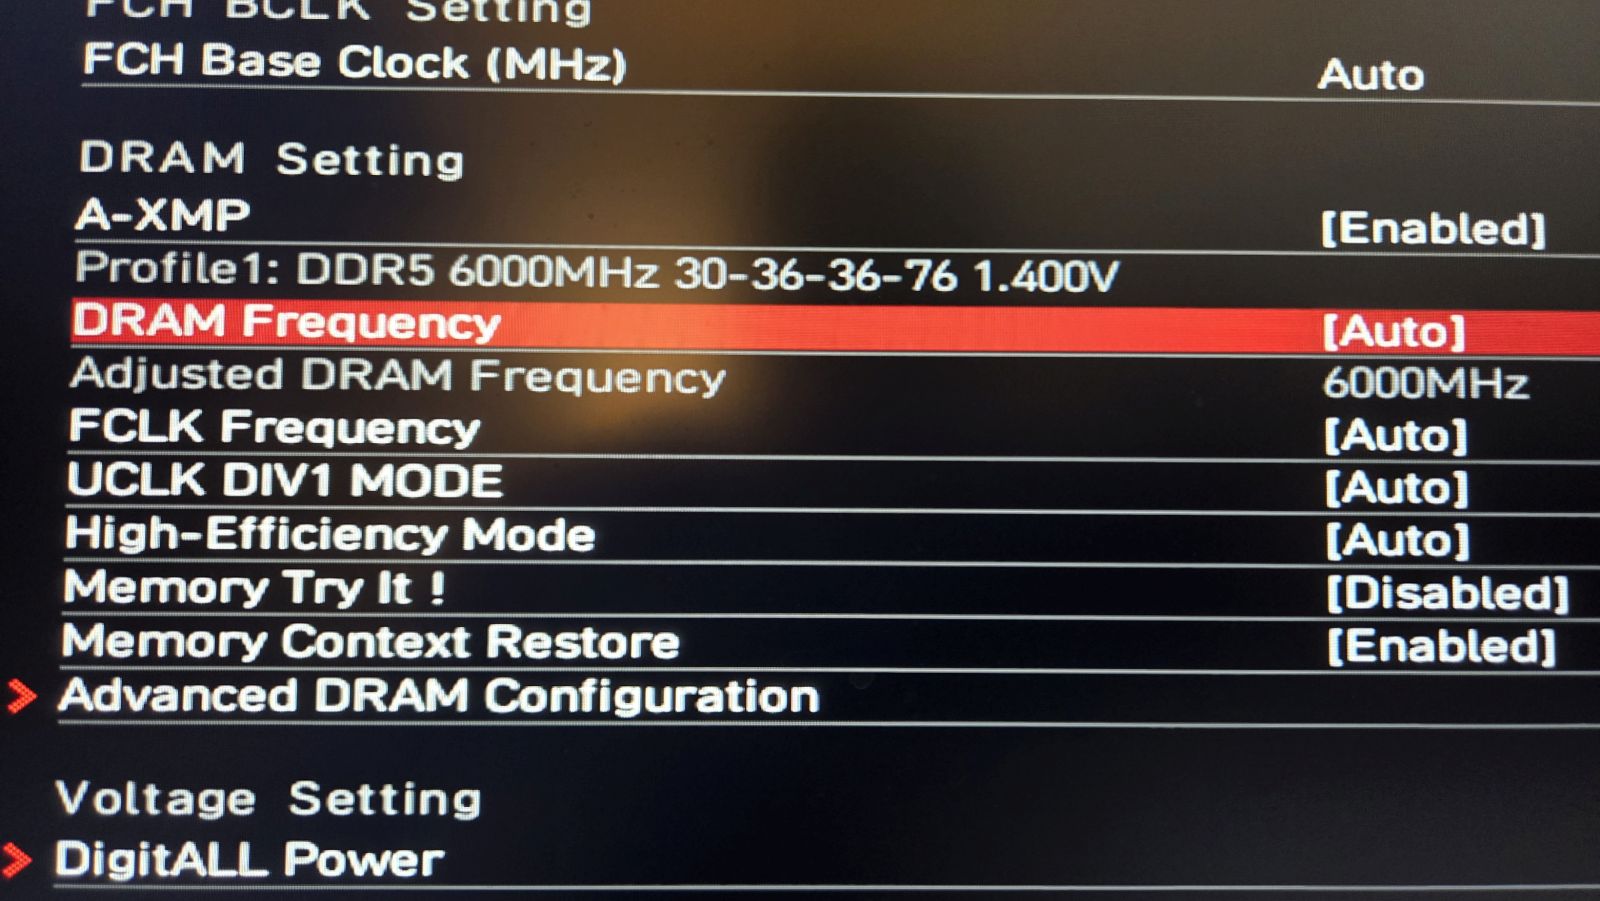
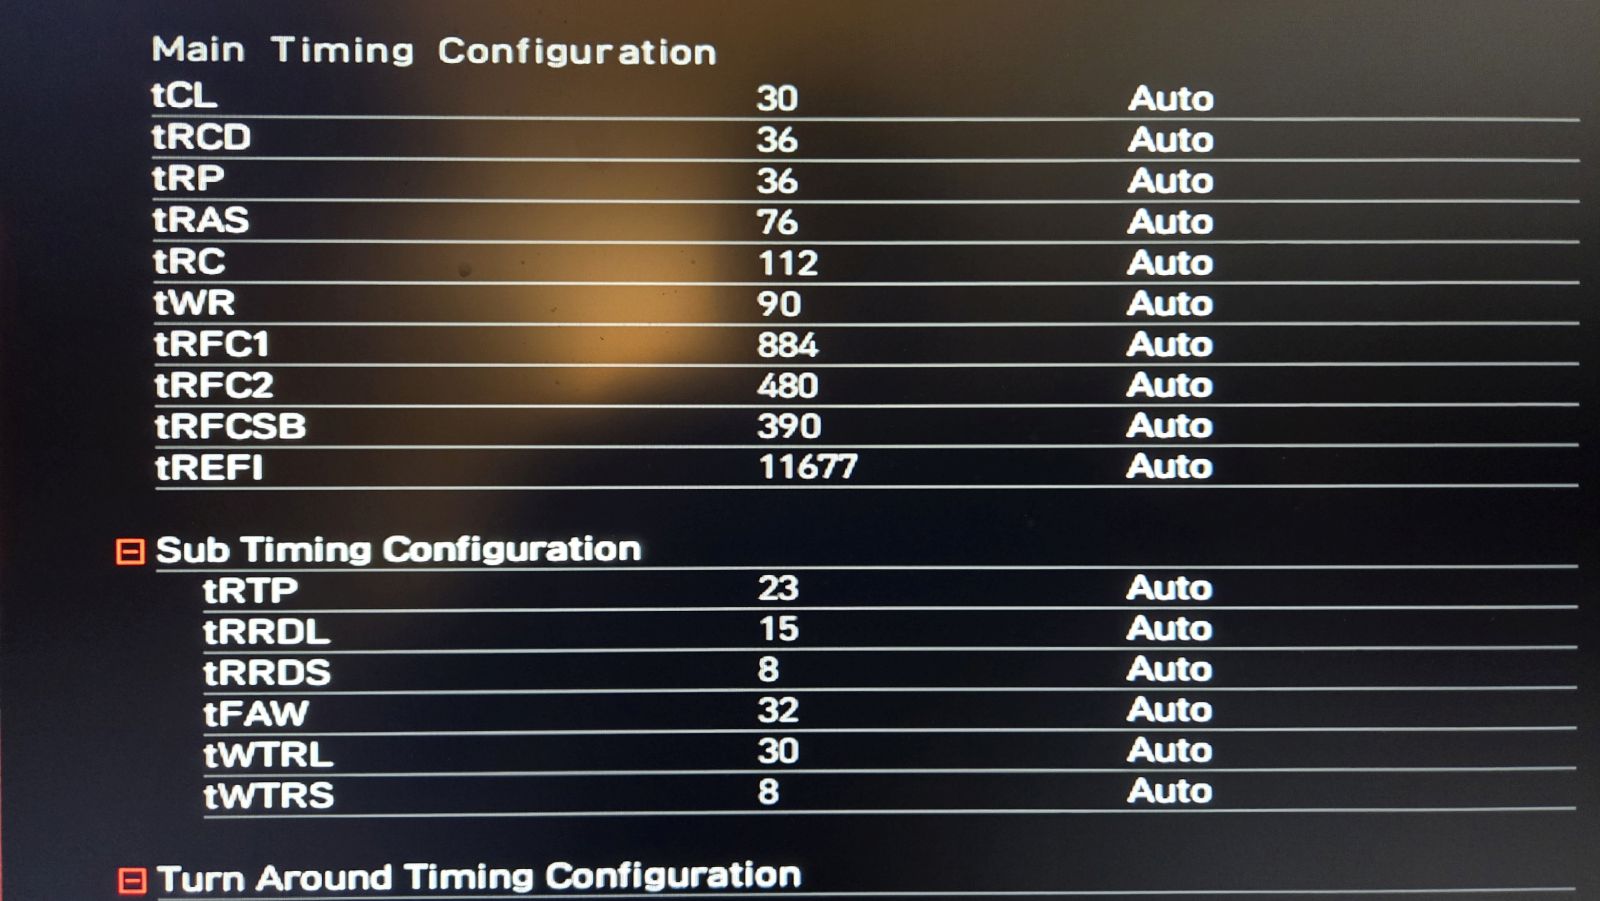
I didn't realize until I built the system that I accidentally bought RAM optimized for Intel CPUs. The MSI B650 Tomahawk WiFi (AM5) motherboard recognized the RAM's Intel XMP-6000 profile and kept the timings of 30-36-36-76 at 1.4V and a frequency of 3,000 MHz. I'm happy it works, and the motherboard's BIOS shows that the correct timings have been picked up as an A-XMP profile.
I noticed that the boot time on this motherboard was much longer than I expected. The issue is that it was retraining memory every time. One of the BIOS updates added the Memory Context Restore option. When enabled, the motherboard avoids retraining memory whenever possible. If you buy an AM5 motherboard and this option is available on the motherboard, you should enable it.
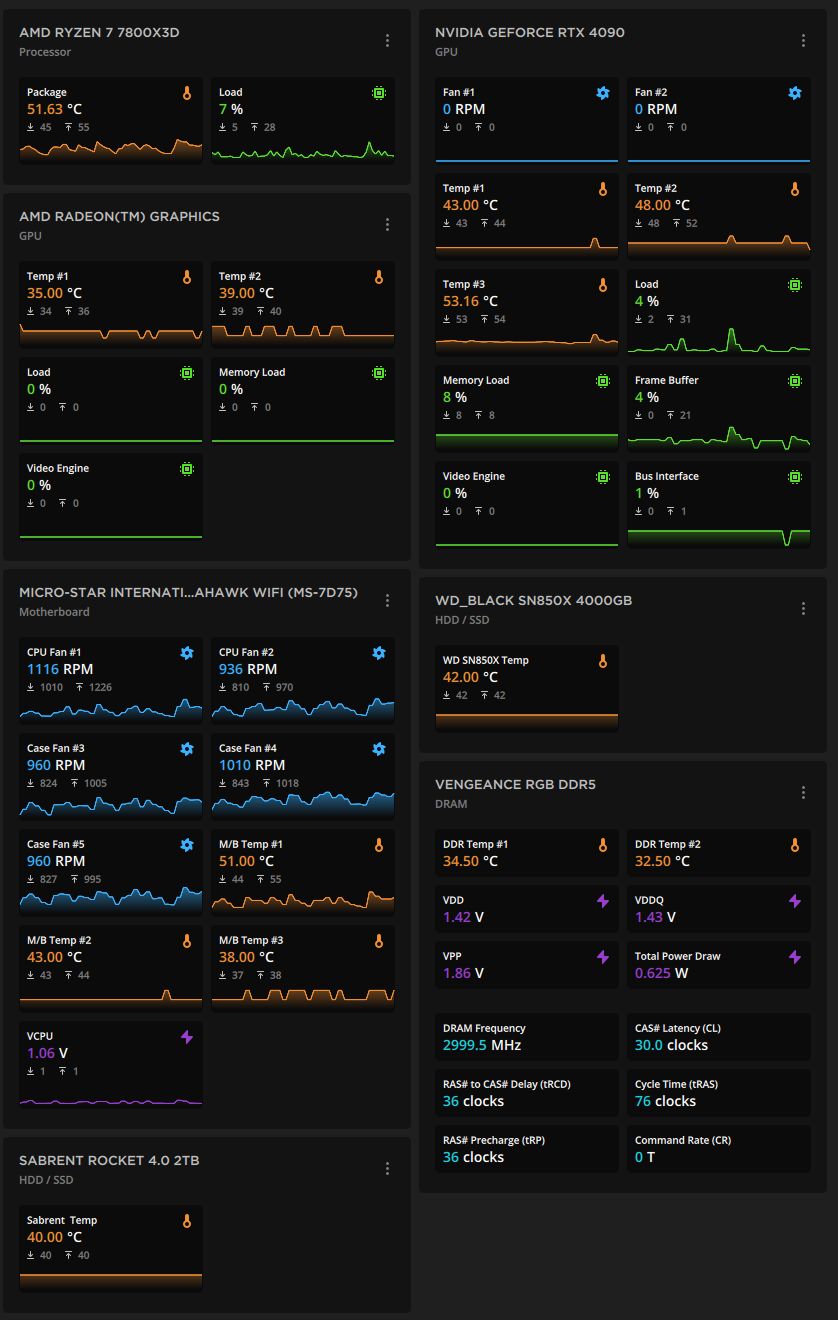
I want to mention the Corsair iCue software. Functionally, I used it to set the memory's color and nothing else. But what I really like is the Dashboard tab, which shows temperature and fan speeds for the motherboard, CPU, GPU, and (of course) memory.
Whenever possible, I recommend building new systems with only M.2 SSDs. I have been doing so for the last several personal and other builds I have done. The builds come out so clean without the SATA SSD (or SATA HDD) power and data cables. The MSI B650 Tomahawk motherboard has three M.2 slots with PCIe Gen 4.0 support. I reused both drives from my last system: a Western Digital Black SN850X 4TB drive as my main drive and a Sabrent Rocket NVMe 4.0 2TB drive as my secondary drive. I upgraded my previous system from the Sabrent Rocket NVMe 4.0 as my primary (boot) drive to the Western Digital Black SN850X 4TB in June 2023. I bought it through a very short-term special offer from Western Digital. Unfortunately, their website doesn't track orders back that far, so I'm unsure exactly what I paid, but I believe it was about $270.
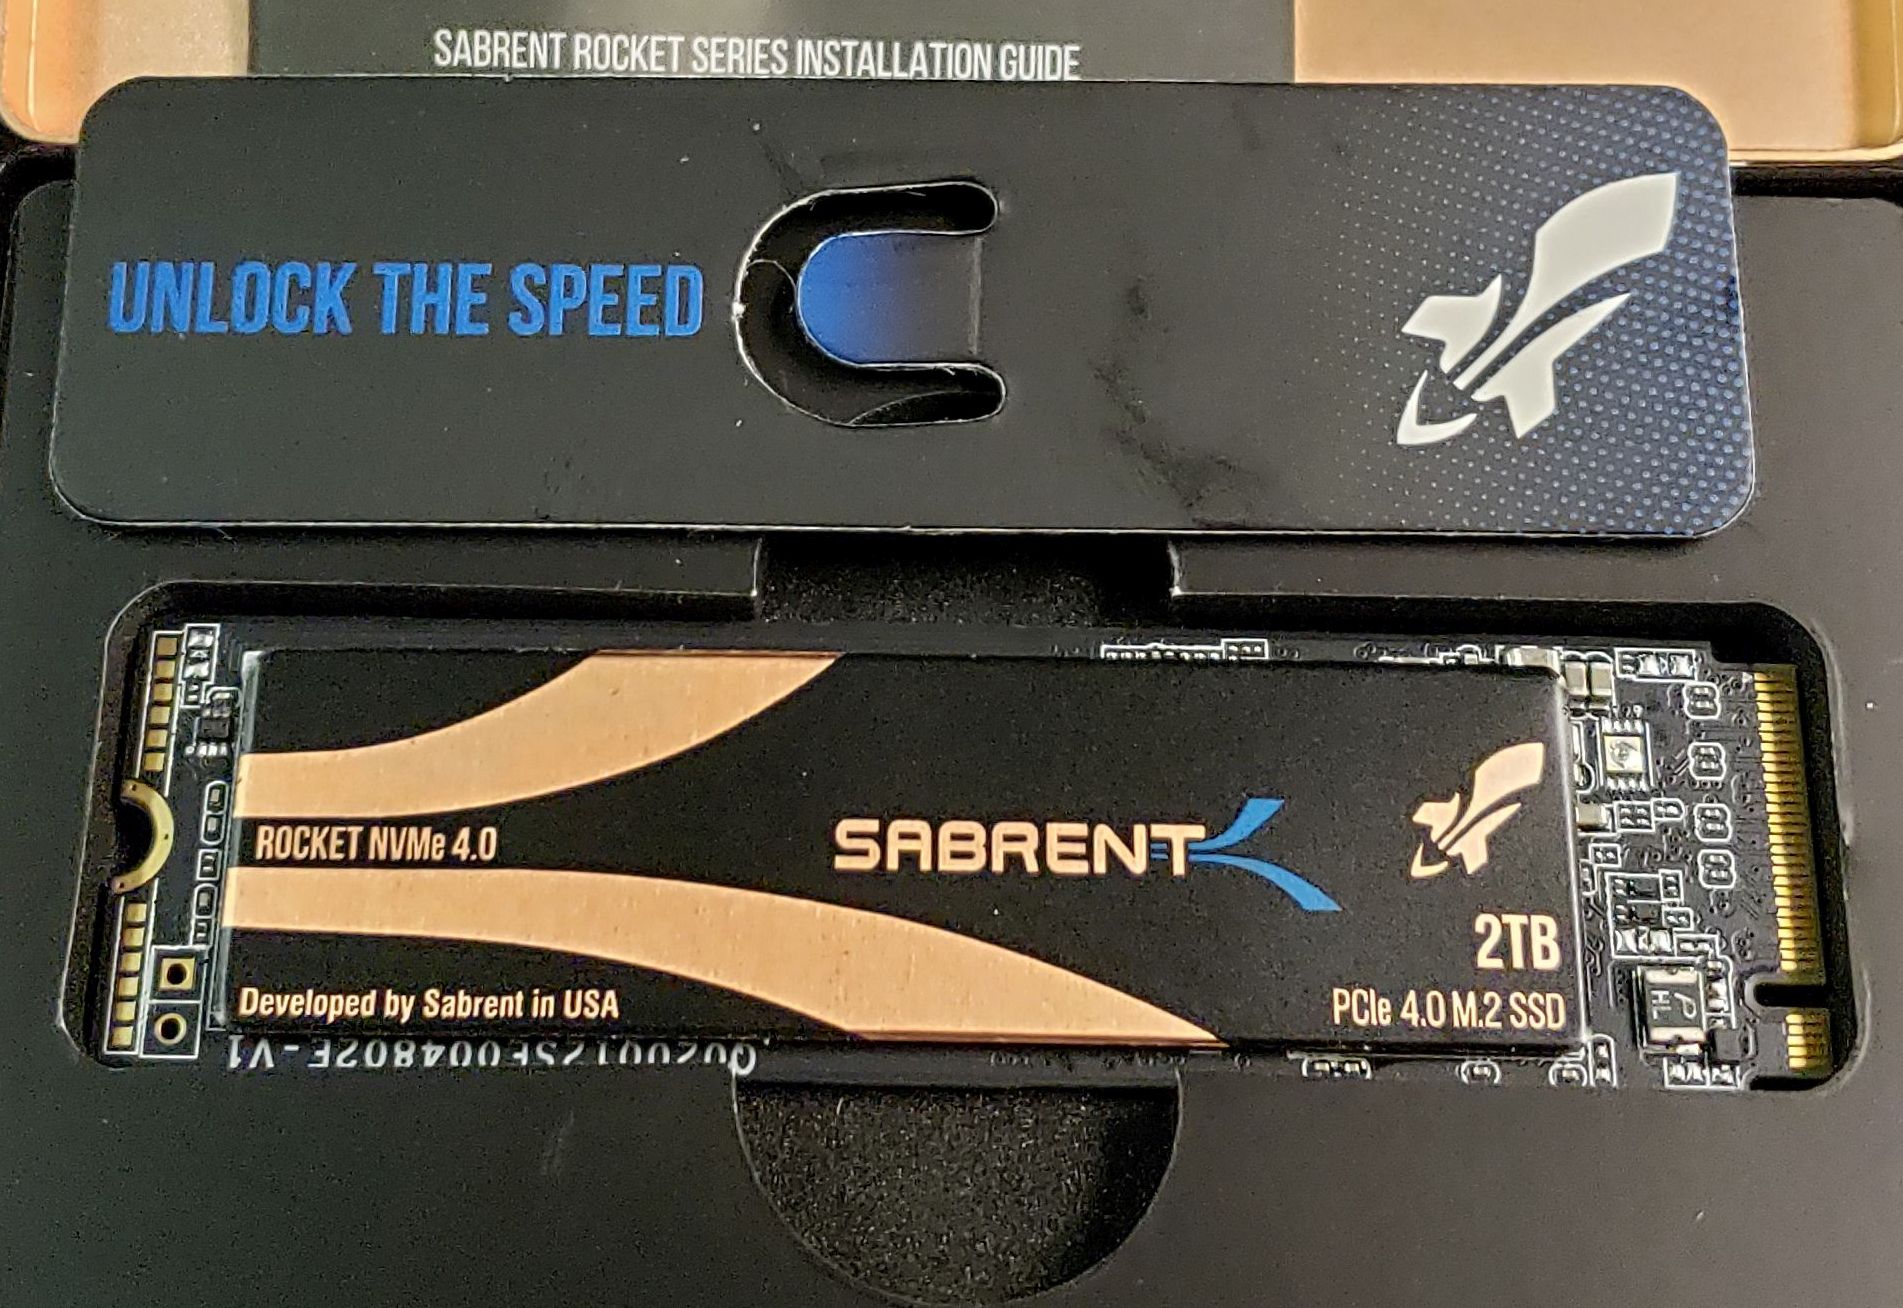

I ran three disk benchmarks: AS SSD Benchmark 2.0.7316, CrystalDiskMark 8.0.5, and ATTO Disk Benchmark 4.01.0f1, and the results are shown below. I have the Western Digital SN850X 4TB partitioned into the C: drive and D: drive. I ran the benchmarks against both partitions. The Sabrent Rocket 4.0 2TB has one large partition. During testing, the Western Digital SN850X 4TB temperature rose from 44°C to a peak of 67°C (in CrystalDiskMark NVMe benchmarking). The Sabrent Rocket 4.0 2TB temperature rose from 42°C to 68°C (also in CrystalDiskMark NVMe benchmarking).
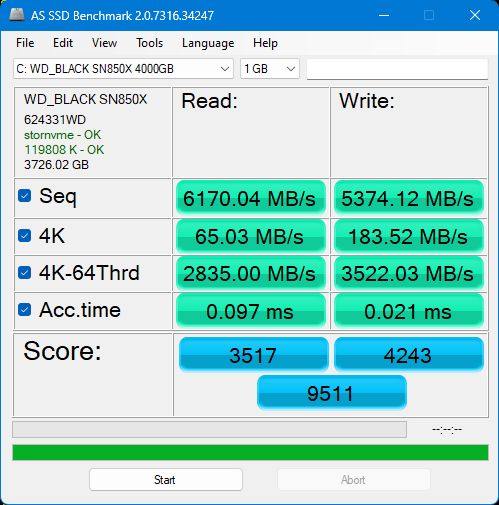
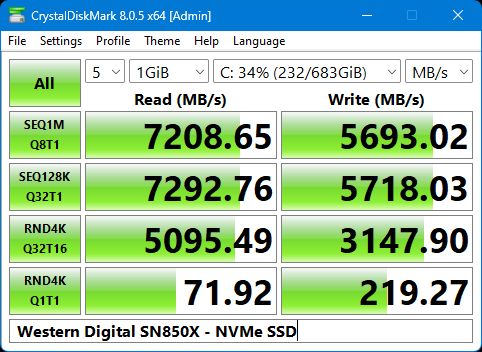
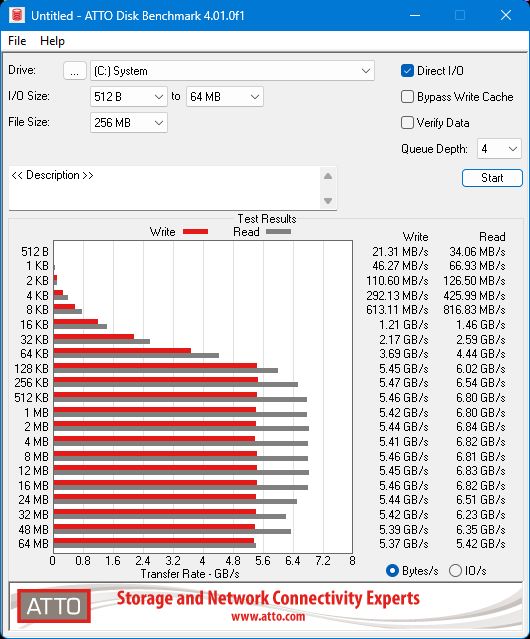
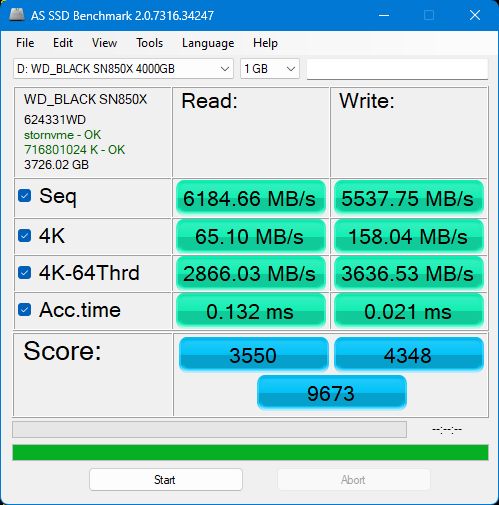
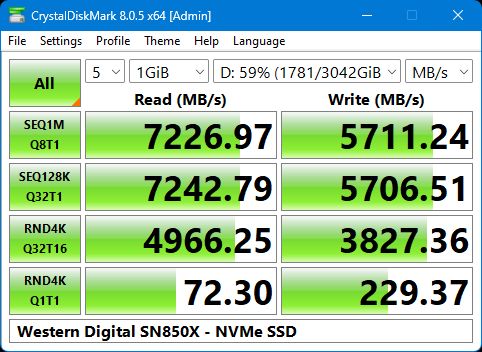
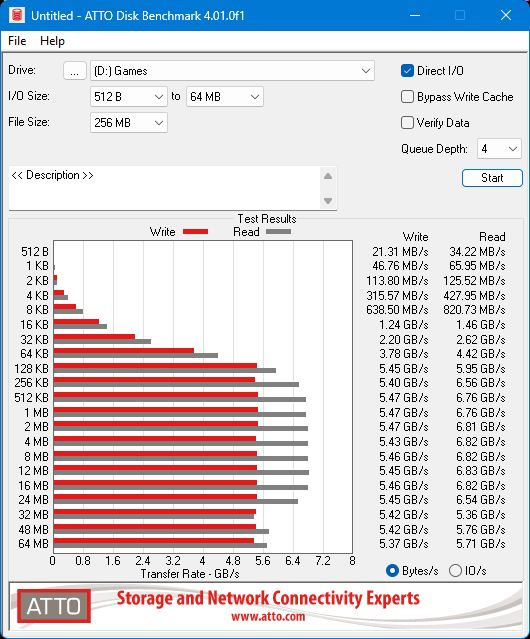
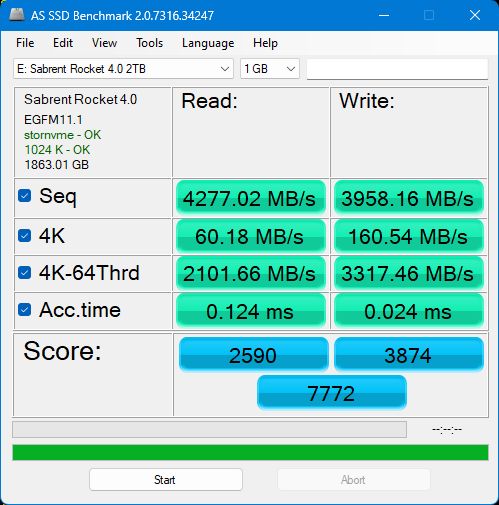
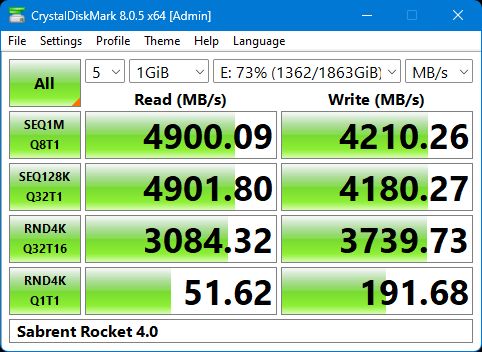

When I got the Sabrent Rocket 4.0 2TB NVMe SSD in 2019, I was blown away by its (PCIe Gen 4) speed. The speed has only gotten better since then. Depending on the test, the improvement from the Western Digital SN850X NVMe SSD is 20-50%. That said, the "feel" isn't that noticeable. The 2019 system booted fast. This system boots fast, too. Perhaps more impressive is that I paid about 50% of the Sabrent Rocket's cost for the Western Digital SN850X while getting twice the space (2TB for the Sabrent versus 4TB for the SN850X).
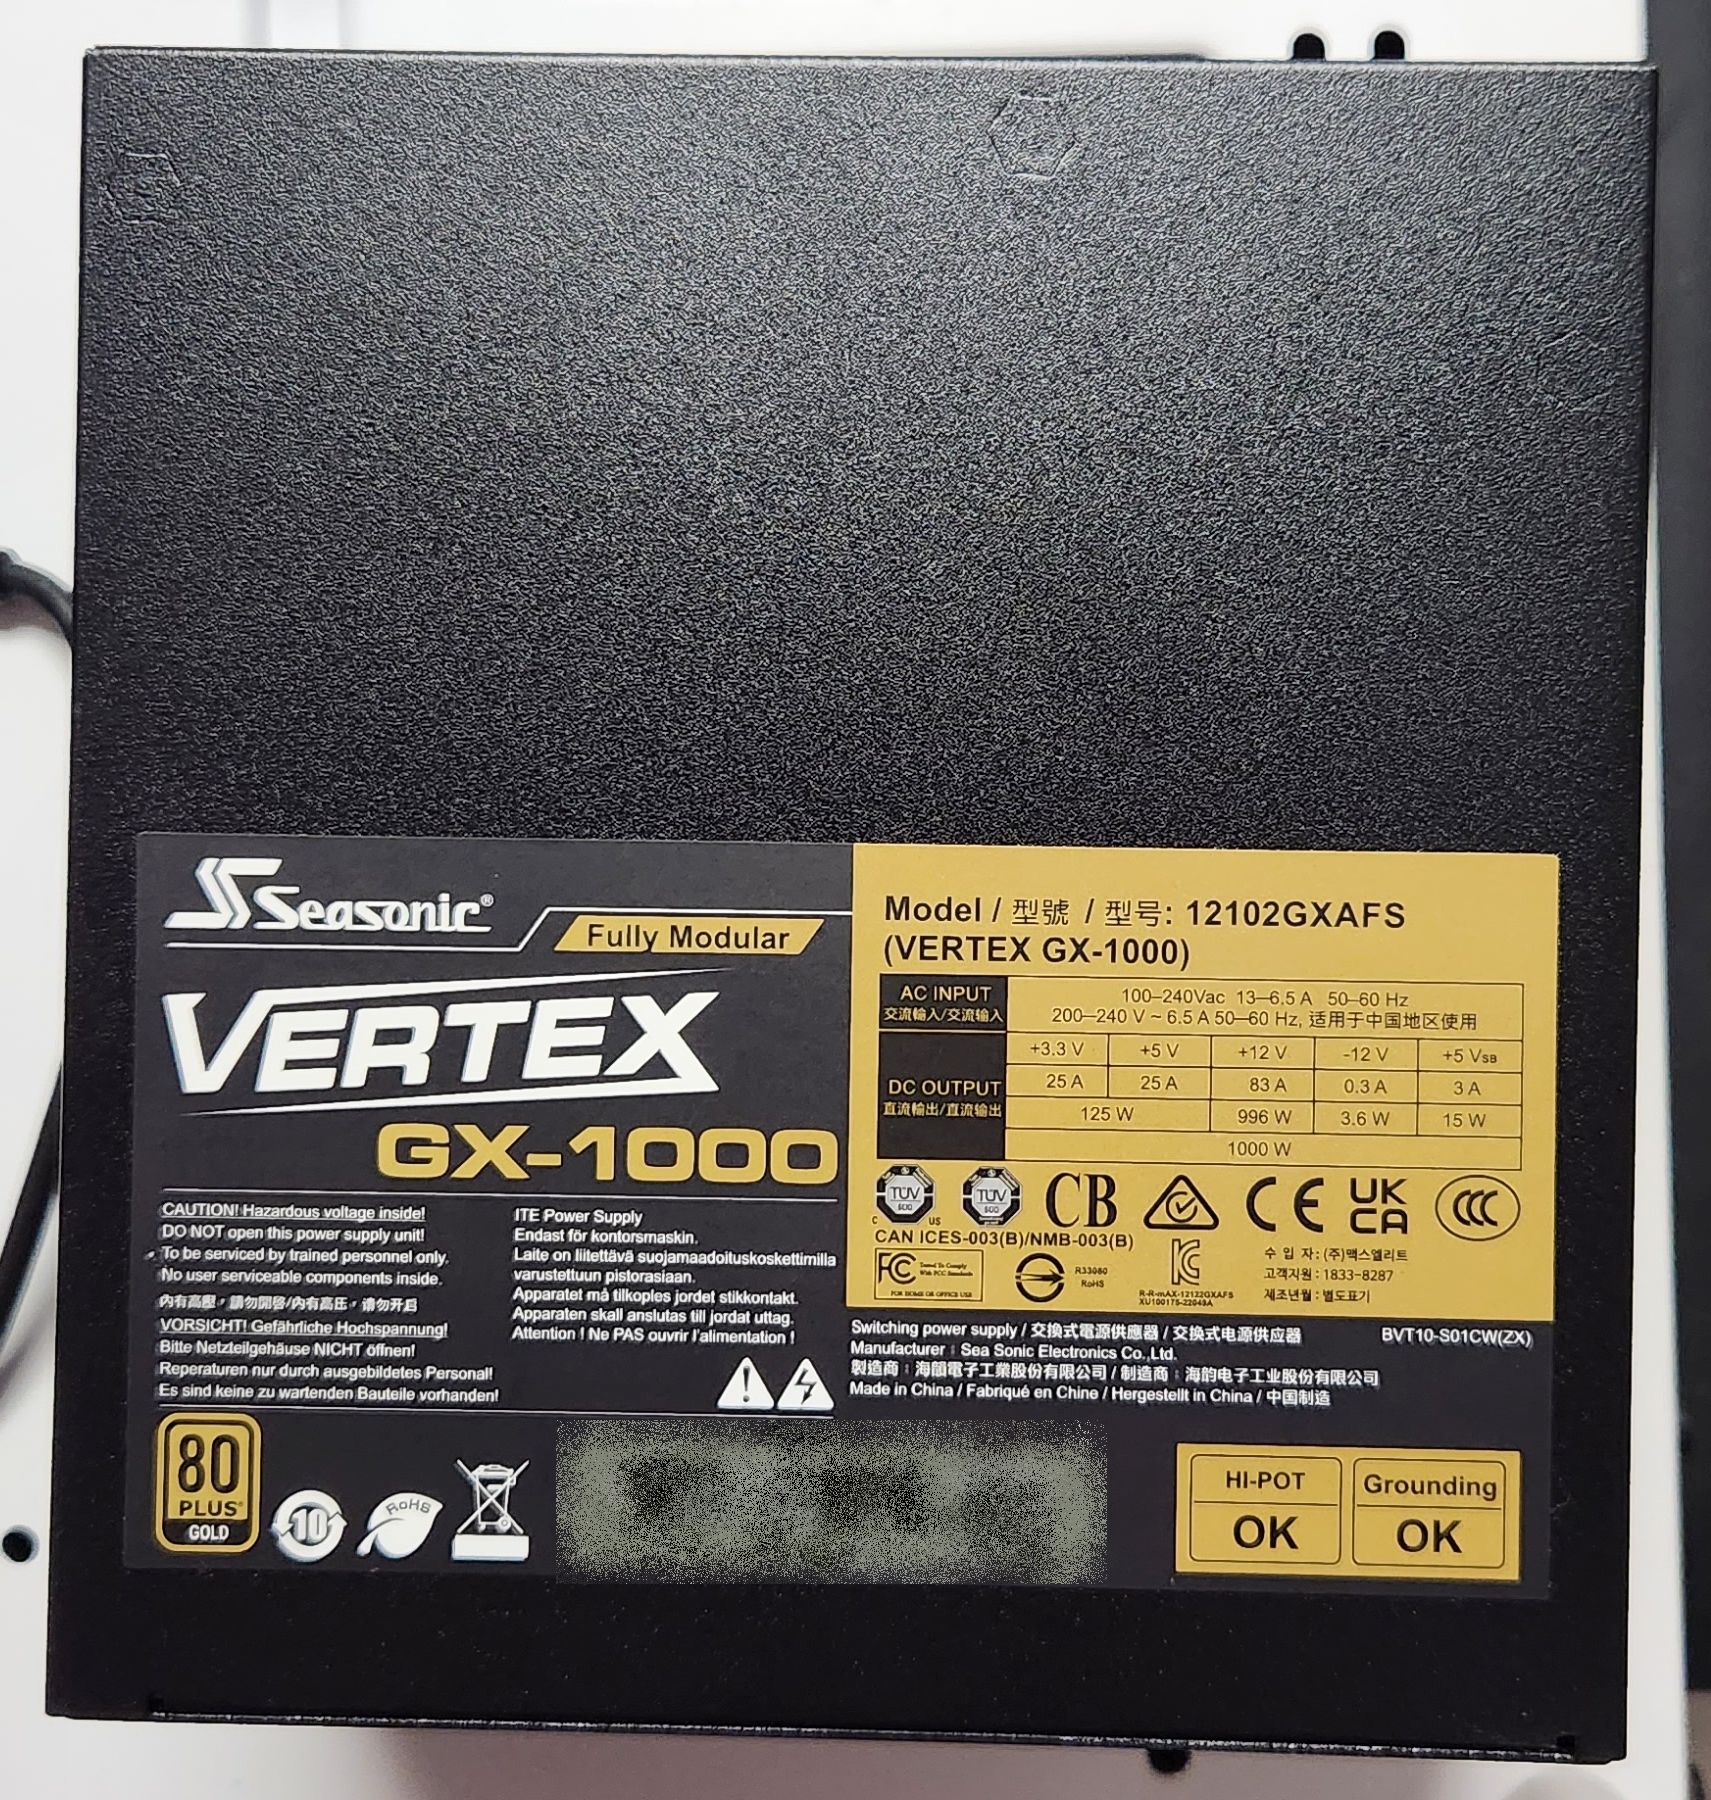
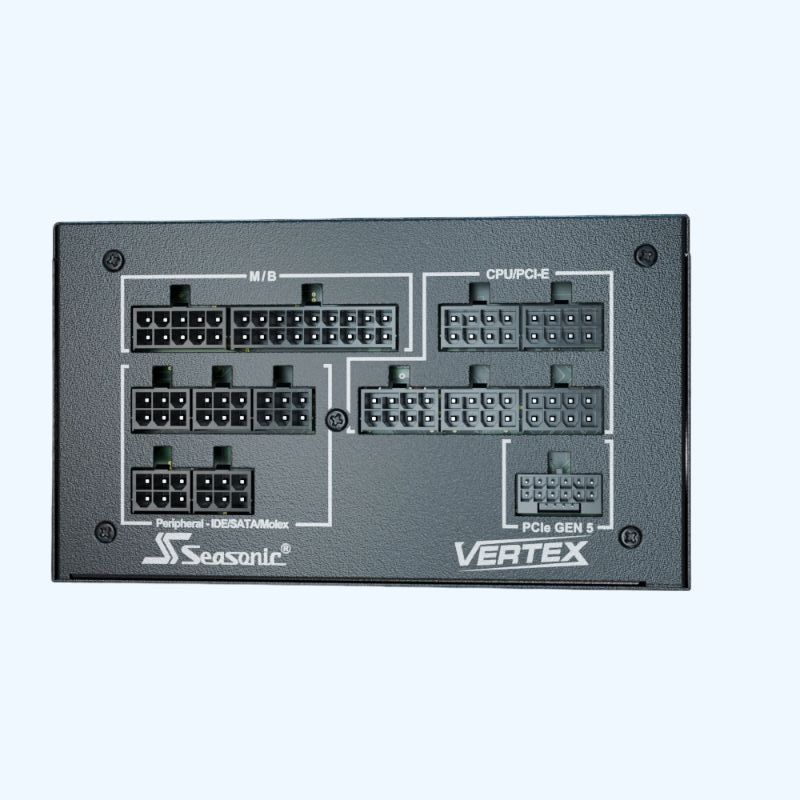
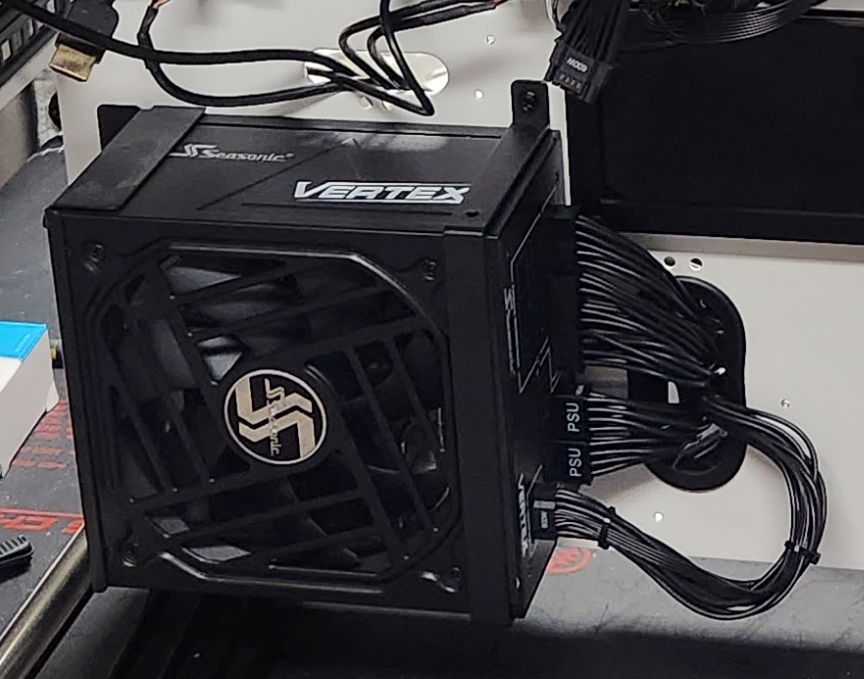
My previous power supply was a Seasonic Prime SnowSilent 750W Titanium, which I liked, but with an RTX 4090, the recommended PSU wattage is 1000W. Instead of going with a white PSU (with black cables), I went with a black Seasonic Vertex GX-1000 (with black cables). I also used the cables that came with the PSU rather than getting custom ones made. One of the reasons that I picked this PSU is that it an ATX 3.0 PSU and has the 12VHPWR connector (and cable) that the Gigabyte RTX 4090 requires. There was (and still is) a lot of controversy about these cables overheating and melting in the GPU power, so I wanted to use the Seasonic OEM cables.
The Seasonic manual had explicit requirements for how much the 12VHPWR cable could be bent. My case - though it's pretty wide - didn't have enough clearance with the tempered glass panel installed. Therefore, I used a U-shaped power adapter, as mentioned and shown in the Graphics section above. I was concerned with the quality of that connector, but under heavy load, I have found it merely warm to the touch.
This gold-rated PSU comes with a 12-year warranty. It also has a feature that shuts the internal fan off when the PSU is lightly loaded. Except when playing some games, the fan is almost always off. I've heard that this feature has caused some problems for Seasonic in that people have returned the units because they have a "broken fan."
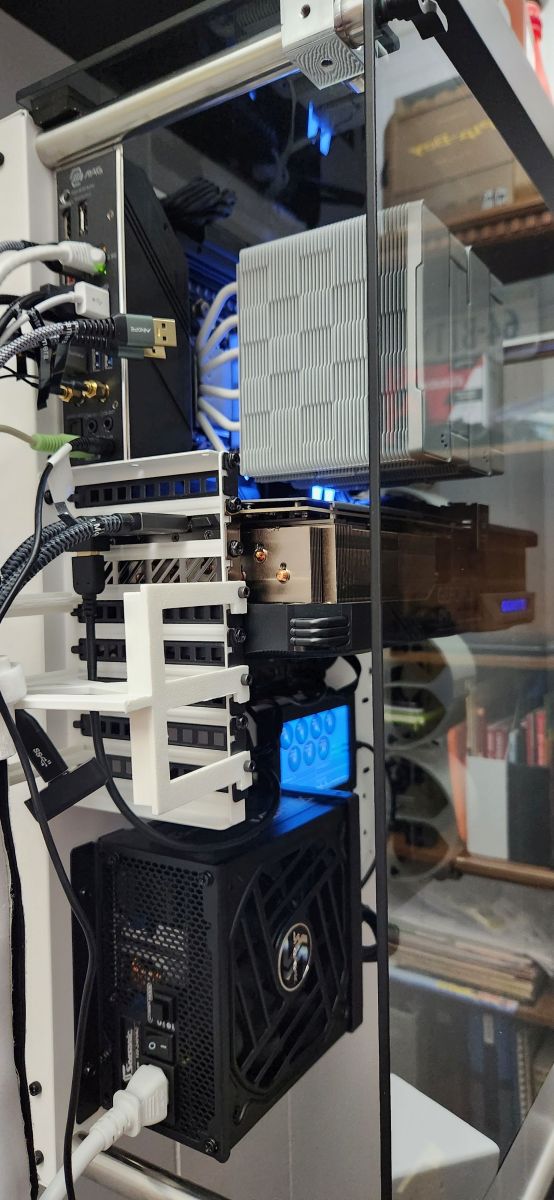
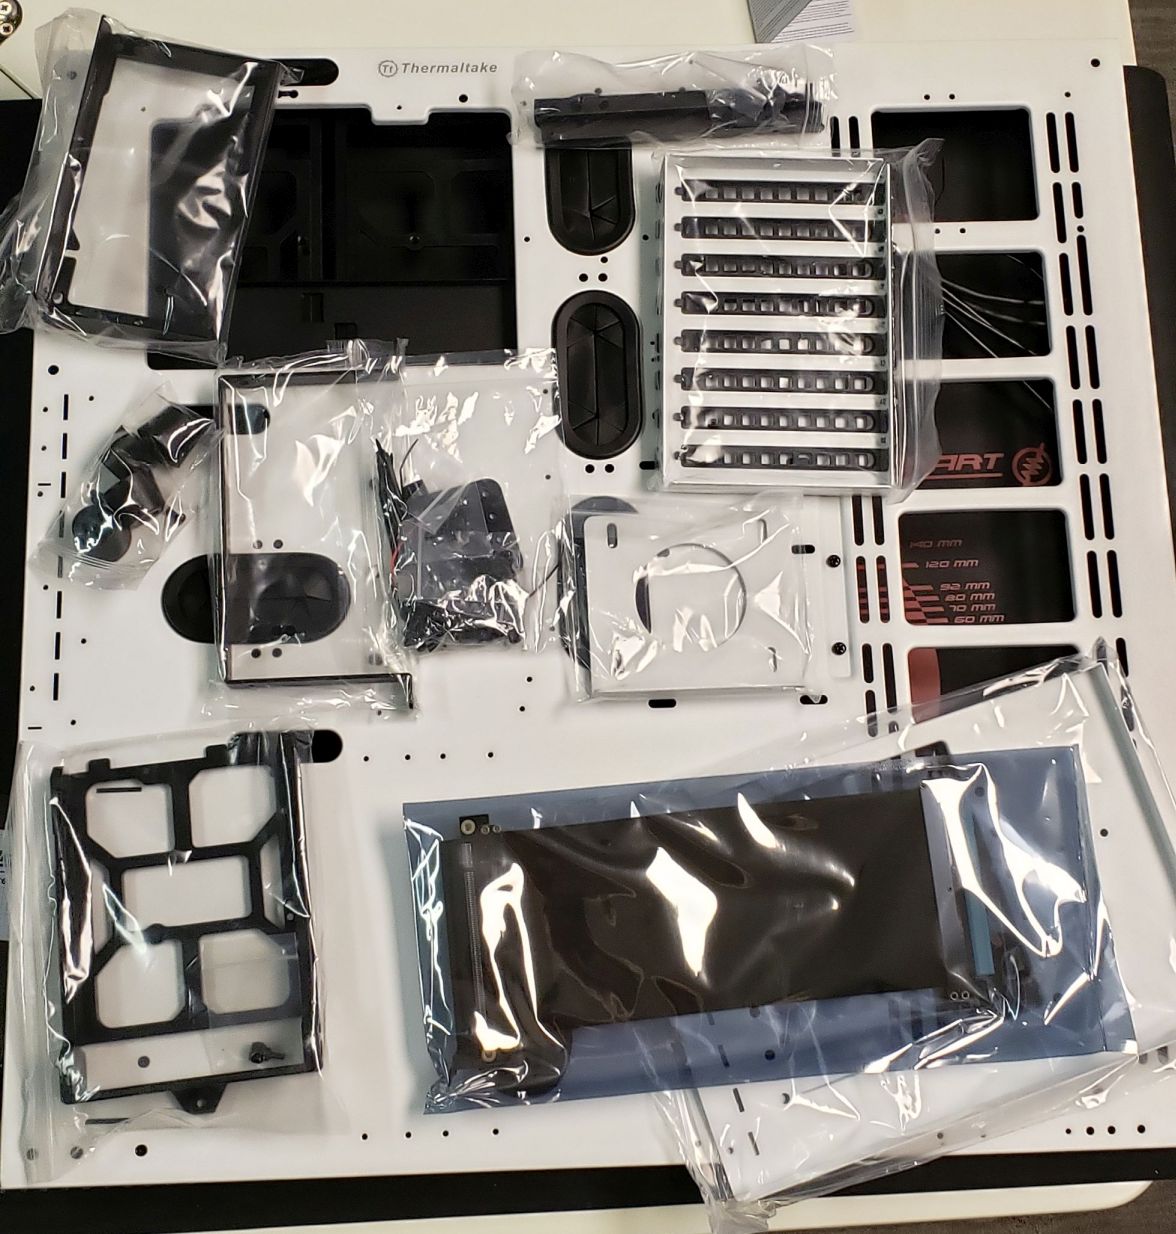
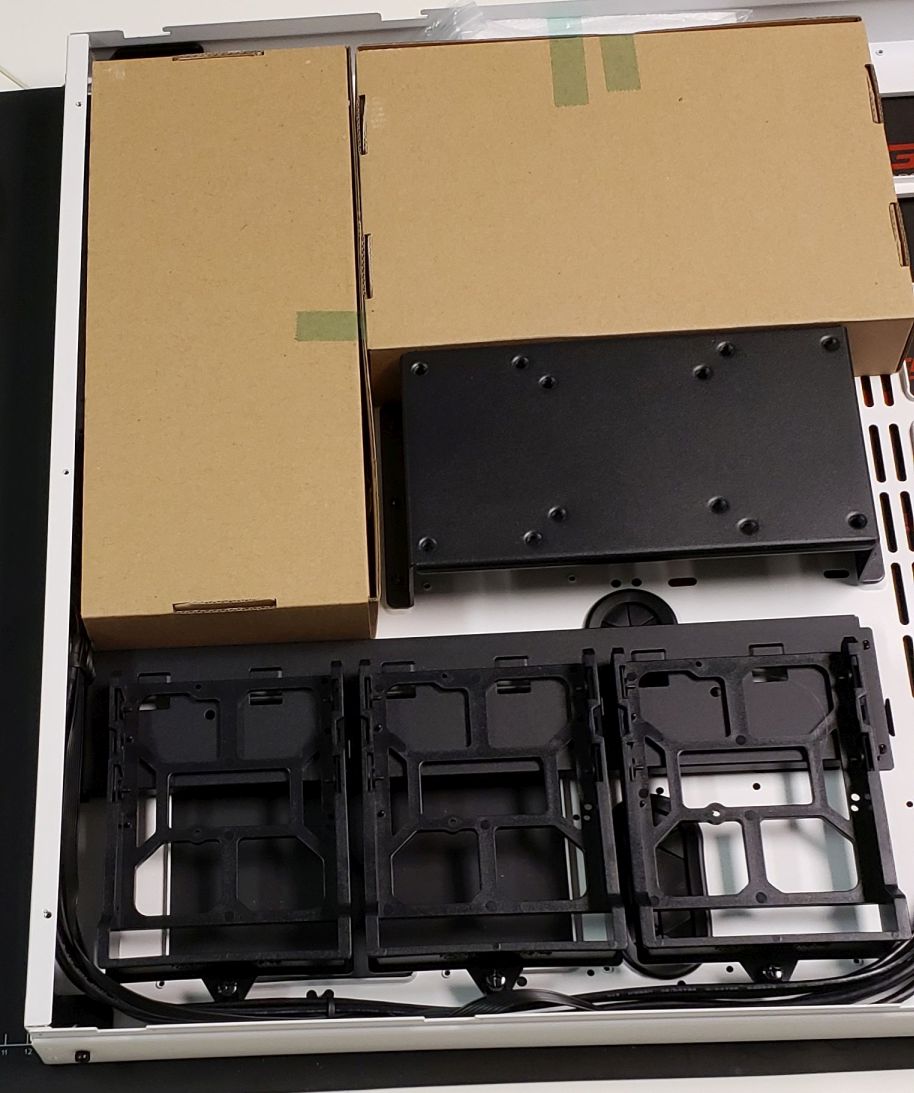
I reused the Core P5 Tempered Glass Snow Edition I bought for my previous build. This case is exceptional to build into, but it is (still) heavy. It weighs 40 lbs fresh from the box and doesn't get lighter once the components are mounted. Thankfully, the air-cooled system weighs quite a few pounds less than my water-cooled one, which is good since it is still wall-mounted.
As a part of moving to an air-cooled system, I removed the radiator, water pump, and tubing. Initially, I converted the Asus Crosshair Hero VIII (X570) motherboard and AMD 3900X back to air-cooled by reinstalling the VRM heatsinks on the motherboard and adding an air cooler for the AMD 3900X. Luckily, when I swapped out the motherboard and CPU, I could reuse the air cooler with the AMD 7800X3D with a change of the (included) mounting kit.
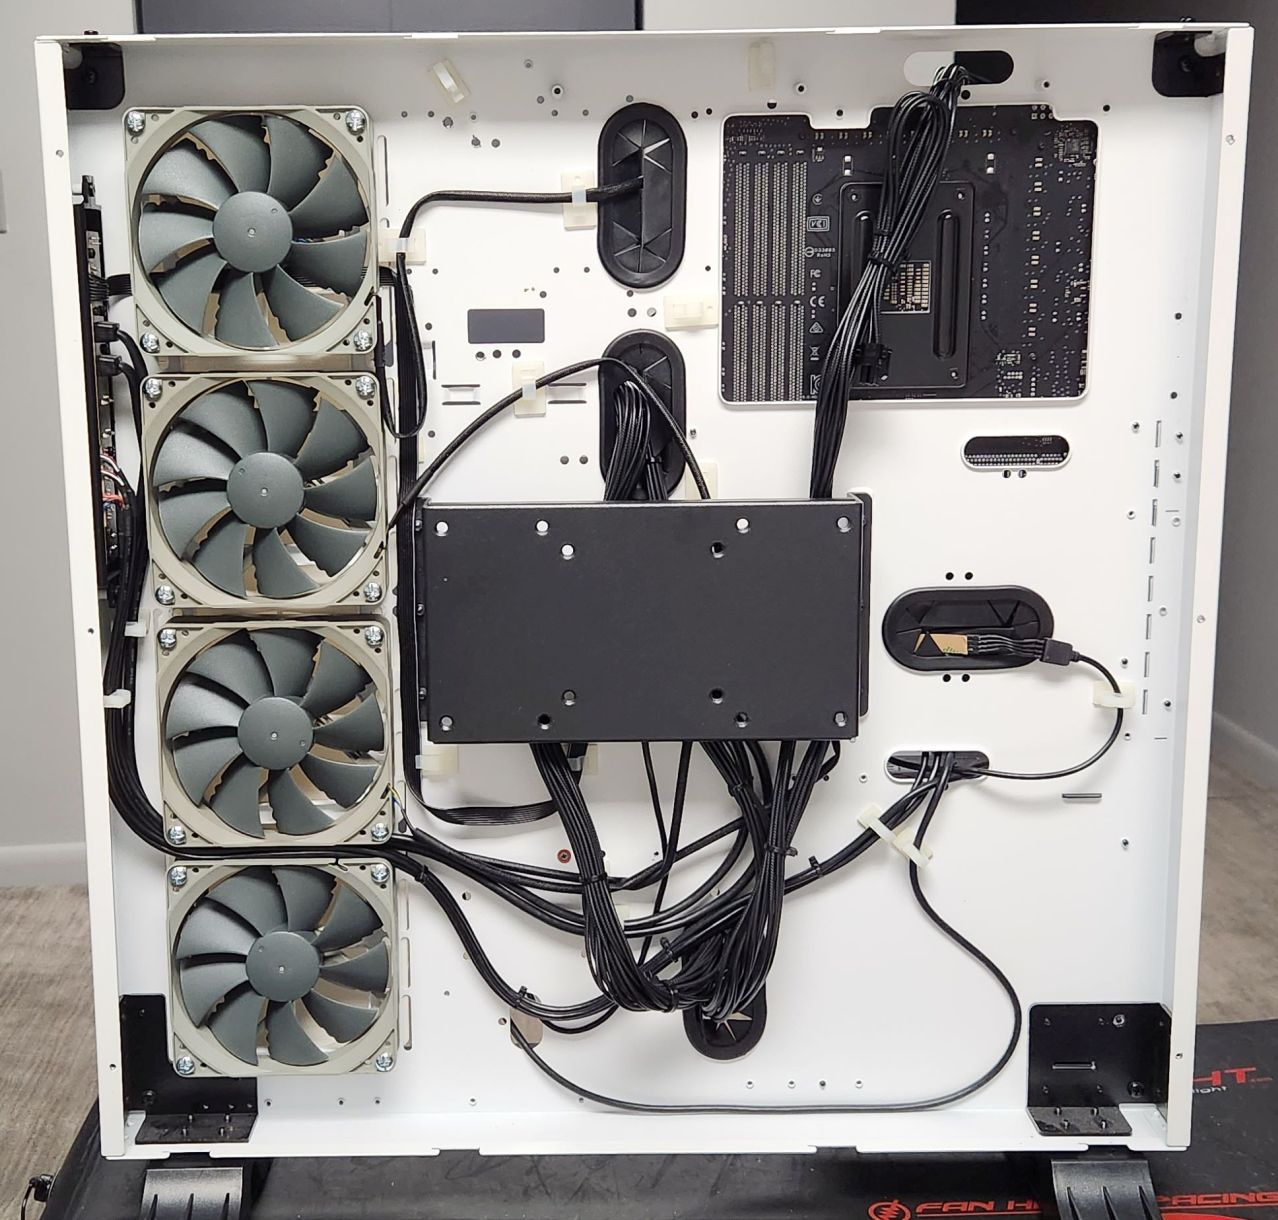
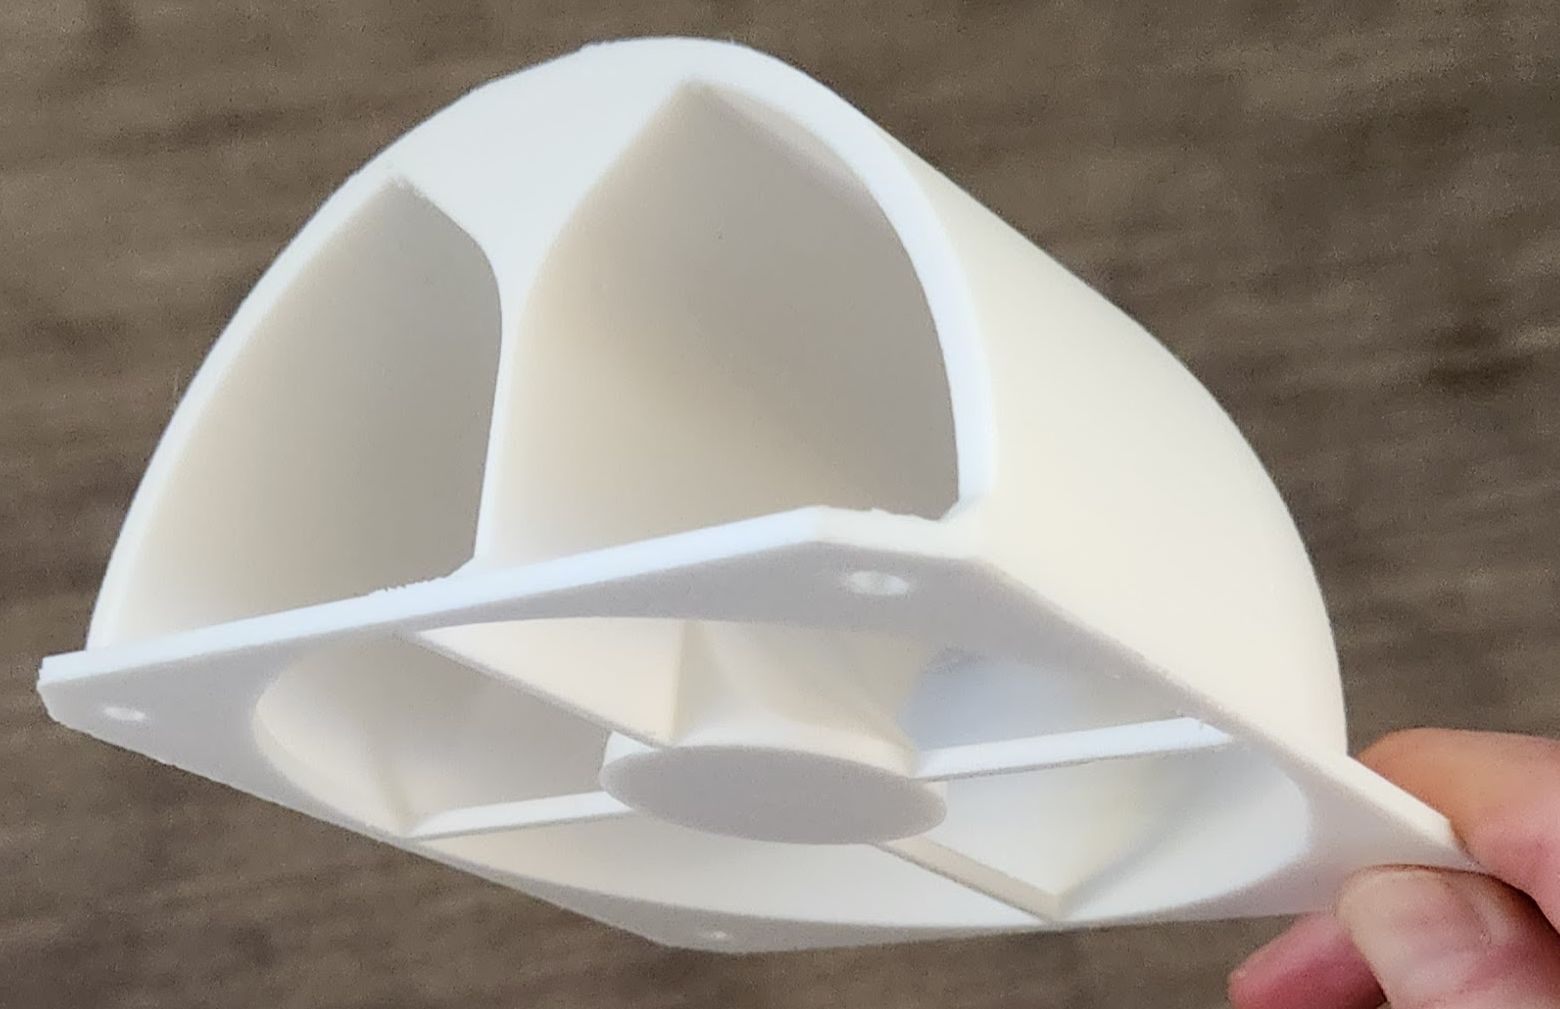
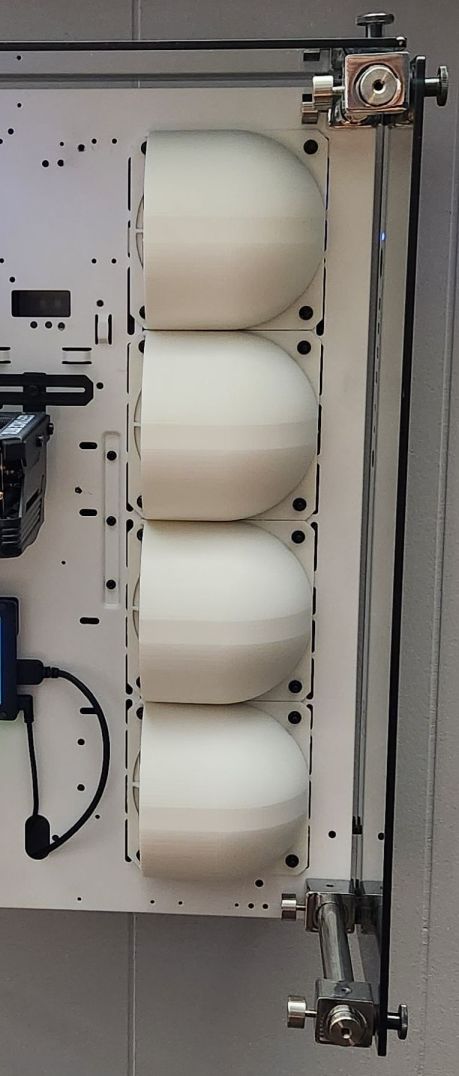
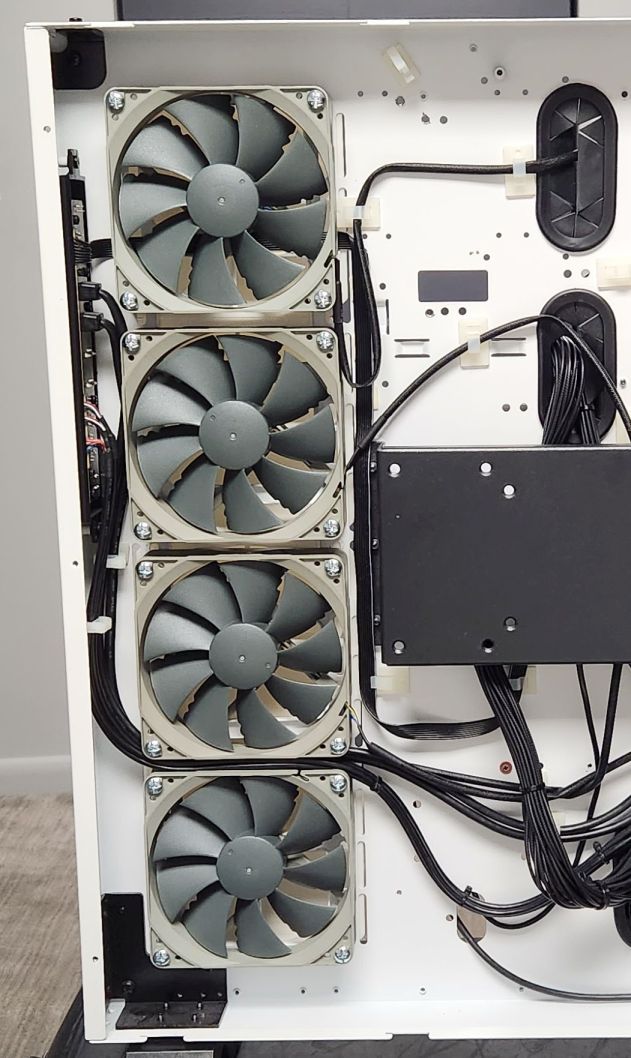
I removed the two case fans I had mounted mid-case to blow air across the motherboard. Without the radiator fans and case fans, I needed an alternate way to get airflow through the case. I mounted four case fans to the back of the case, oriented to pull air from behind the case and exhaust into the case. I needed to redirect the airflow from straight toward the side glass panel to blowing across the motherboard and out the back of the case, so I 3D-printed four air fan ducts to redirect the airflow 90 degrees.
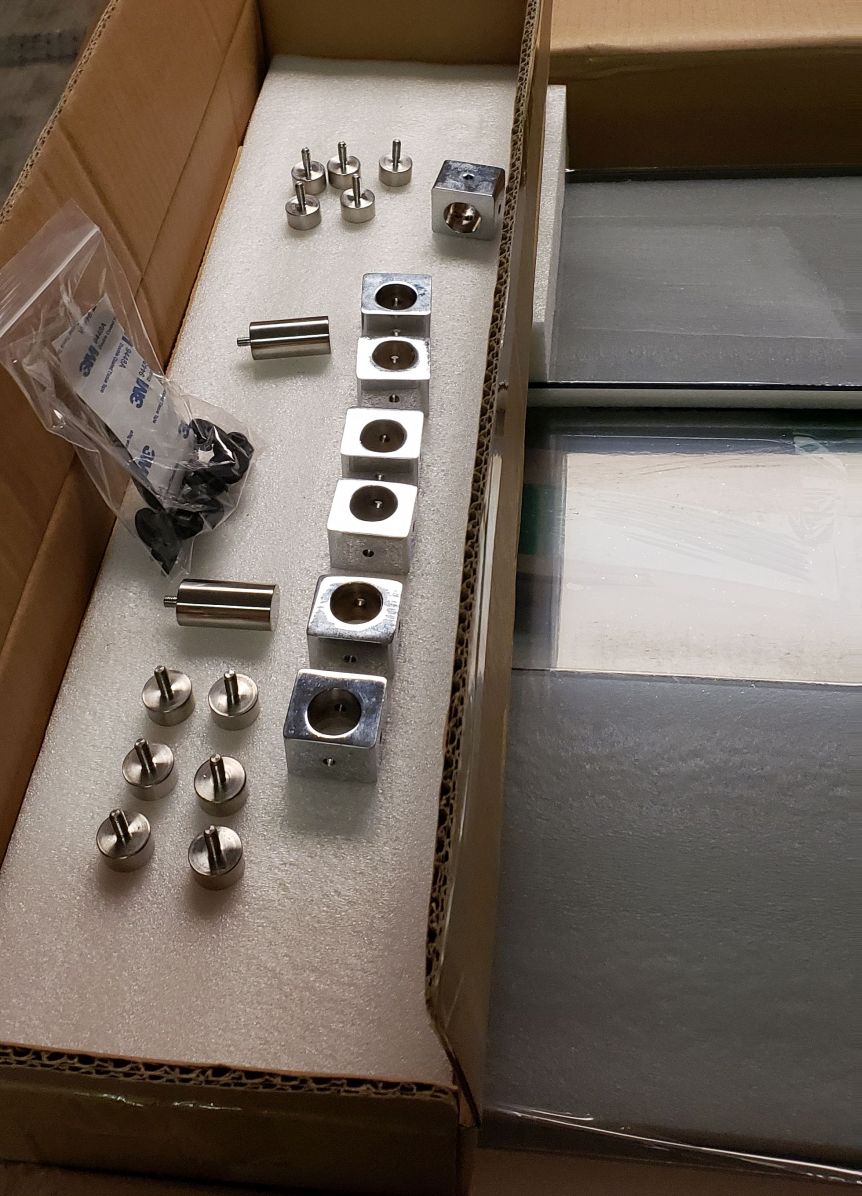
When building "into" this case, I realized it doesn't have a traditional "inside." It is just a raised back panel upon which the other components are mounted. After all the parts are mounted, four posts that hold the tempered glass side panel are installed, followed by the glass panels. There are no tight corners or reaching down into the case, making assembling this system the easiest one I've ever used. Unfortunately, as with the previous system, the upper left post is too close to the motherboard (when the motherboard has a fixed I/O shield anyway) for one of the square glass mounts to clear the motherboard. That would typically hold one of the corners of the top glass panel. I just put a piece of neoprene on the post to support the glass.
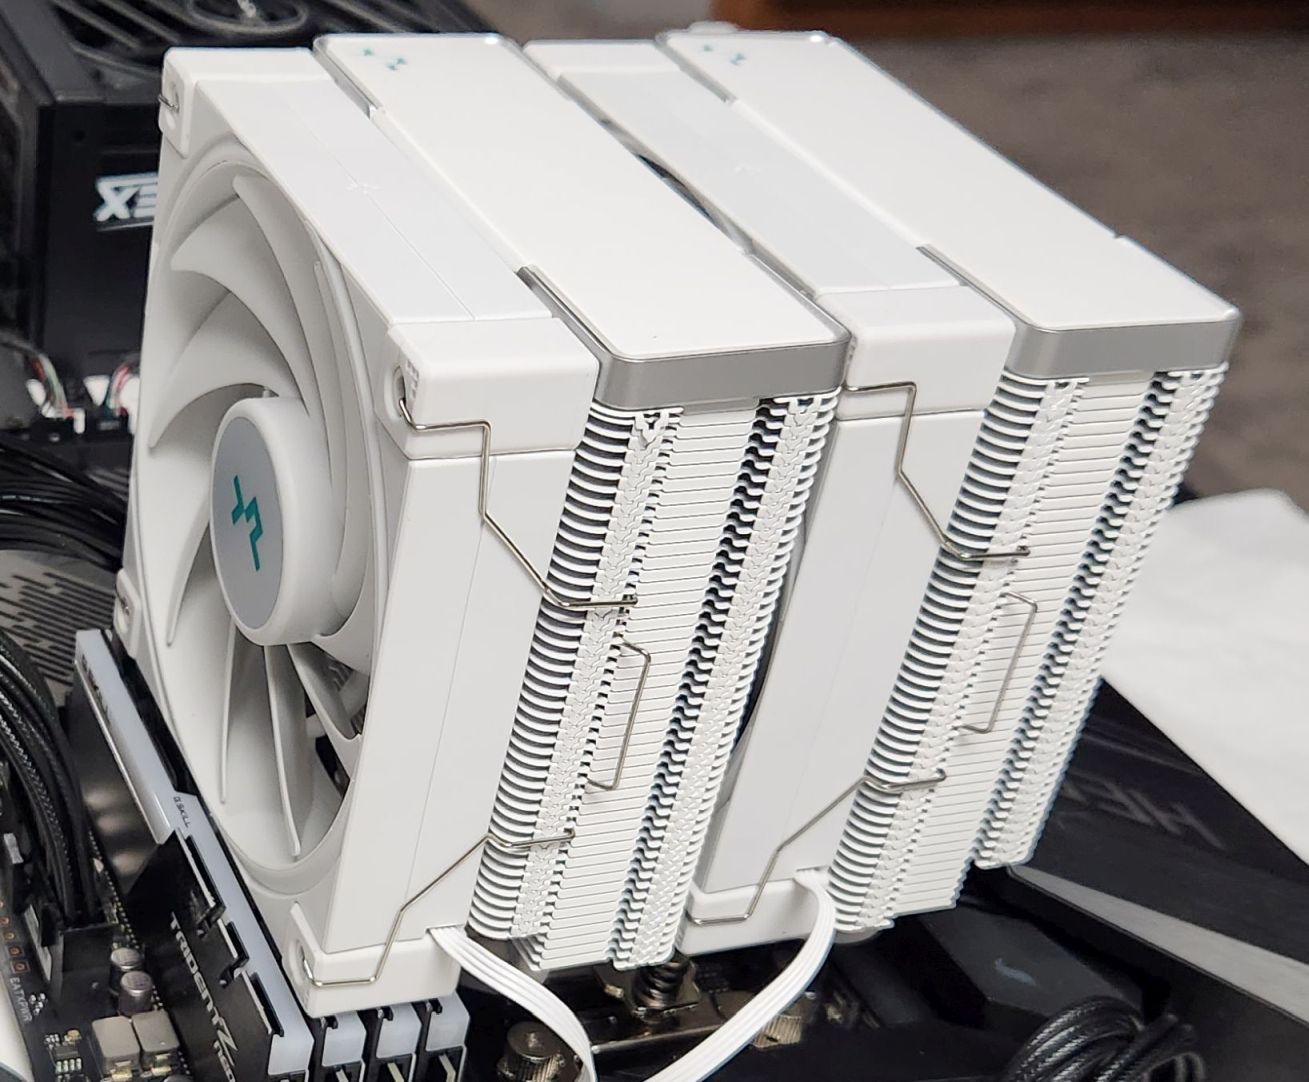
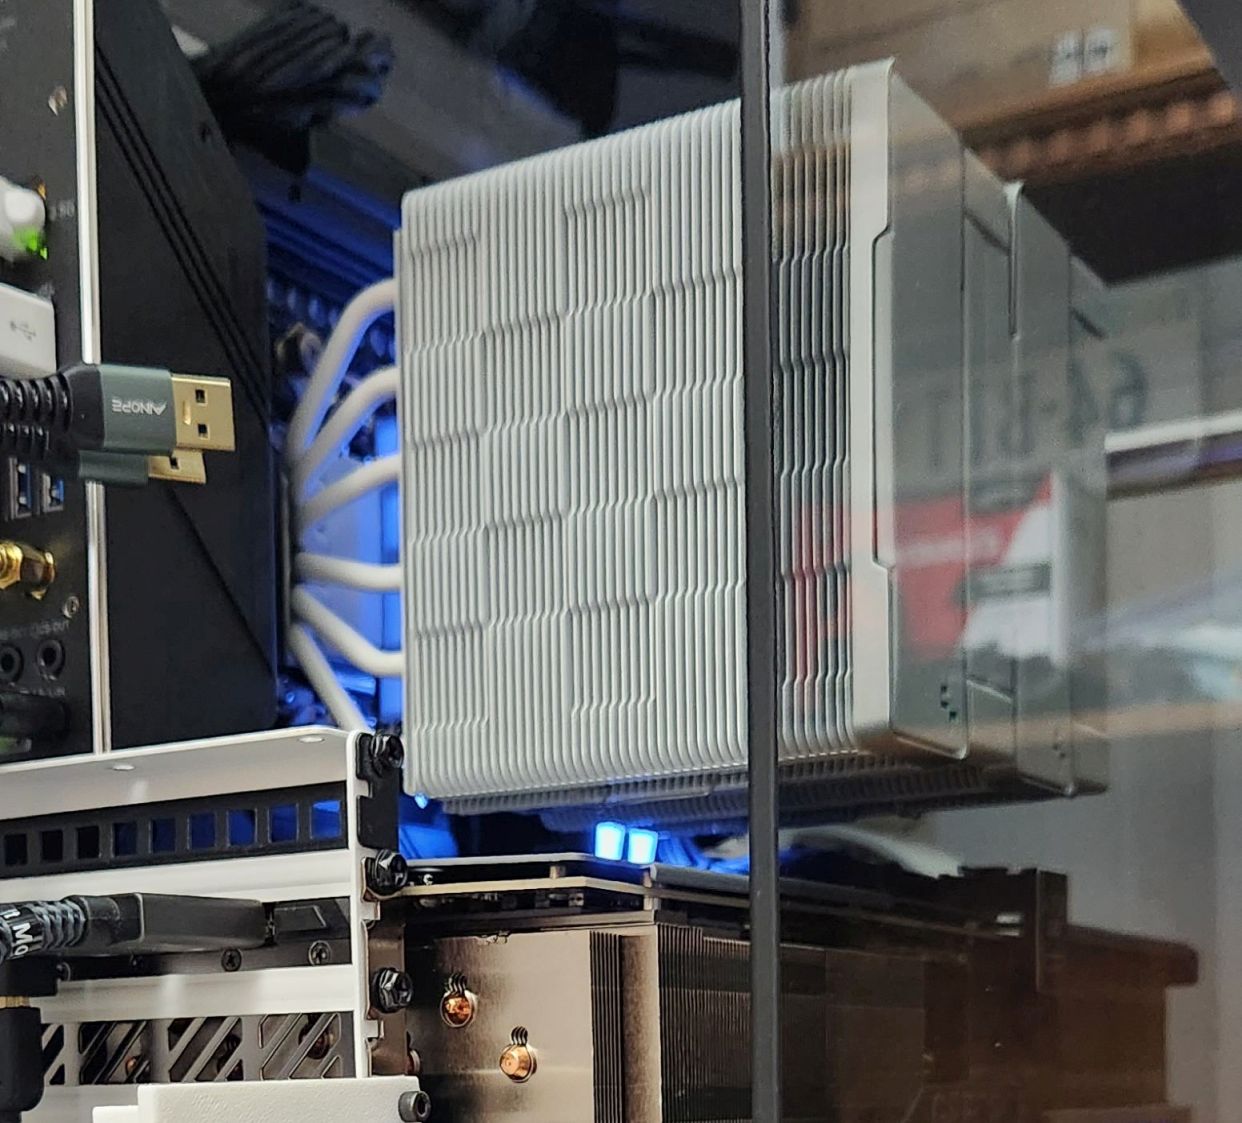
This section was extensive in my previous build because of the water cooling. Without a radiator, pump, tubing, connectors, and all other pieces of the open loop, there's a lot less to talk about. Besides the four case fans with ducts (discussed in the section above), the only other cooling device (unless you count the fan in the PSU) is the CPU's air cooler. I used the DeepCool AK620-WH High-Performance CPU Cooler (White) for this build. For $65, it has excellent performance. I rarely see CPU temps hit the high 60°C range. I used variations of this cooler in three other builds I did last year.
Unfortunately, it is no longer available in the US. The US State Department has sanctioned DeepCool (the China-based company) for selling products to Russian companies. A third-party reseller in China attempted to circumvent the ban by rebranding the coolers as ShakingTank, but when I searched, I found hardly any items for sale under that name. DeepCool quickly shut that retailer down, and the products I found earlier were removed. It's a shame, but DeepCool angered the wrong US government entity.
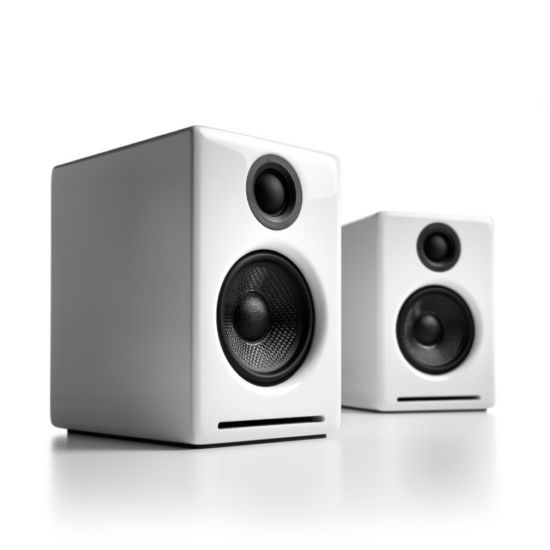
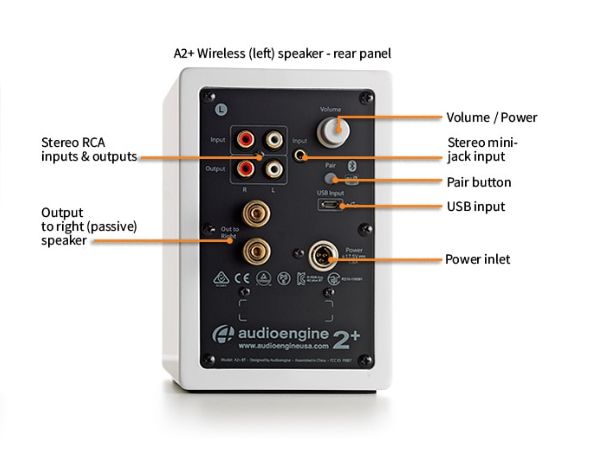
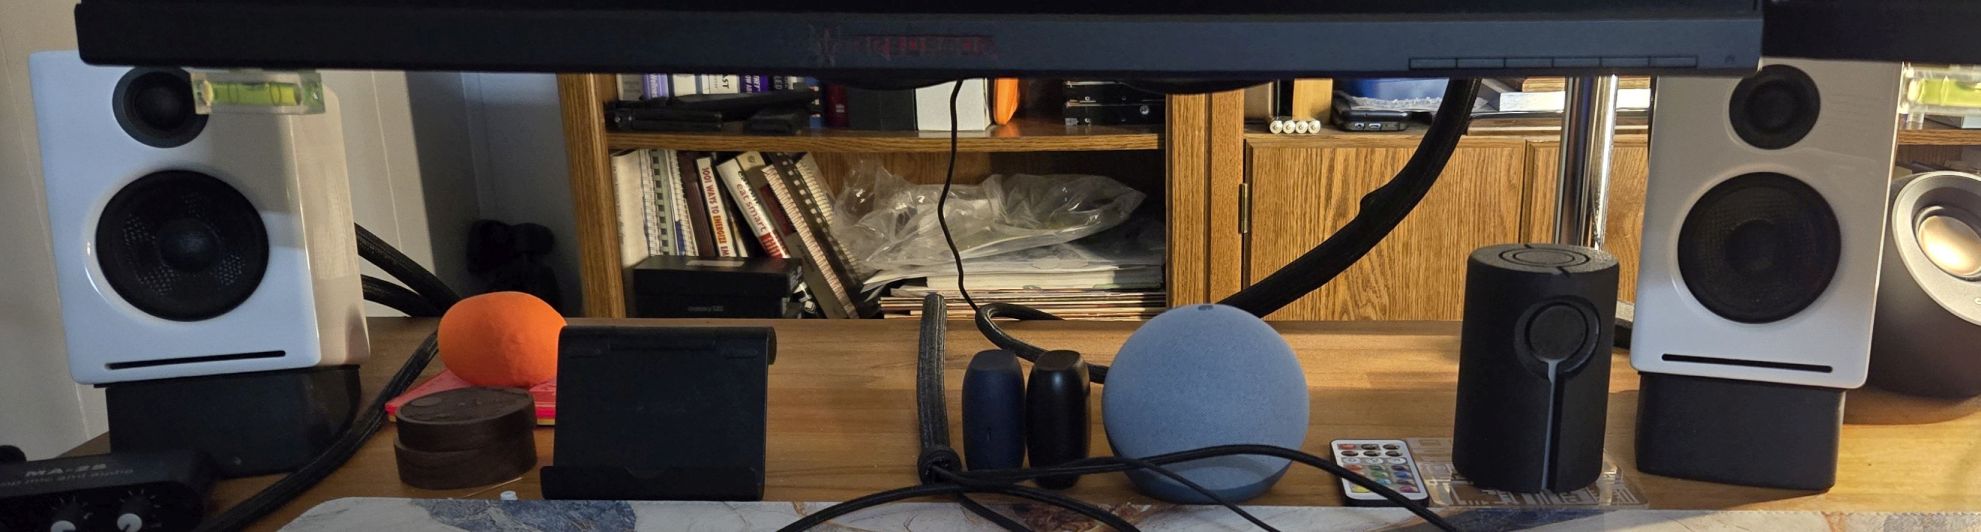
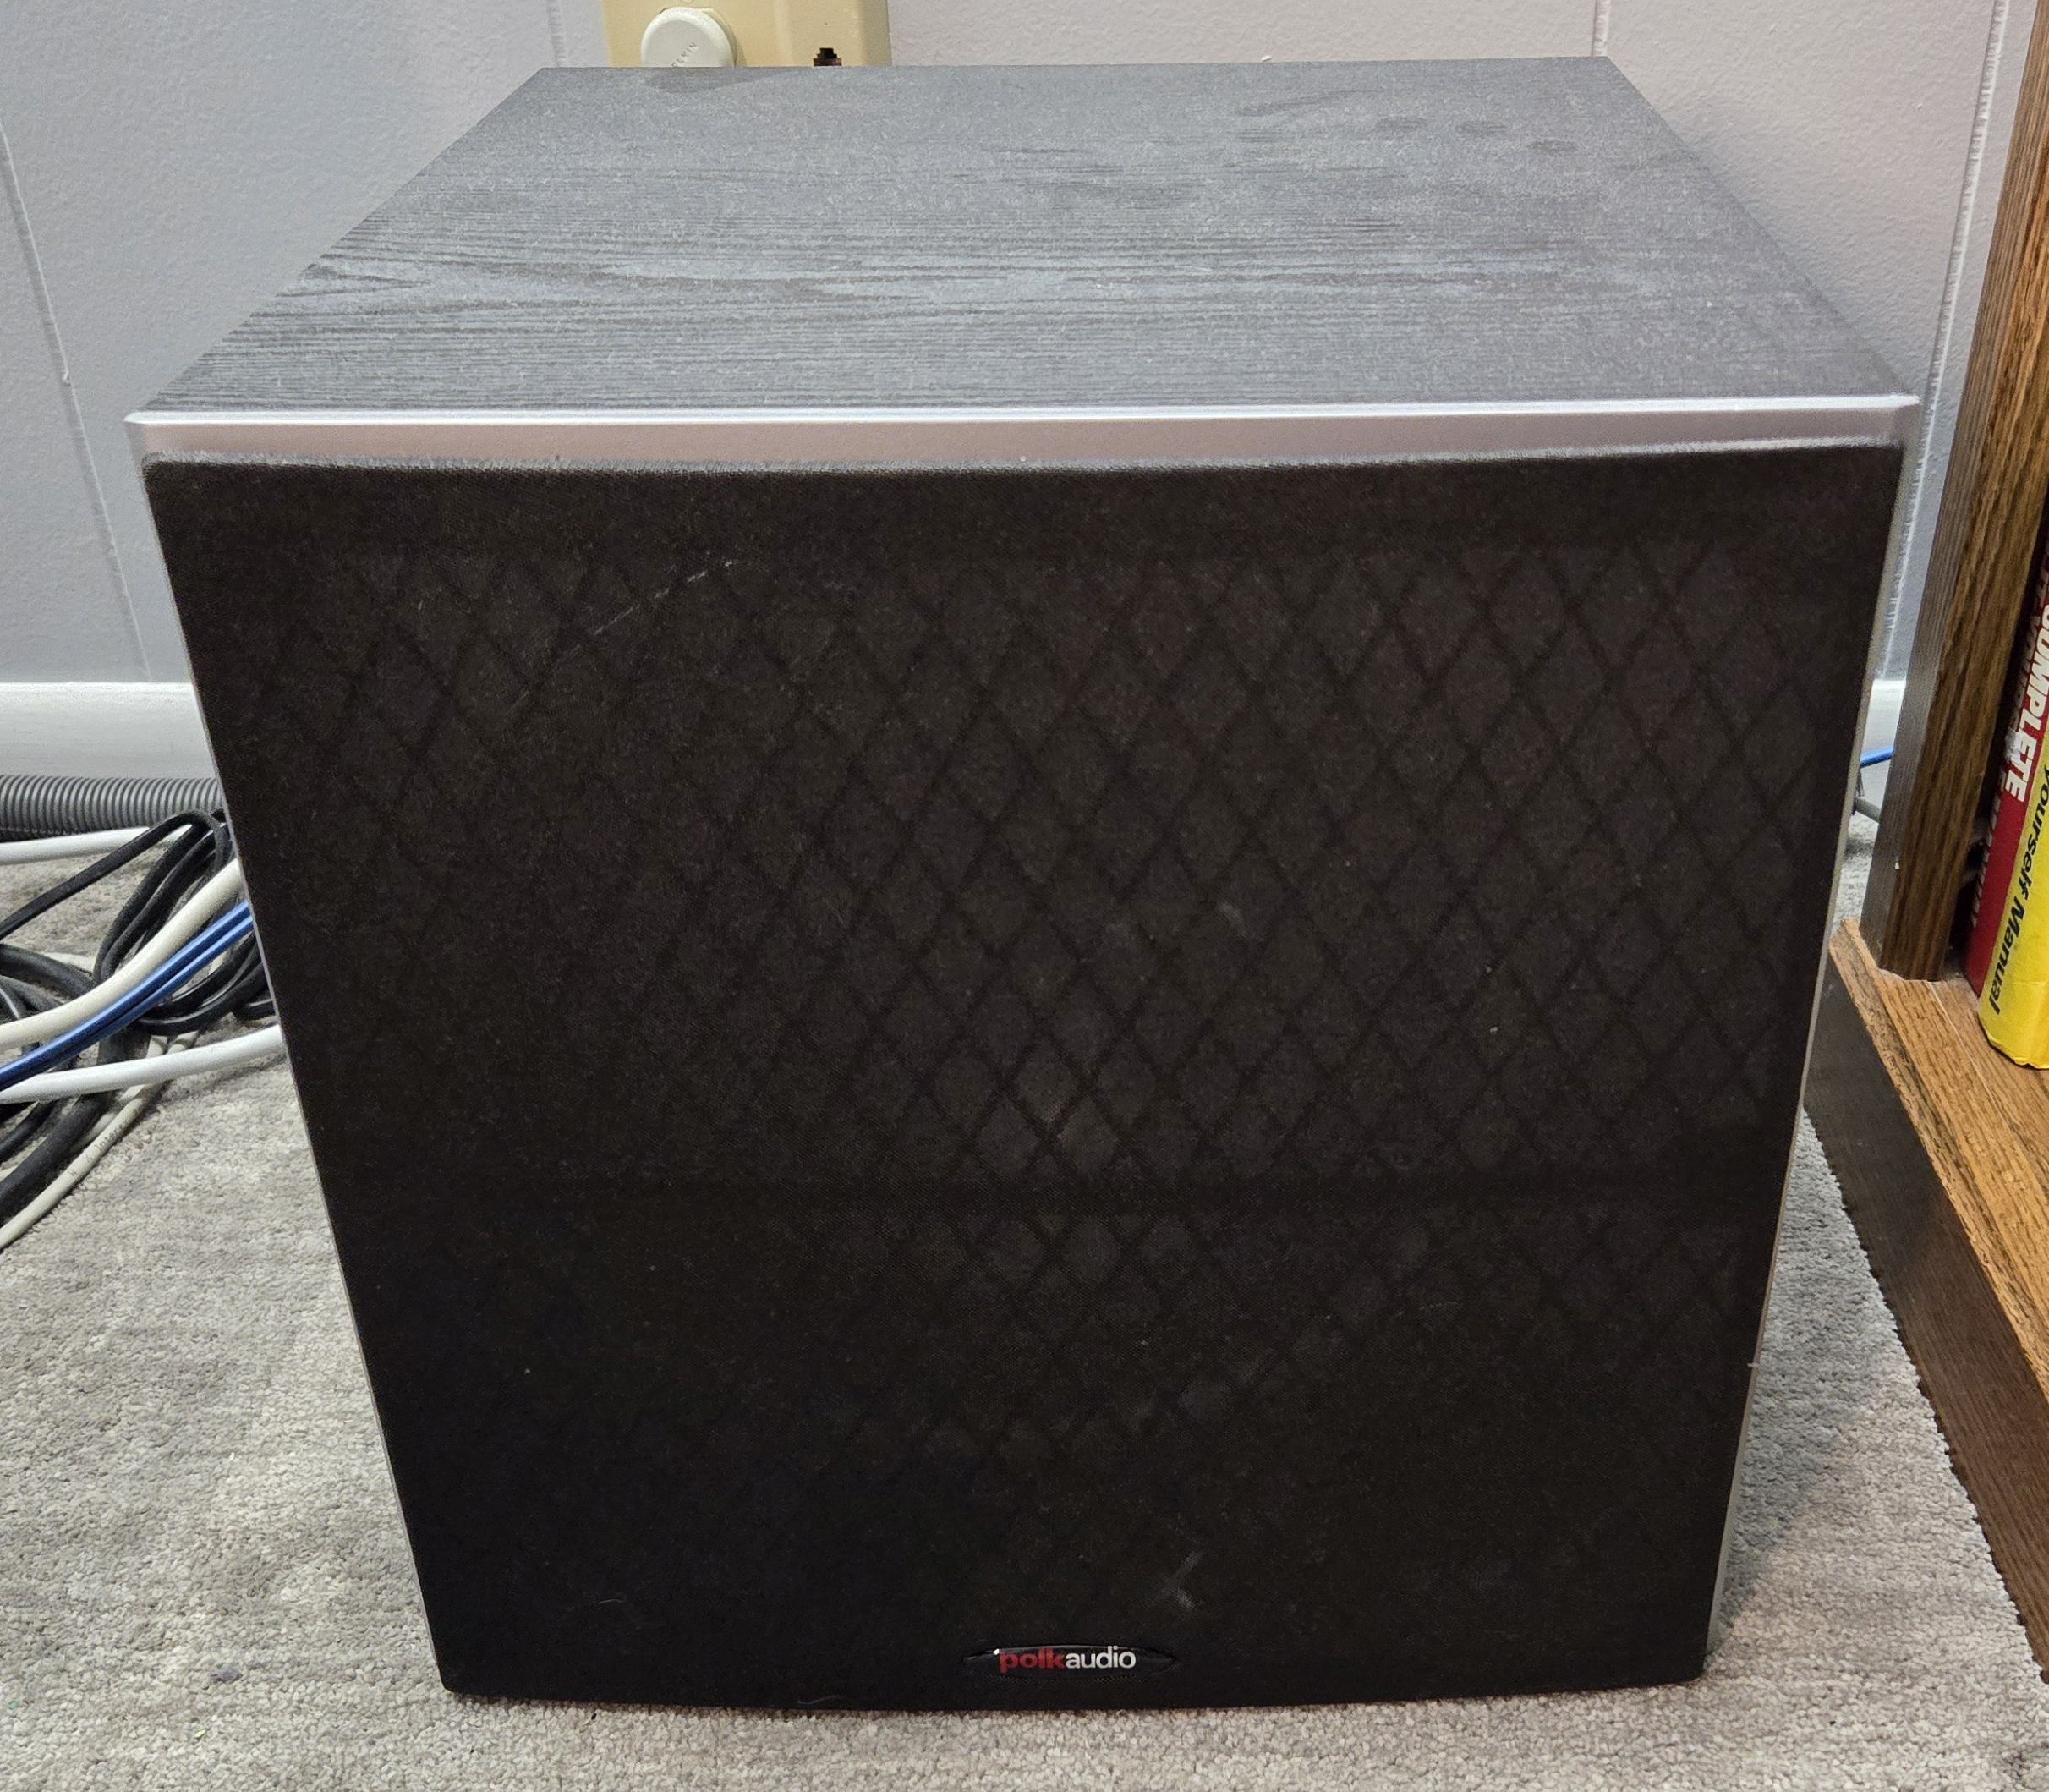
My 20+-year-old Klipsch 4.1 Promedia speakers finally gave up the ghost in September 2022. I bought them (for $400) in 1999, so I can't complain about their longevity (though I replaced both subwoofer speakers with new ones from Klipsch). The amplifier, integrated into the subwoofer, developed a constant, annoying hum. My new speaker and subwoofer setup is the Audioengine A2+ desktop speakers (in white) and a Polk Audio PSW10 powered subwoofer. I am using the audio from the motherboard analog speaker output as the input to the speakers, though Audioengine recommends using a USB or Bluetooth connection so their DAC does the conversion. The audio-out connector from the speakers feeds the subwoofer. I also bought the Audioengine DS1 Small Angled Speaker Stands that isolate the desktop speakers from the desktop.

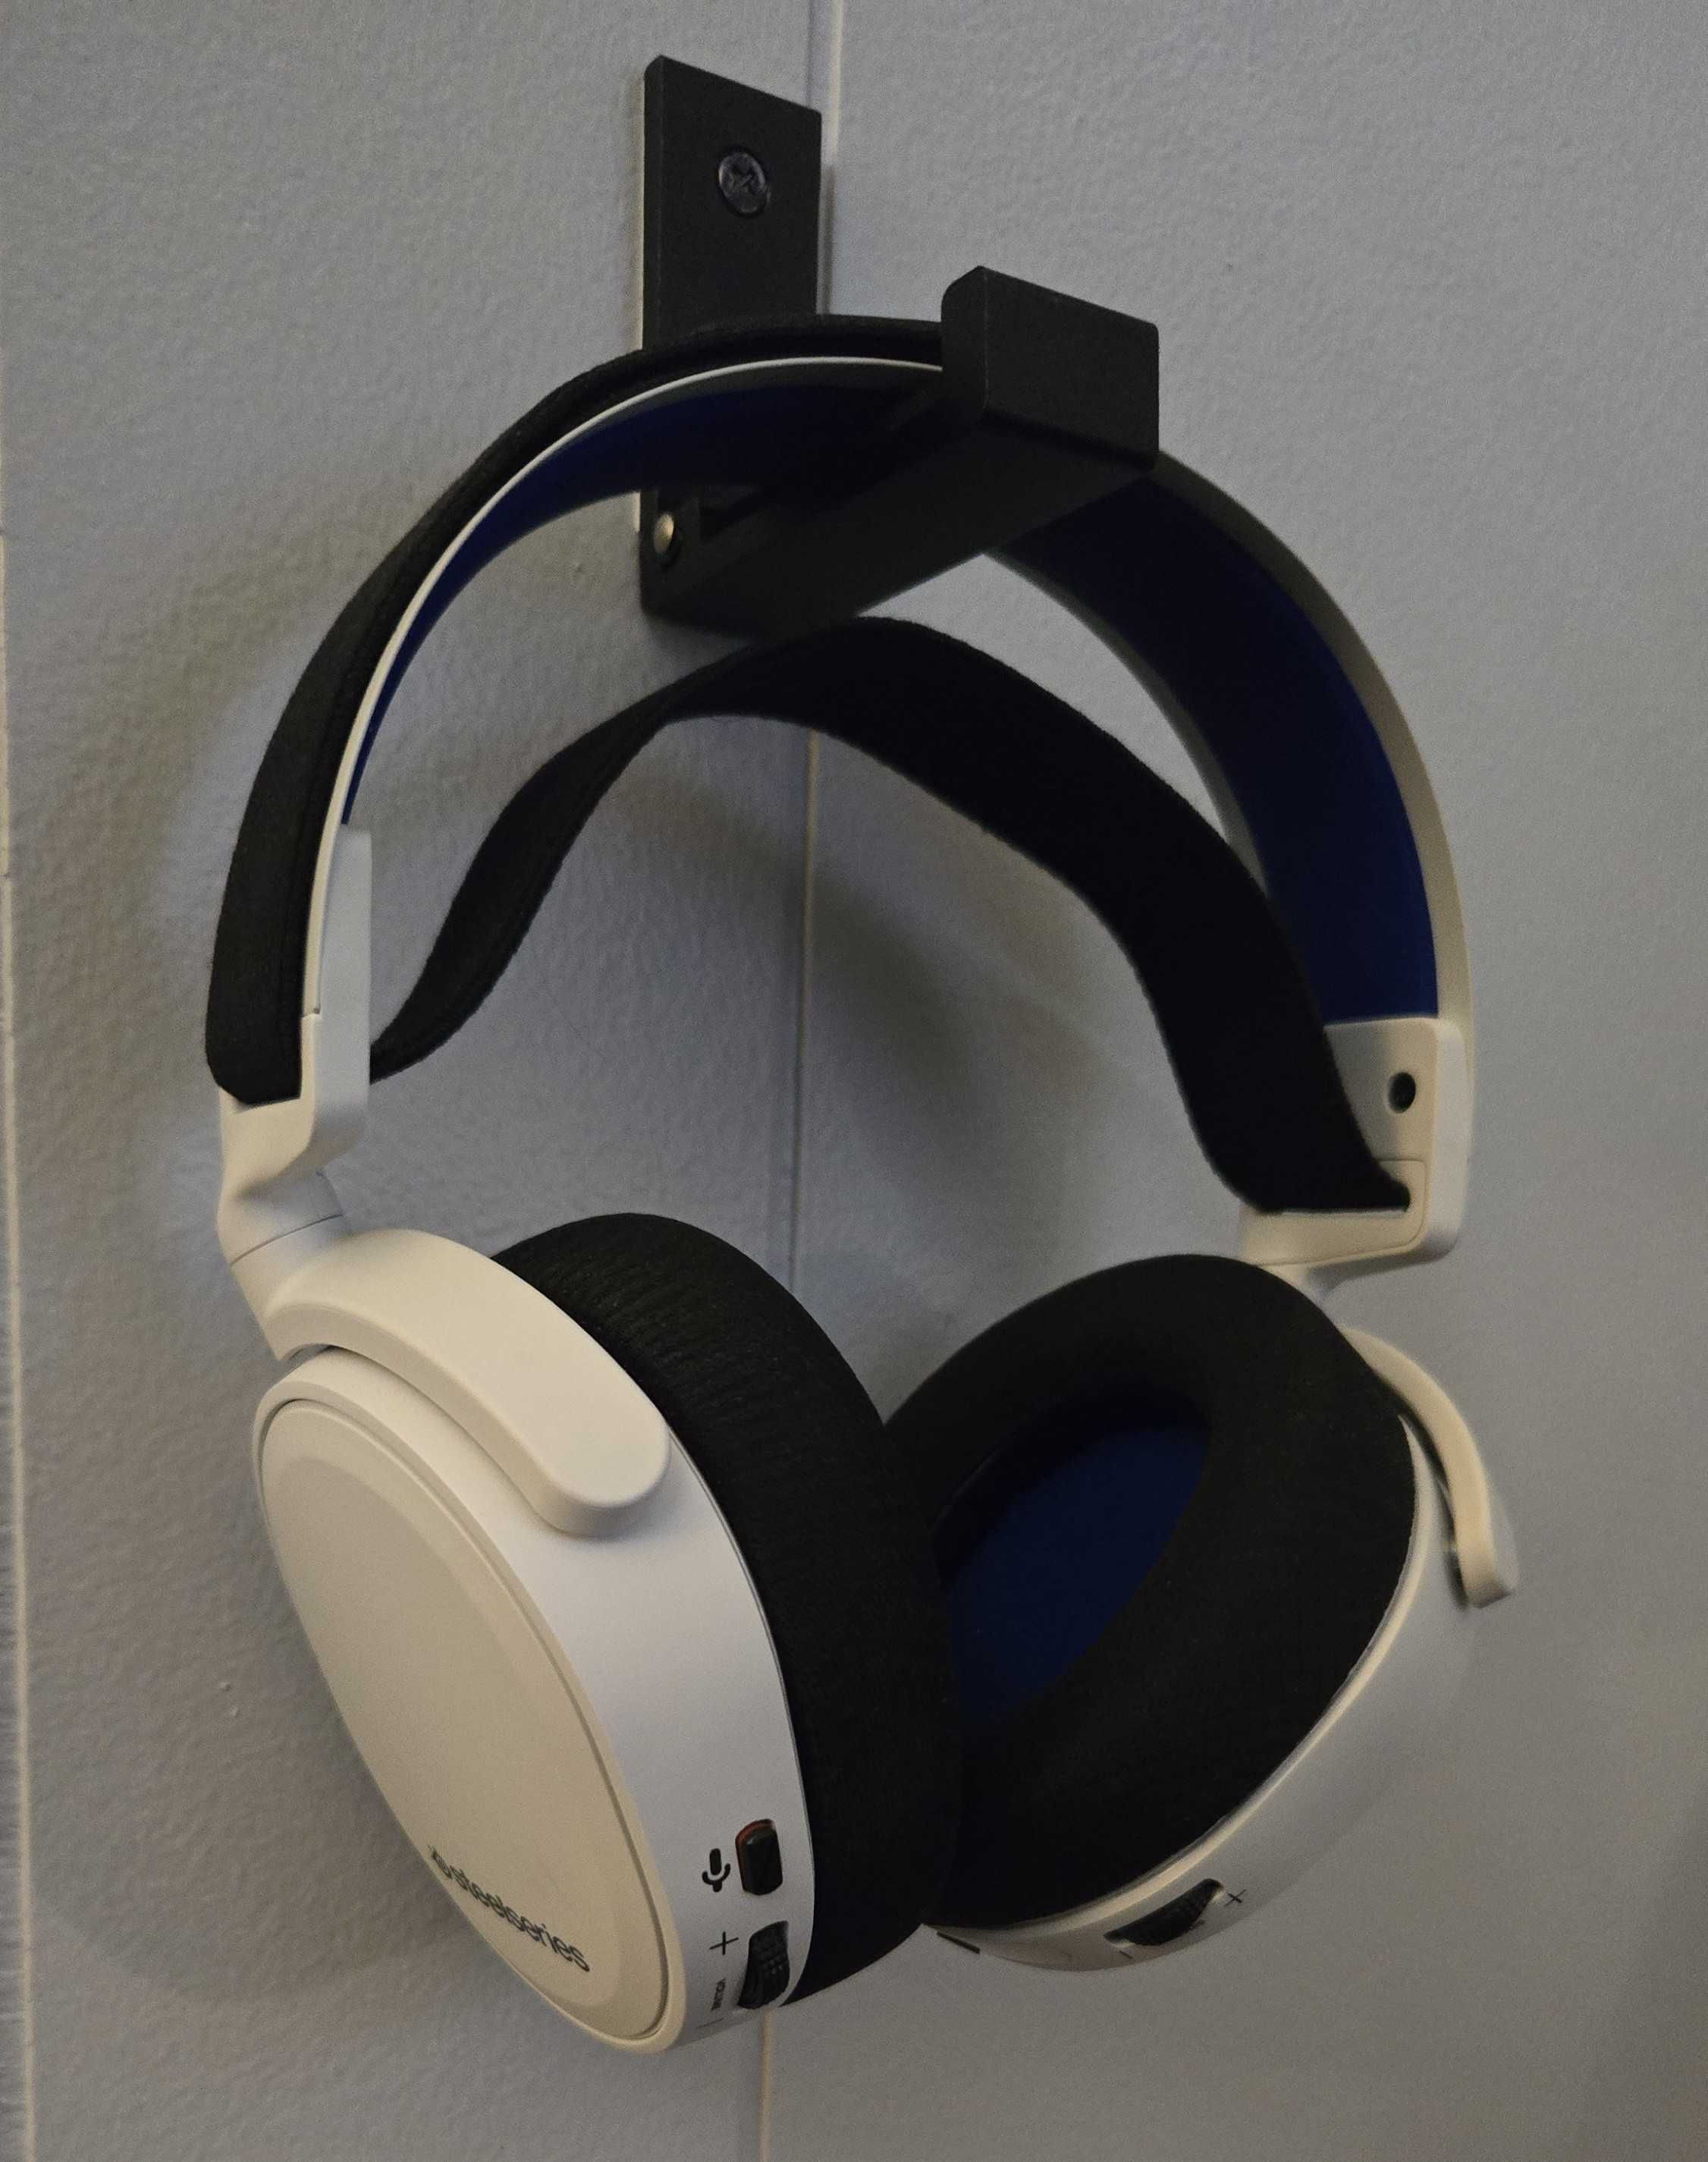
I continue to run through headsets, but my current one is the SteelSeries Arctis 7P+. They weren't cheap at $165, but the battery lasts for hours between charges and is comfortable for hours, too. The microphone on this headset is decent (unlike my last one, which was pretty bad) and can be muted. I prefer to use a separate RODE Wireless GO lapel mic.

I still use an ergonomic keyboard as my daily driver, as I have for the last 20 years. The Microsoft Natural Pro came out in 1999, and to this day, I think it is the best affordable ergonomic keyboard ever made. When I found out they were discontinuing them, I bought five. Unfortunately, gaming is wearing on keyboards, and the WASD and left control (CTRL) keys eventually gave out on all. It took years to go through my stash, but I eventually did. For the next several years, I used the Microsoft Ergonomic Keyboard 4000. The 4000 had an issue in that the keycaps wore off in a very short time. I am primarily a touch typist, but sometimes, I need to look at the keys. Both of these keyboards lack, and I would like to see, some form of backlighting.
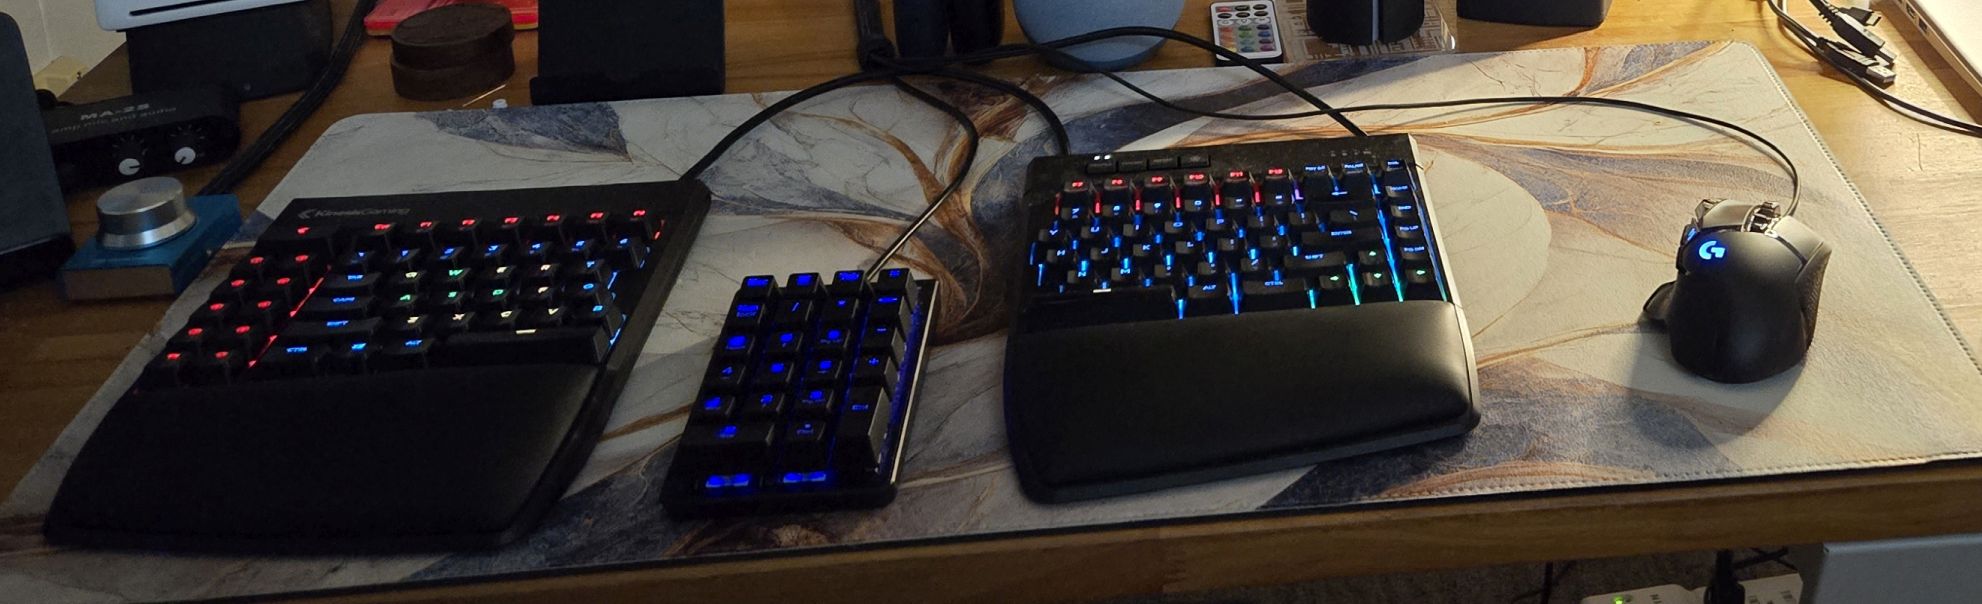
I finally broke down and bought a mechanical ergonomic gaming keyboard, the Kinesis Gaming Freestyle Edge RGB with Cherry MX Brown switches. It's a split keyboard, and I found I like it with the two halves about 6" apart at the top and maybe 7-8" apart at the bottom. (I have the two halves at roughly the same angles as a fully ergonomic keyboard, but further apart.) The keyboard doesn't have a numeric keypad, so I bought a Rottay 22-key Numpad. I put it in the middle between the two halves of the Kinesis keyboard. I took a bit of getting used to it, but I now like it. I can type more quickly and accurately (except I seem to hit caps lock a lot).
I am using the Logitech G502 Hero wired gaming mouse. I preferred the wired Logitech G502 Proteus, but they no longer make that model. The G502 Hero is significantly cheaper at $40 than the top-of-the-line G502 X Plus Gaming Mouse at $140. I don't believe I have the reflexes to tell the difference.
I'm currently using two monitors mounted on a dual-screen support arm. My primary monitor is the MSI MPG 321URX QD-OLED. There was a decent sale on it at Microcenter, and I couldn't pass it up. It is a 4K (3840x2160 - UHD) QD-OLED panel with a 240Hz refresh rate and HDR. Primarily, I wanted to utilize the RTX 4090's capability to handle 4K. I've gained a bit more screen real estate, and in some games, HDR makes a noticeable difference - especially in dark areas.
My secondary monitor is the Acer Predator XB271HU bmiprz 144Hz 2560 x 1440. I got that from B&H Photo Video as a black Friday special in November 2018, but because of the excellent price, it was back-ordered. I didn't receive it until the end of January 2019. The monitor can be "overclocked" to 165Hz, but I leave it at the default 144Hz, as I don't need it to work at that rate. I can tell the difference between games on a 60Hz and 144Hz display, but I can't discern any differences between 144Hz and 165Hz. This monitor also has Nvidia G-Sync built in, which pairs with the Nvidia RTX 4090 to eliminate screen tearing at lower refresh rates.
- Printer-friendly version
- Log in to post comments